Premier Sells Team Longport NJLongport NJ Real Estate

Jerome and Angel DiPentino of Long & Foster Real Estate

  • Home
  • Home Search
  • Our Listings
  • Rentals
  • Area Solds
    • Longport Sold Homes
    • Margate Sold Homes
    • Ventnor Sold Homes
  • Our Sold Homes
  • The Premier Team
    • About Long & Foster Real Estate
  • Contact

Are You Making These 7 Rookie Mistakes in Your Vegetable Garden?

veggie garden

By: Lisa Kaplan Gordon
Published: May 9, 2012

Even the best vegetable gardeners can forget basics and make rookie mistakes. Here are 7 no-nos to avoid.

Even if your vegetable garden is the envy of neighbors, it’s still easy to make rookie mistakes that waste precious resources and growing time.

Avis Richards, whose Ground Up Campaign teaches New York City school kids how to grow their own food, reveals the rookie mistakes that all gardeners should avoid.

1. Unwise watering. Too much, too little, too hard, too soft — they’re all watering mistakes that’ll wreck your garden. Before adding water, poke a finger a couple of inches into the soil. If it’s moist, save the water; if it’s dry, train a gentle spray at the base of plants. Better yet, wind a drip hose ($13 for 50 feet) through your garden; that way, you’ll deliver moisture to the roots without wasting water on leaves and to evaporation.

2. Forgetting to test. Even veteran gardeners forget to test their soil every year to make sure it has the pH and nutrients plants need. For about $10, you can send a sample to your state extension service and receive a complete analysis. Or, buy a DIY test kit at your local garden center. When you know what your soil is made of, either select plants that thrive in that type of earth, or amend soil to match your garden’s needs.

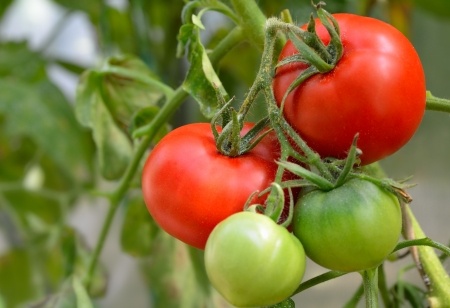
3. Planting garden divas. Of course you love summer tomatoes, but they can be tricky to grow during summers that are too hot, too cold, too wet, too dry. So newbies should try growing a couple of tomato plants just for fun, then load gardens with foolproof veggies and herbs, such as beans, peppers, oregano, and parsley. If you must grow a tomato, plant cherry tomatoes that can survive anything summer can throw at them and even yield fruit into fall.

4. Raising too much.
One cherry tomato plant can yield 80 fruit, and a single zucchini plant can keep your neighbors in zucchini bread through winter. So don’t plant more than you can eat, put up, or share with friends. The National Gardening Association says an edible garden of about 200 sq. ft. should keep a family of four in veggies all summer. If you do grow more than you need, donate it to a local food bank or plan a swap with fellow gardeners.

5. Growing everything from seed. Some crops, such as salad greens, radishes, carrots, peas, beans, and squash, are easy to grow from seeds that germinate in a couple of weeks. Experience will tell you that eggplant, broccoli, cauliflower, and tomatoes are better grown from seedlings, which someone else has nurtured for months. Pick plants that are short and compact; avoid leggy plants with blooms that are liable to die on the vine as the plant acclimates itself to your garden.

6. Assuming you know.
Gardeners often read seed packages and figure they know everything about growing vegetables. Wrong! The more you know about your hardiness zone, soil, weather, insects, and vegetable varieties, the better your garden will grow. So curl up with a good gardening book, and surf the web for garden bloggers that share your passion. Better yet, join a gardening club where you can share tips and seeds.

7. Relying on pesticides.
Don’t bring out the big guns, which can contaminate the watershed, until you’ve tried less-toxic ways to get rid of garden pests. Ladybugs and praying mantis, which you can buy at garden supply stores, will eat garden intruders, such as aphids and beetles. Non-toxic insecticidal soaps will take care of soft-bodied insects (don’t use if ladybugs are around).

Read more: http://members.houselogic.com/articles/growing-vegetable-garden-rookie-mistakes/preview/#ixzz3AOP3p5i1
“Visit HouseLogic.com for more articles like this. Reprinted from HouseLogic.com with permission of the NATIONAL ASSOCIATION OF REALTORS®.”

How to Keep Your House Cool Without AC

window

By: Lisa Kaplan Gordon
Published: March 20, 2013

Want summer comfort but hate the AC? Follow these tips, and you’ll keep your house cool without frosty air conditioning.

You don’t have to switch on the air conditioner to get a big chill this summer. These tips will help you keep your house cool without AC, which will save energy (and avoid AC wars with your family).

Block that Sun!

When sunlight enters your house, it turns into heat. You’ll keep your house cooler if you reduce solar heat gain by keeping sunlight out.

  • Close the drapes: Line them with light-colored fabric that reflects the sun, and close them during the hottest part of the day. Let them pillow onto the floor to block air movement.
  • Add awnings: Install them on south- and west-facing windows to reduce solar heat gain by up to 77%, says the U.S. Department of Energy. Make your own by tacking up sheets outside your windows and draping the ends over a railing or lawn chair.
  • Install shutters: Interior and exterior shutters not only reduce heat gain and loss, but they also add security and protect against bad weather. Interior shutters with adjustable slats let you control how much sun you let in.
  • Apply high-reflectivity window film: Install energy-saving window films on east- and west-facing windows, which will keep you cool in summer, but let in warming sun in the winter. Mirror-like films are more effective than colored transparent films.

Here’s more information about energy-efficient window coverings.

Open Those Windows

Be sure to open windows when the outside temperature is lower than the inside. Cool air helps lower the temps of everything — walls, floors, furniture — that will absorb heat as temps rise, helping inside air say cooler longer.

To create cross-ventilation, open windows on opposite sides of the house. Good ventilation helps reduce VOCs and prevents mold.

Fire Up Fans

  • Portable fans: At night, place fans in open windows to move cool air. In the day, put fans where you feel their cooling breezes (moving air evaporates perspiration and lowers your body temperature). To get extra cool, place glasses or bowls of ice water in front of fans, which will chill the moving air.
  • Ceiling fans: For maximum cooling effect, make sure ceiling fans spin in the direction that pushes air down, rather than sucks it up. Be sure to turn off fans when you’re not in the room, because fan motors give off heat, too.
  • Whole house fans: A whole-house fan ($1,000 to $1,600, including install) exhausts hot inside air out through roof vents. Make sure your windows are open when you run a whole-house fan.

Power Down Appliances

You’ll save money and reduce heat output by turning off appliances you’re not using, particularly your computer and television. Powering down multiple appliances is easier if you connect them to the same power strip.

Don’t use heat- and steam-generating appliances — ranges, ovens, washers, dryers — during the hottest part of the day. In fact, take advantage of the heat by drying clothes outside on a line.

Plant Trees and Vines

These green house-coolers shade your home’s exterior and keep sunlight out of windows. Plant them by west-facing walls, where the sun is strongest.

Deciduous trees, which leaf out in spring and drop leaves in fall, are best because they provide shade in summer, then let in sun when temperatures drop in autumn. Select trees that are native to your area, which have a better chance of surviving. When planting, determine the height, canopy width, and root spread of the mature tree and plant accordingly.

Climbing vines, such as ivy and Virginia creeper, also are good outside insulators. To prevent vine rootlets or tendrils from compromising your siding, grow them on trellises or wires about 6 inches away from the house.

Speaking of shade, here are smart, inexpensive ideas for shading your patio.

Want more tips for staying cool this summer? Substitute CFL and LED bulbs for hotter incandescent lights.

Also, try insulating your garage door to prevent heat buildup.

Read more: http://members.houselogic.com/articles/how-keep-your-house-cool-without-ac/preview/#ixzz3AONp0L1n
“Visit HouseLogic.com for more articles like this. Reprinted from HouseLogic.com with permission of the NATIONAL ASSOCIATION OF REALTORS®.”

5 Maintenance Tasks to Ignore at Your Peril

hardwood floors

By: Jeanne Huber
Published: August 3, 2012

Are you a pro at procrastination? Get off the couch for these 5 critical maintenance jobs; left undone, the consequences could cost you thousands — or worse.

Homeownership means regular maintenance and repair chores, but some are more important than others. Here are five that should top your priority list:

1. Make Sure Your Appliances Aren’t Being Recalled

Why it matters: The non-profit “Consumer Reports” magazine wrote an eye-popping piece about how often home appliances catch fire: more than 150,000 residential fires each year from 2006 to 2008, resulting in 3,670 injuries, 150 deaths, and $547 million in property damage. About half the fires appear to have been caused by faulty appliances. Some had been recalled for defects that could cause an appliance fire, but the home owners weren’t aware.

What you need to do: Write down the model and serial number of each appliance, then check at www.recalls.gov for recalls and what action to take if something you own is involved. Keep your list so it’s easy to recheck; it sometimes takes years for problems to become evident. Keep tabs at HouseLogic for notices about recalls.

Maintenance cost: Free

Worst case if you put it off: You don’t learn that your dishwasher or clothes dryer has a safety defect, and the machine catches fire and burns your house down.

2. Check for Leaks and Fix Them

Why it matters: Water does more damage to houses than anything else, since persistent leaks lead to mold and mildew, rot, and even termites and carpenter ants (they like chewing soggy wood since it’s soft). Yet if you fix a leak soon after it starts, there may be no long-term damage at all.

What you need to do: Inside, keep your eyes open for dark spots under pipes inside sink cabinets, stains on ceilings, toilets that rock, and of course drips. At least once a year, inspect the roof. If you find leaks, fix them immediately. Otherwise, call in a plumber.

Maintenance cost: Negligible for a simple fix, such as a new washer. A visit from a plumber might set you back $250; a roof repair, a few hundred dollars to $1,000.

Worst case if you put it off: Drips ruin the cabinet under the kitchen sink, and run down into the floor sheathing and joists underneath, so you need a structural repair, plus new cabinets and new kitchen flooring. Or the roof rots, so you need a new roof and repairs to rooms directly beneath.

3. Test Your Sump Pump and Backup Pump (or Install a Backup Pump If You Don’t Have One)

Why it matters: The middle of a storm isn’t the time to discover your basement sump pump is clogged, nor is it the time to begin planning for a backup pump. You need them ready before the water arrives.

What you need to do: Fill the sump pump pit with water and make sure the pump switches on and sends water out the discharge line. If you have a backup pump, repeat the test, but unplug the main pump first. If the backup pump runs on batteries that are more than two years old, replace your sump pump. If you don’t have a backup pump and are on municipal water, get one that runs on water pressure. If you’re on well water, your only option is the battery kind.

Maintenance cost: Testing is free; a water-powered backup sump pump, including installation, costs $150-$350; a new battery for a battery-operated sump starts around $200.

Worst case if you put it off: The pump or pumps don’t work when you need them and your basement floods, ruining everything in it and forcing you to tear out drywall and carpeting.

4. Renew the Finish on Your Hardwood Floors

Why it matters: Every wood floor needs to be refinished periodically, but the trick is to get to the job before the old finish wears through. Then you can apply a fresh coat without having to sand into the wood. Since sanding wears away some of the wood, being able to skip that step can extend the life of your floor by decades.

What you need to do: If your floor is dull but OK otherwise, repair scratches and apply a hardwood floor refinisher ($6-$18 per quart). If the old finish is really scratched up, call in a pro to buff it and apply a fresh finish.

Maintenance cost: If you just need the refresher coat and apply it yourself, you can do 500 sq. ft. for around $25. If you hire a pro, figure on $1 per sq ft.

Worst case if you put it off: The finish wears through. If your floor is thick enough to sand, expect to spend $2.50 per sq. ft. for a new finish. If the floor can’t be sanded, you’ll need a whole new floor — $8-$20 per sq. ft., if you stick with wood.

5. Protect your Foundation

Why it matters: If anything goes wrong with your foundation walls — serious cracks, uneven settling — you could be in for one of the most expensive home repair jobs possible.

What you need to do: Every year, check to make sure the soil around your house slopes away from your foundation walls at least 6 inches over 10 feet (rain gutter downspouts should extend at least 5 feet away from your house).

That slope keeps water from getting down right next to your foundation, where it could cause basement walls to lean, crack the masonry, and cause leaks. (For houses with crawl spaces, keeping water away makes sure excess water doesn’t pool underneath your floor, making for damp conditions that encourage mold, rot, and insects.)

Maintenance cost: Topsoil is $10-$20 per cubic yard, plus delivery. You’ll pay $50-$100 per cubic yard if you buy by the bag.

Worst case if you put it off: Hydrostatic pressure causes your foundation to settle, cracking your basement walls. A full excavation is necessary to stabilize, repair, and seal the foundation walls — a $15,000 to $40,000 job.

Read more: http://members.houselogic.com/articles/home-preventative-maintenance-checklist-5-critical-tasks/preview/#ixzz3AONKm2Ha
“Visit HouseLogic.com for more articles like this. Reprinted from HouseLogic.com with permission of the NATIONAL ASSOCIATION OF REALTORS®.”

Negotiate Your Best House Buy

negotiate

By: G. M. Filisko
Published: June 4, 2010

Keep your emotions in check and your eyes on the goal, and you’ll pay less when purchasing a home.

Buying a home can be emotional, but negotiating the price shouldn’t be. The key to saving money when purchasing a home is sticking to a plan during the turbulence of high-stakes negotiations. A real estate agent who represents you can guide you and offer you advice, but you are the one who must make the final decision during each round of offers and counter offers.

Here are six tips for negotiating the best price on a home.

1. Get prequalified for a mortgage

Getting prequalified for a mortgage proves to sellers that you’re serious about buying and capable of affording their home. That will push you to the head of the pack when sellers choose among offers; they’ll go with buyers who are a sure financial bet, not those whose financing could flop.

2. Ask questions

Ask your agent for information to help you understand the sellers’ financial position and motivation. Are they facing foreclosure or a short sale? Have they already purchased a home or relocated, which may make them eager to accept a lower price to avoid paying two mortgages? Has the home been on the market for a long time, or was it just listed? Have there been other offers? If so, why did they fall through? The more signs that sellers are eager to sell, the lower your offer can reasonably go.

3. Work back from a final price to determine your initial offer

Know in advance the most you’re willing to pay, and with your agent work back from that number to determine your initial offer, which can set the tone for the entire negotiation. A too-low bid may offend sellers emotionally invested in the sales price; a too-high bid may lead you to spend more than necessary to close the sale.

Work with your agent to evaluate the sellers’ motivation and comparable home sales to arrive at an initial offer that engages the sellers yet keeps money in your wallet.

4. Avoid contingencies

Sellers favor offers that leave little to chance. Keep your bid free of complicated contingencies, such as making the purchase conditional on the sale of your current home. Do keep contingencies for mortgage approval, home inspection, and environmental checks typical in your area, like radon.

5. Remain unemotional

Buying a home is a business transaction, and treating it that way helps you save money. Consider any movement by the sellers, however slight, a sign of interest, and keep negotiating.

Each time you make a concession, ask for one in return. If the sellers ask you to boost your price, ask them to contribute to closing costs or pay for a home warranty. If sellers won’t budge, make it clear you’re willing to walk away; they may get nervous and accept your offer.

6. Don’t let competition change your plan

Great homes and those competitively priced can draw multiple offers in any market. Don’t let competition propel you to go beyond your predetermined price or agree to concessions—such as waiving an inspection—that aren’t in your best interest.
G.M. Filisko is an attorney and award-winning writer who has to remind herself to remain unemotional during negotiations. A frequent contributor to many national publications including Bankrate.com, REALTOR® Magazine, and the American Bar Association Journal, she specializes in real estate, business, personal finance, and legal topics.

Read more: http://members.houselogic.com/articles/negotiate-best-house-buy/preview/#ixzz3AOL7mGRi
“Visit HouseLogic.com for more articles like this. Reprinted from HouseLogic.com with permission of the NATIONAL ASSOCIATION OF REALTORS®.”

Matching Room Color and Lighting to Get the Effect You Desire

paint

By: Lisa Kaplan Gordon
Published: February 10, 2014

Light changes color, so your lighting design — a top priority for any remodel — should help guide your color choices. Here’s how.

If you want to make your remodel project shine, finalize your lighting design before you select paint and carpet colors. The light you choose to illuminate tasks or set the mood will change the way you see color throughout the room. The Robin’s Egg Blue you picked could look like Paris at Sunset under some kinds of light.

It’s all determined by the way light and colors interact.

“People have to understand that the color of an object won’t look the same 24 hours a day,” says lighting designer Joseph Rey-Barreau. “I just had bamboo flooring installed throughout my house, and during the day it looks totally different than it looks at night.”

The way we “see” color primarily depends on two things:

1. The light that an object absorbs. Black absorbs all colors; white absorbs none; blue absorbs red.

2. How the light source works. Natural light (sunlight) changes throughout the day and is affected by a room’s location. Artificial light changes with the type of bulb you use.

How Sunlight Affects Colors

As the amount and angle of the sun changes, so will your room colors.

“Natural light should always be considered when choosing color for a space,” says Sarah Cole of the Farrow & Ball paint company.

North-facing rooms:
Light in these rooms is cool and bluish. Bolder colors show up better than muted colors; lighter colors will look subdued. “Use strong colors and embrace what nature has given,” says Cole.

South-facing rooms: Lots of high-in-the-sky light brings out the best in cool and warm colors. Dark colors will look brighter; lighter colors will virtually glow.

East-facing rooms: East light is warm and yellowy before noon, then turns bluer later in the day. These are great rooms for reds, oranges and yellows.

West-facing rooms: Evening light in these rooms is beautiful and warm, while scant morning light can produce shadows and make colors look dull.

How Light Bulbs Affect Color

The type of bulb you use can alter the colors in a room, too.

Incandescents: The warm, yellow-amber light of these bulbs will make reds, oranges, and yellows more vivid, while muting blues and greens.

Fluorescents: This flat and cool light enriches blues and greens.

Halogens: These white lights resemble natural light and make all colors look more vivid. Using halogens would make the shift from daylight to artificial light less jarring.

Compact fluorescent lights (CFLs): CFLs can produce either a warm white, neutral, or bluish-white light.

Light-emitting diodes (LEDs):
You can buy warmer or cooler LEDs, and even “smart” LED bulbs whose color you can control wirelessly. “You can point to the color of the sky in a picture at sunset and make the light bulb in the house be that same color,” says Rey-Barreau.

Tips for Achieving the Color You Want

  • Paint squares of primed drywall with samples of the colors you’re considering, and then move them around the room during the day. Apply at least two coats.
  • Evaluate samples of carpet during different daylight conditions.
  • Most contractors won’t hang lights before you paint, but you can get a color approximation by placing a bulb you’ll be using in a floor or desk lamp. If you’re hyper-sensitive to color or want a very specific look, ask your electrician to hang the lights, then cover them carefully during painting.
  • Remember that natural and artificial light will work together during certain times of day, especially in summer when dusk lasts a long time. Turn on artificial lights even during daylight to see what your colors will look like.
  • Paint sheen also affects color. Glossy finishes will reflect light and change the way the color looks, whereas flat finishes are less reflective and allow colors to look truer under bright light.
  • Light-colored walls can reflect the colors of bold carpets: A bright blue rug, for instance, can cast a bluish tone on a white wall.

“Visit HouseLogic.com for more articles like this. Reprinted from HouseLogic.com with permission of the NATIONAL ASSOCIATION OF REALTORS®.”

Pinning Your Way to Pretty, Practical Home Improvements

pintrest

By: Deirdre Sullivan
Published: March 13, 2014

How a site known for pretty pictures can also be a powerful home improvement tool.

Stuck for home improvement ideas? Want help planning your remodel? Hello, Pinterest.

Its treasure trove of images is an unlimited resource for organizing and planning projects. From picking paint colors to fixing clogged drains, we’ll show you how to put Pinterest to work.

Pinterest Basics

If you’re already on Pinterest, just scroll past this primer to the tips.

If you’re not using Pinterest, here’s the 411: It’s a virtual scrap board that allows users to find, save, and share images. Pinterest calls saved images “pins.”

When you save a pin, you’re asked to pick or create a board. Boards are how you organize pins by topic. For example, if you’re remodeling your kitchen, you can save all of your kitchen ideas on a board titled “kitchen.”

What else can you do?

  • Create collaboration boards that allow other people to pin their ideas to your boards.
  • Make your board secret so only you and the people you invite can see it.
  • Follow other boards created by Pinterest users. When you do, their images show up in your home feed.
  • Use your home feed to find new things to pin to your boards.

Tip: Pinterest is a great way to make sure family members, remodelers, and contractors are on the same page when it comes to projects, products, materials, and your vision.

No Need to Surf Multiple Sites

Although you can pin images from other websites to your board, you can also find all the products, tips, and DIYs you need right on Pinterest. Here’s an example:

When HouseLogic writer Dona DeZube was looking for countertops and floor tile to pair with her new cabinets, she searched Pinterest using the cabinets’ brand and style to find how others were using the cabinets. She even found a few ideas on how to configure her cabinets. Check out her board.

Tip: Eliminating pins is just as important as posting new finds. Edit your boards to save only the best combinations of ideas.

Search Tips

Some tricks for browsing through lots of pinboards for ideas:

Be specific when you use the search box. If you’re looking for flooring, search by the type of flooring you want, like wood flooring.

Filter results.
Right under the search box, you can toggle between Pins, Boards, and Pinners to get different views on your search:

  • When you click Pins, you’ll see pins of wood flooring.
  • When you click Boards, you’ll see boards with the words “wood flooring” in the title.
  • When you click Pinners, you”lll see boards created by companies that have “wood flooring” in their name.

Related: Should your Refinish Hardwood Floors Yourself?
Having problems finding something? Change the wording in your search. Let’s use clogged drains as an example:

  • Our search “how to unclog a drain” resulted in a gazillion solutions.
  • When we searched by “unclog a drain DIY,” we whittled the results to a more manageable few dozen.

Tip: When looking for instructions, try separate searches using the terms “DIY” or “tutorial” along with the name of your topic.

Tip: When you find a pin you like, scroll down. You’ll see an option to check out more boards that feature similar pins. Scroll down further, and you’ll see a list of related pins.

A Short List of Home Improvement Boards to Follow

For a pop of color, check out these paint trend boards:

  • Valspar paint’s 2014 color trends
  • Lowe’s color of the year: radiant orchid
  • Benjamin Moore’s color trends

Helpful home improvements boards:

  • Consumer Reports’ tips, curated and otherwise, from cleaning the drain on your front-loading washer to cordless drill reviews
  • Six-second fixes from Lowe’s
  • Tools you can rent

“Visit HouseLogic.com for more articles like this. Reprinted from HouseLogic.com with permission of the NATIONAL ASSOCIATION OF REALTORS®.”

Ikea Studied Americans at Home. Here’s What It Found.

recycle

By: Deirdre Sullivan
Published: April 15, 2014


Ikea was curious about what Americans want from their homes. Surprisingly, it has nothing to do with expensive upgrades.

The Swedish retailer’s first annual “US Life at Home Report” uncovered that, above all else, 95% of Americans consider comfort a top home feature. We’re not talking about cushy furniture or other features that makes life at home physically more comfortable. It’s an emotional thing. Ikea found that American consumers want their homes to have a feel-good environment so they can let their hair down and connect with loved ones.

Here are more nuggets from the report:

We aren’t show-offs. In fact, we’re modest (!). Ikea says, “… home in the U.S. is not so much about status or wealth. Or keeping up with the Joneses.” Only a mere 1% wants their abodes to reflect their success.

We love living rooms. Maybe that’s why open kitchens are hot. Homeowners don’t want to be separated from their favorite room. Of those polled, 65% agree it’s the most popular spot in the house.

We feel cramped in the kitchen. We’re starved for kitchen storage. We also want more elbow room and counter space.

We use technology in the kitchen. But this has nothing to do with futuristic home gadgets. A total of 27% listen to music, use the computer, or watch TV while cooking or hanging out.

We stash stuff under our beds. The bedroom is another room that leaves us feeling squeezed for space. Fifty-four percent of Americans use the space under their beds for storage.

We want to save energy. If the opportunity popped up, 98% of us would buy an Energy Star-rated appliance. We’re also starting to shift away from inefficient incandescent light bulbs. Forty-three percent of us have transitioned to LED bulbs and have at least one in the house.

We’re getting greener. A whopping 71% of Americans recycle at home. Twenty-eight percent want to generate their own solar power.

The panel for this study consisted of 4,000 U.S. consumers:

  • A combination of male and female heads of household between the ages of 25-54
  • Household income of at least $35,000

“Visit HouseLogic.com for more articles like this. Reprinted from HouseLogic.com with permission of the NATIONAL ASSOCIATION OF REALTORS®.”

11 Reasons to Have a Sunny Outlook on Solar Panels

TOSHIBA Exif JPEG

By: John Riha
Published: June 17, 2014

Falling costs, a host of temporary incentives, and thousands in value-adds make this a great time to add solar power to your home.

Solar power for homes is going mainstream, and if you haven’t thought about adding the technology to your home, you should.

In addition to trimming energy costs and making your house more comfortable, you can take advantage of current rebates and tax credits that practically beg you to get on the solar bandwagon. Those incentives won’t last forever.

Need more convincing? Here are the top reasons to go solar:

1. The Price is (Getting) Right

As solar panels and installation methods get more efficient, the price of residential solar electricity has dropped a whopping 46% since 2010.

Meanwhile, the national average cost of an entire household system — one big enough to power the everyday needs of a family of four — has fallen from about $36,000 in 2010 to around $24,000, factoring in permits and installation.

That still puts solar in the range of a new car — and out of the reach of many — but there’s much more to the cost story.

2. Rebates, Incentives, and Credits — Oh My! (But They Won’t Last!)

Rebates and incentives offered by the local, state, and federal government can total as much as 50% of a system, depending on where you live. Some states even throw in exemptions for property taxes and sales taxes.

The biggest is the tax credit from the Feds. Until Dec. 31, 2016, you’re eligible for a tax credit of 30% of the price of your installed system.

Tip: Make sure your solar installer gives you a rundown of local and state incentives. And double check with your tax adviser.

3. Solar — It’s the Law

One big reason that states offer incentives is the RPS — the renewable portfolio standard. These are mandates some states have imposed on their utility companies, saying how much renewable energy (solar, wind) local utilities must provide their customers by such-and-such a date. Failure to comply means utilities will be fined heavily.

  • Hawaii has an ambitious RPS — 40% of the state’s energy must be from renewable energy sources by 2030.
  • New Jersey says 22.5% of its energy must be from renewables by 2021.
  • Wisconsin requires less but much sooner — 10% by 2015.

Those RPS mandates mean generous credits and rebates on solar, but they’re not here forever. In Wisconsin, for example, they’ll expire after 2015.

4. Payback Times are Shortening

As system prices fall, payback times — the number of years it takes to recoup your investment — are shortening. Payback times are now about half of what they used to be just five years ago; the average payback time is now around 11 years.

Local electrical rates determine how much money you’ll save, and how long it’ll take your energy savings to pay back the cost of a system.

After your payback is complete, years of pure energy savings add up. With annual savings averaging about $600 (and going up 2% to 3% each year), you’ll save thousands of dollars over the 25-year lifetime of a system.

5. You Don’t Need Lots of Sun

Annual energy savings from solar is much more about your local electrical rates than how sunny your locale is. Places with the highest rates enjoy more savings and more rapid payback on their systems.

Here’s a sampling of annual savings from solar energy from EnergySage.com:

  • New York City: $1,091 (224 sunny days per year, on average)
  • San Francisco: $916 (259 sunny days)
  • Phoenix: $701 (300 sunny days)
  • Boston: $641 (200 sunny days)
  • Minneapolis: $518 (198 sunny days)

6. You Don’t Have to Pay Up Front

One of the latest innovations in home solar is the leasing plan. With leasing, you pay nothing up front for your solar array. A crew comes over, sets you up with panels, a converter, a connection to the grid, and you’re good to go.

You sign a long-term lease agreement of 15 to 25 years and pay only for the solar-generated electricity, which is typically priced 10% to 25% lower than the cost charged by a local utility provider.

You’ll still pay your utility company nominal monthly maintenance fees to keep the grid up and running, plus charges for any electricity you use in excess of what your solar system can provide. Some solar leasing companies guarantee that whatever you spend — combined — will be less than your old monthly electric bill.

SolarCity, one of the world’s largest providers of home solar, throws in an upfront energy evaluation of your house, acquires all necessary permits and licenses (a big hassle; see “10. Soft Costs are Lowering”), and adds a personal website for monitoring your system and energy savings — all for free.

Leasing is a good way to go if you’re interested in adding solar but the upfront costs are a deal breaker. With leasing, you won’t own the system and won’t be able to reap the benefits of free electricity when the system is paid off, but you’ll still trim your monthly electric bill.

7. Big Builders are on Board

Solar providers are hooking up with home builders in increasing numbers, creating houses powered by the sun and bringing solar power into the mainstream homebuying experience. Solar home builders are some of the nation’s biggest, including Meritage and Pulte.

Shea Homes offers a line of homes called SheaXero that includes solar panels designed to take care of all household electrical needs. The system is standard, rather than an option.

8. Big Box Home Improvement Stores are on Board

Solar panels and systems are no longer exotic specialty items. In fact, you’ll find them at major retailers about as cheap as they can be found. For the DIYer determined to shave up to $5,000 from the cost of solar installation, off-the-shelf panels and converters are available.

Here’s a partial rundown of who has them:

  • Best Buy
  • Costco
  • Home Depot
  • Ikea
  • Walmart

9. Net Metering Rocks

Net metering is the term for what happens when your solar panels generate enough electricity to send the excess back to the grid — in effect, making your meter run backwards.

The regular, grid-produced electricity you use, minus whatever you generate from your rooftop panels, equals the “net” — what your utility company ultimately charges you. If you make more juice than you use, you typically get a credit that rolls over to next month’s bill.

It’s a terrific benefit for owners of solar installations and one way that solar helps pay for itself.

In an attempt to encourage the growth of renewable energy, almost all states have adopted laws that permit net metering. A 2005 federal law says all public utilities must provide net metering if requested by the state.

Every state has its own approach, and you’ll need to check with your local utility to figure out the net metering rules in your locale.

10. Soft Costs are Lowering

As prices for panels fall, solar energy is increasingly affordable. But prices will only fall so far.

Today one of the biggest hurdles is soft costs – the price of obtaining permits, connecting your system to the grid, and having everything inspected (whether your installation is pro or DIY). On average, soft costs add more than $2,500 to the price of home solar.

Reducing paperwork and cutting red tape helps installers be more efficient and lets them pass savings on to you. In Chicago, for example, recent streamlining has trimmed permit wait times from 30 days to one day — a huge boon for solar installation efficiency.

Trimming soft costs is an initiative of the U.S. Department of Energy, which has a stated goal of reducing the 2011 costs of solar energy 75% by 2020. The DOE is hoping a $5 million research grant will spur the development of “plug-and-play” systems that can be installed in a day.

11. Solar Adds Value

Studies by the Appraisal Institute, a worldwide association of real estate appraisers, say a home improvement that leads to documented energy savings can yield up to a 20-to-1 valuation. At that rate, if your solar array saves $1,000 per year, you can expect a $20,000 increase in your home’s value.

An actual valuation increase depends on the location and condition of your house.

That info is echoed by research from the Lawrence Berkeley National Laboratory that says every kilowatt of electricity your solar system is capable of generating adds about $3,500 to the resale value of a home. For a typical 5 kW system, that’s a $17,500 bump.

Tip: To get your marketing edge, document your energy bill before and after your solar installation.

Bonus: You Can Save the Planet

Add “save the planet” to the list of benefits and you’d be right — lowering reliance on fossil fuels reduces pollution for everybody. But if you’re like most people, that’s not a big motivator.

When asked what was the most-convincing reason for installing solar power, only 3% of respondents said “reducing environmental impact,” according to a survey from national polling firm Zogby Analytics.

The most popular answer from homeowners was “low upfront costs,” followed closely by “save money on monthly utility bill.”

Saving money is good. And while you’re at it, you can add “saving jobs” to the list of bennies.

“Solar energy is a tremendous driver of economic growth and jobs,” says Jonathan Bass, vice president of communications at SolarCity. “Right now we’re hiring upwards of 400 people per month.”

“Visit HouseLogic.com for more articles like this. Reprinted from HouseLogic.com with permission of the NATIONAL ASSOCIATION OF REALTORS®.”

If You Were Selling Today, Would You Have the Home That Buyers Want?

green

By: Dona DeZube
Published: November 8, 2013

Knowing what appeals to today’s homebuyers, and considering those trends when you remodel, can pay off years from now when you sell your home.

Two new surveys about what homebuyers want have me feeling pretty smug about my own home choices. Maybe you’ll feel the same.

Privacy from neighbors remains at the top of the most-wanted list (important to 86% of buyers), according to the NATIONAL ASSOCIATION OF REALTORS’® “2013 Community Preference Survey.” Privacy is no doubt the best feature of my mid-century ranch home, since I can only see one neighbor’s house and it’s a couple hundred feet down my driveway.

It may not be practical to move your neighbors farther away (although I’m sure many people wish they had that superpower), but you can increase your home’s privacy (and therefore its resale value) by planting a living privacy screen of trees and shrubs or by physically screening off your patio.

3 More Takeaways for the Next Time You Remodel

1. More and more generations are living together. Another NAR survey, the “2013 Profile of Home Buyers and Sellers,” found 14% of buyers purchased a home suited to a multigenerational household due to children over the age of 18 moving back into the house, cost savings, and the health and caretaking of aging parents.

I did that back when my parents were still alive, and it worked out great for everyone. I didn’t have time to let my infant daughter nap on my shoulder all afternoon, but my mom did. She couldn’t drive to church meetings at night, but I could take her. And neither of us liked cleaning the gutters, but my husband didn’t mind that chore.

Even if you’d rather live in a cardboard box than with your mother, you might want to consider the multigenerational living trend when you’re remodeling. For instance, opting for a full bath when finishing the basement could offer more convenience for you now and boost your home’s resale value by making it more appealing to a multigenerational family.

2. On average, homeowners live in their home for nine years. That’s up from six years in 2007. Since you’ll be in your home for a long time, it makes sense to remodel to suit your taste but also with long-lasting marketability in mind. After all, you don’t want to have to redo stuff. For instance, you can go for trend-defying kitchen features, like white overtones and Shaker-style cabinets, which work with a variety of styles.

I feel compelled to caution against going so far out of the norm for your neighborhood that it’ll turn off potential buyers even nine years from now. (It never hurts to get your REALTOR®’s opinion on your remodeling plans.)

3. Homebuyers love energy efficiency. Heating and cooling costs were “somewhat” or “very important” to a whopping 85% of buyers. If your home could use an energy-efficiency upgrade, go with projects that have a solid return on investment, like sealing your air leaks and adding attic insulation. You’ll save money on your utility bills now and when you’re ready to sell, your home will appeal to buyers looking for efficiency.

By the way, to take back your energy bills, you need to do at least four things. One to two fixes won’t cut it, thanks to rising energy costs.

About two-thirds of survey respondents also thought energy-efficient appliances and energy-efficient lighting were important. Tuck away your manuals and energy-efficiency information when you buy new appliances and lighting. When you’re ready to sell (in nine years) you can pull those out and display them where buyers will see them.


“Visit HouseLogic.com for more articles like this. Reprinted from HouseLogic.com with permission of the NATIONAL ASSOCIATION OF REALTORS®.”

10 Inside Tips From a Designer Who Specializes in Small Baths

bath

By: Dona DeZube
Published: December 27, 2012

A New York City designer shares secrets to making a small bath both functional and beautiful.

Got a small bathroom to renovate? Go wild with texture and colors if it’s a rarely used guest bath, but stick to clean and simple in a master bath.

That’s the word from designer Jamie Gibbs, who transforms incredibly small New York City bathrooms into beautiful spaces. “I liked being shocked by details in a little space, especially if it’s not going to be used much,” Gibbs says.

His small-bath secrets:

1. Avoid textures in bathrooms that get daily use. In a heavily used bathroom, anything with texture becomes a collection spot for mold, mildew, and toothpaste. Say no to carved vessel sinks or floor tile with indentations.

2. Be careful with no-enclosure showers with drains right in the floor. These Euro showers allow for a feeling of openness, but the average American contractor doesn’t know how to waterproof the floor for them, Gibbs says. The tile seals can be compromised if not installed correctly, causing the materials to decompose, and water to leak underneath.

3. Use opaque windows and skylights to let light filter into all parts of the bath. A long skinny window with frosted glass means you don’t have to burn high-wattage light bulbs. Make sure water condensation will roll off the window into an appropriate place (i.e. not the framing or the wall) to avoid future maintenance issues.

4. Look for fixtures that have a single handle rather than separate hot and cold taps. “Space-saving gearshift faucets are a very good choice in small bathrooms,” says Gibbs. You’ll also save money by not having to drill holes in the countertop for the hot and cold taps.

5. Save space with wall-mounted toilets and bidets, but be aware that the water tank goes into the wall. That’s fine if space is such a premium that you won’t mind going into the wall to make any repairs. But if you share a wall with a neighbor, that’s a different issue.

6. Use a wall-mount faucet to make a reduced-depth vanity work in a small space. “I can get away with a 22” vanity instead of a 24” vanity with a wall mount faucet,” Gibbs says.

7. Check the space between the handles and the faucet of any space-saving fixtures. “If you can only get a toothbrush in it to clean, you’ll save space, but it’s functionally stupid,” Gibbs says. Make sure the sink is functional, too. If you’re using a vessel sink, make sure it’s large enough and not too high. “If it’s too high, you’ll knock it so many times that the fittings will come loose,” Gibbs says.

8. A pedestal sink is all form and no function. “It’s a great-looking sink, but there’s no place to [set] anything,” Gibbs says.

9. Wall-mounted vanities seem like they’re space savers, but they create dead space between the vanity and the floor — a space that often accumulates junk and never gets cleaned.

10. If you’re comfortable with it, go European and put up a glass walls between the bathroom and bedroom to create the illusion of space. Or put bathroom fixtures in the bedroom just outside the bath.

“Visit HouseLogic.com for more articles like this. Reprinted from HouseLogic.com with permission of the NATIONAL ASSOCIATION OF REALTORS®.”

  • « Previous Page
  • 1
  • 2
  • 3
  • 4
  • 5
  • 6
  • 7
  • Next Page »
Powered by NJ Interest Rates

Featured Properties

1102 Atlantic Ave, Longport, NJ 08403
IDX Image
$3,895,000
Beds: 5
Baths: 4 | 1
 
2700 Atlantic Ave #501, Longport, NJ 08403
IDX Image
$1,450,000
Beds: 3
Baths: 2
 
View all

About Jerome & Angel DiPentino

Jerome & Angel DiPentinoFormer owners of Premier Properties Real Estate Inc., Jerome and Angel DiPentino, shaped their business into a “boutique real estate firm” in Longport, New Jersey as the community’s leading real estate agency in 1990.

Premier Properties has joined forces with Long & Foster Real Estate – the largest real estate company in the Mid-Atlantic region. Long & Foster provides a one stop shopping experience with real estate, mortgage, title and insurance. While our name has changed, The Premier Team still prides itself on providing that “boutique real estate feel” in Longport. Read More...

Copyright © 2023 · Longport New Jersey Homes and Real Estate for Sale · Long & Foster Real Estate Longport

Jerome DiPentino and Angel DiPentino | Broker/Sales Associates
Jerome Cell: 609-432-5588 | Angel Cell: 609-457-0777
Long & Foster Real Estate, Inc | 2401 Atlantic Avenue - Longport, NJ 08403 | Office: 609-822-3339
All information provided is deemed reliable but is not guaranteed and should be independently verified.
Equal Housing Opportunity