Premier Sells Team Longport NJLongport NJ Real Estate

Jerome and Angel DiPentino of Long & Foster Real Estate

  • Home
  • Search for Homes
  • Our Listings
  • Rentals
  • Area Solds
    • Longport Sold Homes
    • Margate Sold Homes
    • Ventnor Sold Homes
  • Our Sold Homes
  • The Premier Team
    • About Long & Foster Real Estate
  • Contact Us

11 Ways to Create a Welcoming Front Entrance for Under $100

mailbox

Wouldn’t it be nice to approach your home’s entrance with a grin instead of a grimace? Take our tips for beating a clear, safe, and stylish path to your front door.

First impressions count — not just for your friends, relatives, and the UPS guy, but for yourself. Whether it’s on an urban stoop or a Victorian front porch, your front door and the area leading up to it should extend a warm welcome to all comers — and needn’t cost a bundle.

Here’s what you can do to make welcoming happen on the cheap.

1. Clear the way for curb appeal. The path to your front door should be at least 3 feet wide so people can walk shoulder-to-shoulder, with an unobstructed view and no stumbling hazards. So get out those loppers and cut back any overhanging branches or encroaching shrubs.

2. Light the route. Landscape lighting makes it easy to get around at night. Solar-powered LED lights you can just stick in the ground, requiring no wiring, are suprisingly inexpensive. We found 8 packs for under $60 online.

3. Go glossy. Borrow inspiration from London’s lovely row houses, whose owners assert their individuality by painting their doors in high-gloss colors. The reflective sheen of a royal blue, deep green, crimson, or whatever color you like will ensure your house stands out from the pack.

4. Pretty up the view. A door with lots of glass is a plus for letting light into the front hall — but if you also want privacy and a bit of decor, check out decorative window film. It’s removable and re-positionable, and comes in innumerable styles and motifs. Pricing depends on size and design; many available for under $30.

A way to get the look of stained glass without doing custom work or buying a whole new door: Mount a decorative panel on the inside of the door behind an existing glass insert, $92 for an Arts and Crafts-style panel 20-inches-high by 11-inches-wide.

5. Replace door hardware. While you’re at it, polish up the handle on the big front door. Or better yet, replace it with a shiny new brass lockset with a secure deadbolt. Available for about $60.

6. Please knock. Doorbells may be the norm, but a hefty knocker is a classic that will never run out of battery life, and another opportunity to express yourself (whatever your favorite animal or insect is, there’s a door-knocker in its image).

7. Ever-greenery. Boxwoods are always tidy-looking, the definition of easy upkeep. A pair on either side of the door is traditional, but a singleton is good, too. About $25 at garden centers. In cold climates, make sure pots are frost-proof (polyethylene urns and boxes mimic terracotta and wood to perfection).

8. Numbers game. Is your house number clearly visible? That’s of prime importance if you want your guests to arrive and your pizza to be hot. Stick-on vinyl numbers in a variety of fonts make it easy, starting at about $4 per digit.

9. Foot traffic. A hardworking mat for wiping muddy feet is a must. A thick coir mat can be had at the hardware store for less than $20. Even fancier varieties can be found well under $50.

10. Go for the glow. Fumbling for keys in the dark isn’t fun. Consider doubling up on porch lights with a pair of lanterns, one on each side of the door, for symmetry and twice the illumination. Many mounted lights are available well under $100.

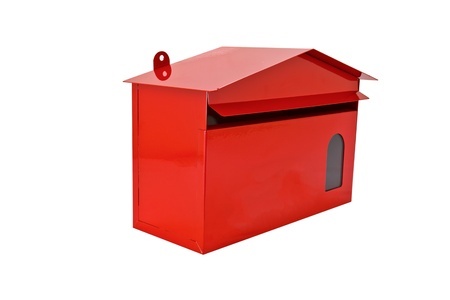
11. Snail mail. Mailboxes run the gamut from kitschy roadside novelties masquerading as dogs, fish, or what-have-you to sober black lockboxes mounted alongside the front door. Whichever way you go, make sure yours is standing or hanging straight, with a secure closure, and no dings or dents. The mail carrier will thank you.

By: Cara Greenberg
Published: November 5, 2012

Read more: http://members.houselogic.com/articles/front-door-entry-ideas/preview/#ixzz30rm1yCF4

“Visit HouseLogic.com for more articles like this. Reprinted from HouseLogic.com with permission of the NATIONAL ASSOCIATION OF REALTORS®.”

4 Tips to Determine How Much Mortgage You Can Afford

mortgage

By: G. M. Filisko

Published: March 11, 2010

By knowing how much mortgage you can handle, you can ensure that home ownership will fit in your budget.

1. The general rule of mortgage affordability

As a rule of thumb, you can typically afford a home priced two to three times your gross income. If you earn $100,000, you can typically afford a home between $200,000 and $300,000.

To understand how that rule applies to your particular financial situation, prepare a family budget and list all the costs of homeownership, like property taxes, insurance, maintenance, utilities, and community association fees, if applicable, as well as costs specific to your family, such as day care costs.

2. Factor in your downpayment

How much money do you have for a downpayment? The higher your downpayment, the lower your monthly payments will be. If you put down at least 20% of the home’s cost, you may not have to get private mortgage insurance, which costs hundreds each month. That leaves more money for your mortgage payment.

The lower your downpayment, the higher the loan amount you’ll need to qualify for and the higher your monthly mortgage payment.

3. Consider your overall debt

Lenders generally follow the 28/41 rule. Your monthly mortgage payments covering your home loan principal, interest, taxes, and insurance shouldn’t total more than 28% of your gross annual income. Your overall monthly payments for your mortgage plus all your other bills, like car loans, utilities, and credit cards, shouldn’t exceed 41% of your gross annual income.

Here’s how that works. If your gross annual income is $100,000, multiply by 28% and then divide by 12 months to arrive at a monthly mortgage payment of $2,333 or less. Next, check the total of all your monthly bills including your potential mortgage and make sure they don’t top 41%, or $3,416 in our example.

4. Use your rent as a mortgage guide

The tax benefits of homeownership generally allow you to afford a mortgage payment—including taxes and insurance—of about one-third more than your current rent payment without changing your lifestyle. So you can multiply your current rent by 1.33 to arrive at a rough estimate of a mortgage payment.

Here’s an example. If you currently pay $1,500 per month in rent, you should be able to comfortably afford a $2,000 monthly mortgage payment after factoring in the tax benefits of homeownership.

However, if you’re struggling to keep up with your rent, consider what amount would be comfortable and use that for the calcuation instead.

Also consider whether or not you’ll itemize your deductions. If you take the standard deduction, you can’t also deduct mortgage interest payments. Talking to a tax adviser, or using a tax software program to do a “what if” tax return, can help you see your tax situation more clearly.


G.M. Filisko is an attorney and award-winning writer who’s owned her own home for more than 20 years. A frequent contributor to many national publications including Bankrate.com, REALTOR® Magazine, and the American Bar Association Journal, she specializes in real estate, business, personal finance, and legal topics.

“Visit HouseLogic.com for more articles like this. Reprinted from HouseLogic.com with permission of the NATIONAL ASSOCIATION OF REALTORS®.”

Small Home Storage: Maximize Your Storage Space

storage

By: Terry Sheridan

Published: January 21, 2011

Your small home has more storage space than you think. For relatively little money but a lot of common sense and ingenuity, there’s space to be found.

Here are six tips to maximize storage that won’t empty your savings account:

1. De-clutter. It’s the first thing architect Sarah Susanka of “Not So Big House” tells clients who talk of expanding their homes. Haven’t used something for a couple of years? Pitch it, she says. You’ll be amazed at how much space opens up when you do.

Cost: $0.

2. Platform/bunkbeds. Add space and eliminate a dresser in a small bedroom with a three-drawer or six-drawer platform bed. Find one at a furniture or big department store, and online.

Cost: $400 to $600, queen size.

Bunkbeds won’t have drawers, but save space by stacking beds. And kids love ‘em. They come in a variety of styles and configurations. Some will convert to two twin beds.

Cost: $300 to $550.

3. Shoe organizers. They’re for so much more than just shoes. Hang one in a kitchen closet or pantry, and use it as your small home catch-all for remotes, keys, notepads, cell phones, and chargers, and other household essentials. It’ll free up a kitchen drawer or two for other uses.

Cost: Less than $20.

4. Toe-kick storage. The space under your kitchen cabinets is a treasure trove of storage possibilities. Put placemats, napkins, cookie sheets, and how-to manuals there. Hire a cabinet-maker to install them, or request them as a custom feature in a new-cabinet order.

Cost: About $300 per drawer.

5. Floor-to-ceiling storage. Furniture-style 6-foot-tall bookcases don’t use all available wall space. But extend shelving that extra two feet to the ceiling, and you’ve got room for a lot more books, knickknacks, or art objects. Home improvement stores have brackets and shelves in a variety of colors and sizes to match your décor.

Cost: Under $200, depending on the space size.

“Visit HouseLogic.com for more articles like this. Reprinted from HouseLogic.com with permission of the NATIONAL ASSOCIATION OF REALTORS®.”

7 Smart Strategies for Kitchen Remodeling

kitchen

By: John Riha
Published: May 30, 2013

Follow these seven strategies to get the most financial gain on your kitchen remodel.

A significant portion of kitchen remodeling costs may be recovered by the value the project brings to your home. Kitchen remodels in the $50,000 to $60,000 range recoup about 74% of the initial project cost at the home’s resale, according to recent data from Remodeling Magazine’s Cost vs. Value Report.

A minor kitchen remodel of about $19,000 does even better, returning more than 82% of your investment.

To maximize your return on investment, follow these seven strategies to keep you on budget and help you make smart choices.

1. Plan, Plan, Plan

Planning your kitchen remodel should take more time than the actual construction. If you plan well, the amount of time you’re inconvenienced by construction mayhem will be minimized. Plus, you’re more likely to stay on budget.

How much time should you spend planning? The National Kitchen and Bath Association recommends at least six months. That way, you won’t be tempted to change your mind during construction and create change orders, which will inflate construction costs and hurt your return on investment.

Some tips on planning:

Study your existing kitchen: How wide is the doorway into your kitchen? It’s a common mistake many homeowners make: Buying the extra-large fridge only to find they can’t get it in the doorway. To avoid mistakes like this, create a drawing of your kitchen with measurements for doorways, walkways, counters, etc. And don’t forget height, too.

Think about traffic patterns: Work aisles should be a minimum of 42 inches wide and at least 48 inches wide for households with multiple cooks.

Design with ergonomics in mind: Drawers or pull-out shelves in base cabinets; counter heights that can adjust up or down; a wall oven instead of a range: These are all features that make a kitchen accessible to everyone — and a pleasure to work in.

Plan for the unforeseeable: Even if you’ve planned down to the number of nails you’ll need in your remodel, expect the unexpected. Build in a little leeway for completing the remodel. Want it done by Thanksgiving? Then plan to be done before Halloween.

Choose all your fixtures and materials before starting: Contractors will be able to make more accurate bids, and you’ll lessen the risk of delays because of back orders.

Don’t be afraid to seek help: A professional designer can simplify your kitchen remodel. Pros help make style decisions, foresee potential problems, and schedule contractors. Expect fees around $50 to $150 per hour, or 5% to 15% of the total cost of the project.

2. Keep the Same Footprint

Nothing will drive up the cost of a remodel faster than changing the location of plumbing pipes and electrical outlets, and knocking down walls. This is usually where unforeseen problems occur.

So if possible, keep appliances, water fixtures, and walls in the same location. 

Not only will you save on demolition and reconstruction costs, you’ll cut the amount of dust and debris your project generates.

3. Get Real About Appliances

It’s easy to get carried away when planning your new kitchen. A six-burner commercial-grade range and luxury-brand refrigerator may make eye-catching centerpieces, but they may not fit your cooking needs or lifestyle.

Appliances are essentially tools used to cook and store food. Your kitchen remodel shouldn’t be about the tools, but the design and functionality of the entire kitchen.

So unless you’re an exceptional cook who cooks a lot, concentrate your dollars on long-term features that add value, such as cabinets and flooring.

Then choose appliances made by trusted brands that have high marks in online reviews and Consumer Reports.

4. Don’t Underestimate the Power of Lighting

Lighting can make a world of difference in a kitchen. It can make it look larger and brighter. And it will help you work safely and efficiently. You should have two different types of lighting in your kitchen:

Task Lighting: Under-cabinet lighting should be on your must-do list, since cabinets create such dark work areas. And since you’re remodeling, there won’t be a better time to hard-wire your lights. (Here’s more about under-cabinet lights.) Plan for at least two fixtures per task area to eliminate shadows. Pendant lights are good for islands and other counters without low cabinets. Recessed lights and track lights work well over sinks and general prep areas with no cabinets overhead.

Ambient lighting: Flush-mounted ceiling fixtures, wall sconces, and track lights create overall lighting in your kitchen. Include dimmer switches to control intensity and mood.

5. Be Quality-Conscious

Functionality and durability should be top priorities during kitchen remodeling. Resist low-quality bargains, and choose products that combine low maintenance with long warranty periods. Solid-surface countertops, for instance, may cost a little more, but with the proper care, they’ll look great for a long time.

And if you’re planning on moving soon, products with substantial warranties are a selling advantage.

6. Add Storage, Not Space

Storage will never go out of style, but if you’re sticking with the same footprint, here are a couple of ideas to add more:

Install cabinets that reach the ceiling: They may cost more — and you might need a stepladder — but you’ll gain valuable storage space for Christmas platters and other once-a-year items. In addition, you won’t have to dust cabinet tops.

Hang it up: Mount small shelving units on unused wall areas and inside cabinet doors; hang stock pots and large skillets on a ceiling-mounted rack; and add hooks to the backs of closet doors for aprons, brooms, and mops.

7. Communicate Clearly With Your Remodelers

Establishing a good rapport with your project manager or construction team is essential for staying on budget. To keep the sweetness in your project:

Drop by the project during work hours: Your presence broadcasts your commitment to quality.

Establish a communication routine: Hang a message board on site where you and the project manager can leave daily communiqués. Give your email address and cell phone number to subs and team leaders.

Set house rules: Be clear about smoking, boom box noise levels, available bathrooms, and appropriate parking.

Be kind: Offer refreshments (a little hospitality can go a long way), give praise when warranted, and resist pestering them with conversation, jokes, and questions when they are working. They’ll work better when refreshed and allowed to concentrate on work.

“Visit HouseLogic.com for more articles like this. Reprinted from HouseLogic.com with permission of the NATIONAL ASSOCIATION OF REALTORS®.”

Your Top Home Ownership Tax Questions Answered

taxes

By: Natasha Padgitt
Published: December 31, 2012

Which tax benefits do home owners miss? Will you get audited if you take the home office deduction? Find out the answers to these questions and more before Tax Day.

There are a lot of home ownership tax benefits — if you don’t forget to take them. To make sure you get your due, HouseLogic asked tax expert Abe Schneier, a senior technical manager with the American Institute of CPAs, for tax-filing tips.

HouseLogic: What’s the most common home-related tax deduction or credit claimed by home owners?

“Visit HouseLogic.com for more articles like this. Reprinted from HouseLogic.com with permission of the NATIONAL ASSOCIATION OF REALTORS®.”

Abe Schneier: The mortgage interest deduction, [which the NATIONAL ASSOCIATION OF REALTORS® estimates amounts to about $3,000 in tax savings for the average itemizing home owner] and [the deduction for] real property taxes.

HL: Which tax provision do home owners often overlook?

AS: You can deduct mortgage insurance premiums [or PMI] if you were required to get PMI as a condition of receiving financing on your home. Some people will overlook that, although it’s typically disclosed on the 1099 that you receive from the bank, along with all the deductible information you need.

HL note: The PMI deduction has been extended through 2013 and is retroactive for 2012.

[Another area of tax-filing confusion is] whether you’ve correctly treated any points you paid if you refinanced. In a new home purchase, the points can be deducted [in the tax year you paid them]. But typically in a refinancing, you have to amortize and deduct any points you paid over the life of the mortgage, and people tend to forget that after a couple of years.

HL: What’s the No. 1 mistake home owners make when filing their taxes?

AS: Because you receive a statement from the bank with details [such as] how much mortgage interest you paid over the year, and how much the bank pays on your behalf in real estate taxes, the number of mistakes has dropped.

But if you’re in a state where you pay the real estate taxes on your own — the bank doesn’t handle it for you — [people] make mistakes because sometimes real estate tax bills include other items besides pure real estate taxes. It could be trash collection fees; it could be snow removal fees that the state or county is assessing on the real estate tax bill. Since the items are included in the same bill, home owners sometimes deduct [those fees] regardless of whether the items are actually taxes.

HL: What’s the single most important piece of advice for people filing their taxes as a first-time home owner?

AS: You have to take a look at your closing statement from when you bought the house. It’s commonly called the HUD-1 form and you receive it at the closing. Occasionally, there are fees such as prepaid taxes or interest at closing that can be deductible.

HL: What tax advice do you have for someone who’s owned their home for 10 or 20 years?

AS: If you’ve been a longtime home owner and you’ve been through refinancings, you have to be careful about how much interest you’ve deducted, especially if you have a home equity loan or equity line. A lot of people who’ve refinanced have sizable equity lines. The maximum outstanding home equity debt on which interest is deductible is $100,000; the maximum loan amount on which interest is deductible is $1 million.

HL: What home improvement-related records should home owners keep?

AS: Absolutely keep your receipts for couple of reasons:

1. You want to make sure — if there are any warranties attached to the work that was done — that you maintain those records and you have something to go back to the person who did the work in case something doesn’t function properly.

2. If you’ve added value to the home — you’ve added a deck, you’ve added a room, you’ve added something new to house — you’ll need to know what the gain is on that capital improvement when you sell the house.

HL note: Tax rules let you add capital improvement expenses to the cost basis of your home, and a higher cost basis lowers the total profit or capital gain you’re required to pay taxes on. Of course, most home owners are exempted from taxes on the first $500,000 in profit for joint filers ($250,000 for single filers). So it doesn’t apply to too many people.

HL: How do I tell the difference between a capital improvement and a repair?

AS: Typically a repair is [done] to allow an item, like a home furnace or air conditioner, to continue. But if you were to replace the heating unit, that’s not a repair.

HL: Does taking any home-related tax benefits, such as the home office deduction, make a taxpayer more likely to be audited?

AS: Only if numbers look out of the ordinary — for instance, if one year you were writing off $20,000 in mortgage interest debt and the next year you’re writing off $100,000 in mortgage interest. Taking the home office deduction in and of itself doesn’t usually generate an audit. However, if you claim nominal income and significantly higher expenses in an effort to create artificial losses, the IRS will see that there’s something else going on there.

HL: Once filing season is over, when should home owners start thinking about next year’s taxes?

AS: Well, hopefully, when you visit your CPA to give information about or pick up [this year’s] tax return, your CPA has spoken with you about your plans for [next year]:

  • If any major improvements are scheduled
  • If you’re planning on moving
  • How to organize any expenditures for fixing up the home before sale

If you’re planning to do any of those things, talk with your CPA so that you’re prepared with documentation and so that the [tax pro] can help minimize your tax situation.

“Visit HouseLogic.com for more articles like this. Reprinted from HouseLogic.com with permission of the NATIONAL ASSOCIATION OF REALTORS®.”

Got Leaky Windows? 3 Low-Cost Tips to Fix Them

window

By: Nicolette Toussaint
Published: May 2, 2011

I used to hang an extra woolly robe in my bathroom because my post-shower route took me past a window so drafty it made me wonder about the etymology of “window.” Turns out it comes from the Anglo-Saxon “vindr” and “auga,” which translates as “wind eye.” How appropriate.

If the “wind eye” focused on you last winter, but you’re not ready to invest in new windows, you can still cut your energy bills if you seal those air leaks—and if you do so now, you’ll prevent cool air from escaping your home this summer.

Here are three low-cost tips to help keep air leaks at bay:

#1: For most windows: Just fill the gaps.

Easier said than done if you’re dealing with old, flaky caulk, weather stripping, or adhesive that’s really tough to remove. But if you don’t clean it off well, your new caulk and stripping won’t adhere well and could peel away before you see any benefits.

However, a common household product, petroleum jelly, removes that adhesive goo quite well. Just rub the jelly over the sticky goo, let it sit for a few minutes, then wipe away. Another swipe with rubbing alcohol will remove the greasy film left from the jelly. (This technique, by the way, also works for removing price labels.)

#2. For older windows with rattling panes: Make baffles.

Cut quarter-round pine strips to fit. Use finishing nails and wood glue to secure them just inside the framed glass. Once you’ve caulked and painted the strips to match, they will disappear into the framework and look like part of the original window. It worked wonderfully on my 1920-era casement windows.

#3. If you want window treatments, too: Install waffle shades.

Folding fabric shades that are made with cells that trap air have great insulating properties—so good that some of them qualify for federal energy rebates, which have been extended into 2011. They start at around $50—still less expensive than new windows—and you get a new look, too.

Leaky windows are a big deal, winter or summer. What ways have you found to fix your windy windows?

Read more: http://members.houselogic.com/articles/got-leaky-windows-3-low-cost-tips-fix-them/preview/#ixzz3CMLObKOL
“Visit HouseLogic.com for more articles like this. Reprinted from HouseLogic.com with permission of the NATIONAL ASSOCIATION OF REALTORS®.”

7 Smart Strategies for Bathroom Remodeling

bath

By: John Riha
Published: March 4, 2011

Here’s how to get the bathroom of your dreams without making your budget a nightmare.

You dream about a bathroom that’s high on comfort and personal style, but you also want materials, fixtures, and amenities with lasting value. Wake up! You can have both.

A mid-range bathroom remodel is a solid investment, according to Remodeling Magazine’s annual Cost vs. Value Report. An average bath remodel of $16,128 will recoup about 72.5% of those costs when it’s time to sell your home, and a more extensive $51,374 job returns about 63.6%. In addition, you can maximize the value of your investment by using these smart strategies, which will create a stylish yet budget-friendly bathroom.

1. Stick to a Plan

A bathroom remodel is no place for improvisation. Before ripping out the first tile, think hard about how you will use the space, what materials and fixtures you want, and how much you’re willing to spend.

The National Kitchen and Bath Association (NKBA) recommends spending up to six months evaluating and planning before beginning work. That way, you have a roadmap that will guide decisions, even the ones made under remodeling stress. Once work has begun — a process that averages two to three months — resist changing your mind. Work stoppages and alterations add costs. Some contractors include clauses in their contracts that specify premium prices for changing original plans.

If planning isn’t your strong suit, hire a designer. In addition to adding style and efficiency, a professional designer makes sure contractors and installers are scheduled in an orderly fashion. A pro charges $100 to $200 per hour, and spends 10 to 30 hours on a bathroom project.

2. Keep the Same Footprint

You can afford that Italian tile you love if you can live with the total square footage you already have.

Keeping the same footprint, and locating new plumbing fixtures near existing plumbing pipes, saves demolition and reconstruction dollars. You’ll also cut down on the dust and debris that make remodeling so hard to live with.

Make the most of the space you have. Glass doors on showers and tubs open up the area. A pedestal sink takes up less room than a vanity. If you miss the storage, replace a mirror with a deep medicine cabinet.

3. Make Lighting a Priority

Multiple shower heads and radiant heat floors are fabulous adds to a bathroom remodel. But few items make a bathroom more satisfying than lighting designed for everyday grooming. You can install lighting for a fraction of the cost of pricier amenities.

Well-designed bathroom task lighting surrounds vanity mirrors and eliminates shadows on faces: You look better already. The scheme includes two ceiling- or soffit-mounted fixtures, and side fixtures or sconces distributed vertically across 24 inches (to account for people of various heights). Four-bulb lighting fixtures work well for side lighting.

Today, shopping for bulbs means paying attention to lumens, the amount of light you get from a bulb — i.e., brightness. For these bathroom task areas, the Lighting Research Center recommends:

  • Toilet: 45 lumens
  • Sink: 450 lumens
  • Vanity: 1,680 lumens

4. Clear the Air

Bathroom ventilation systems may be out of sight, but they shouldn’t be out of mind during a bathroom remodel.

Bathroom ventilation is essential for removing excess humidity that fogs mirrors, makes bathroom floors slippery, and contributes to the growth of mildew and mold. Controlling mold and humidity is especially important for maintaining healthy indoor air quality and protecting the value of your home — mold remediation is expensive, and excess humidity can damage cabinets and painted finishes.

A bathroom vent and water closet fan should exhaust air to the outside — not simply to the space between ceiling joists. Better models have whisper-quiet exhaust fans and humidity-controlled switches that activate when a sensor detects excess moisture in the air.

5. Think Storage

Bathroom storage is a challenge: By the time you’ve installed the toilet, shower, and sink, there’s often little space left to store towels, toilet paper, and hair and body products. Here are some ways to find storage in hidden places.

  • Think vertically: Upper wall space in a bathroom is often underused. Freestanding, multi-tiered shelf units designed to fit over toilet tanks turn unused wall area into found storage. Spaces between wall studs create attractive and useful niches for holding soaps and toiletries. Install shelves over towel bars to use blank wall space.
  • Think moveable: Inexpensive woven baskets set on the floor are stylish towel holders. A floor-stand coat rack holds wet towels, bath robes, and clothes.
  • Think utility: Adding a slide-out tray to vanity cabinet compartments provides full access to stored items and prevents lesser-used items from being lost or forgotten.

6. Contribute Sweat Equity

Shave labor costs by doing some work yourself. Tell your contractor which projects you’ll handle, so there are no misunderstandings later.

Some easy DIY projects:

  • Install window and baseboard trim; save $250.
  • Paint walls and trim, 200 sq.ft.; save $200.
  • Install toilet; save $150.
  • Install towel bars and shelves; save $20 each.

7. Choose Low-Cost Design for High Visual Impact

A “soft scheme” adds visual zest to your bathroom, but doesn’t create a one-of-a-kind look that might scare away future buyers.

Soft schemes employ neutral colors for permanent fixtures and surfaces, then add pizzazz with items that are easily changed, such as shower curtains, window treatments, towels, throw rugs, and wall colors. These relatively low-cost decorative touches provide tons of personality but are easy to redo whenever you want.

Read more: http://members.houselogic.com/articles/strategy-for-bathroom-remodeling/preview/#ixzz3CMM54GIe
“Visit HouseLogic.com for more articles like this. Reprinted from HouseLogic.com with permission of the NATIONAL ASSOCIATION OF REALTORS®.”

Fall Maintenance Checklist

fall

By: John Riha
Published: October 1, 2012

You’ll be ready for winter’s worst and head off expensive repairs when you complete this checklist of 10 essential fall maintenance tasks.

1. Stow the mower.

If you’re not familiar with fuel stabilizer, you should be. If your mower sits for months with gas in its tank, the gas will slowly deteriorate, which can damage internal engine parts. Fuel stabilizer ($10 for a 10-ounce bottle) prevents gas from degrading.

Add stabilizer to your gasoline can to keep spare gas in good condition over the winter, and top off your mower tank with stabilized gas before you put it away for the winter. Run the mower for five minutes to make sure the stabilizer reaches the carburetor.

Another lawn mower care method is to run your mower dry before stowing it.

1. When the mower is cool, remove the spark plug and pour a capful of engine oil into the spark plug hole.

2. Pull the starter cord a couple of times to distribute the oil, which keeps pistons lubricated and ensures an easy start come spring.

3. Turn the mower on its side and clean out accumulated grass and gunk from the mower deck.

2. Don’t be a drip.

Remove garden hoses from outdoor faucets. Leaving hoses attached can cause water to back up in the faucets and in the plumbing pipes just inside your exterior walls. If freezing temps hit, that water could freeze, expand, and crack the faucet or pipes. Make this an early fall priority so a sudden cold snap doesn’t sneak up and cause damage.

Turn off any shutoff valves on water supply lines that lead to exterior faucets. That way, you’ll guard against minor leaks that may let water enter the faucet.

While you’re at it, drain garden hoses and store them in a shed or garage.

3. Put your sprinkler system to sleep.

Time to drain your irrigation system. Even buried irrigation lines can freeze, leading to busted pipes and broken sprinkler heads.

1. Turn off the water to the system at the main valve.

2. Shut off the automatic controller.

3. Open drain valves to remove water from the system.

4. Remove any above-ground sprinkler heads and shake the water out of them, then replace.

If you don’t have drain valves, then hire an irrigation pro to blow out the systems pipes with compressed air. A pro is worth the $75 to $150 charge to make sure the job is done right, and to ensure you don’t have busted pipes and sprinkler head repairs to make in the spring.

4. Seal the deal.

Grab a couple of tubes of color-matched exterior caulk ($5 for a 12-ounce tube) and make a journey around your home’s exterior, sealing up cracks between trim and siding, around window and door frames, and where pipes and wires enter your house. Preventing moisture from getting inside your walls is one of the least expensive — and most important — of your fall maintenance jobs. You’ll also seal air leaks that waste energy.

Pick a nice day when temps are above 50 degrees so caulk flows easily.

5. De-gunk your gutters.

Clogged rain gutters can cause ice dams, which can lead to expensive repairs. After the leaves have fallen, clean your gutters to remove leaves, twigs, and gunk. Make sure gutters aren’t sagging and trapping water; tighten gutter hangers and downspout brackets. Replace any worn or damaged gutters and downspouts.

If you find colored grit from asphalt roof shingles in your gutters, beware. That sand-like grit helps protect shingles from the damaging ultraviolet rays of the sun. Look closely for other signs of roof damage (#5, below); it may be time for a roofing replacement.

Your downspouts should extend at least 5 feet away from your house to prevent foundation problems. If they don’t, add downspout extensions; $10 to $20 each.

6. Eyeball your roof.

If you have a steep roof or a multistory house, stay safe and use binoculars to inspect your roof from the ground.

Look for warning signs: Shingles that are buckled, cracked, or missing; rust spots on flashing. Any loose, damaged, or missing shingles should be replaced immediately.

Black algae stains are just cosmetic, but masses of moss and lichen could signal roofing that’s decayed underneath. Call in a pro roofer for a $50 to $100 eval.

A plumbing vent stack usually is flashed with a rubber collar — called a boot — that may crack or loosen over time. They’ll wear out before your roof does, so make sure they’re in good shape. A pro roofer will charge $75 to $150 to replace a boot, depending on how steep your roof is.

7. Direct your drainage.

Take a close look at the soil around your foundation and make sure it slopes away from your house at least 6 vertical inches over 10 feet. That way, you’ll keep water from soaking the soils around your foundation, which could lead to cracks and leaks.

Be sure soil doesn’t touch your siding.

8. Get your furnace in tune.

Schedule an appointment with a heating and cooling pro to get your heating system checked and tuned up for the coming heating season. You’ll pay $50 to $100 for a checkup.

An annual maintenance contract ensures you’re at the top of the list for checks and shaves 20% off the cost of a single visit.

Change your furnace filters, too. This is a job you should do every two months anyway, but if you haven’t, now’s the time. If your HVAC includes a built-in humidifier, make sure the contractor replaces that filter.

9. Prune plants.

Late fall is the best time to prune plants and trees — when the summer growth cycle is over. Your goal is to keep limbs and branches at least 3 feet from your house so moisture won’t drip onto roofing and siding, and to prevent damage to your house exterior during high winds.

For advice on pruning specific plants in your region, check with your state extension service.

10. Give your fireplace a once-over.

To make sure your fireplace is safe, grab a flashlight and look up inside your fireplace flue to make sure the damper opens and closes properly. Open the damper and look up into the flue to make sure it’s free of birds’ nests, branches and leaves, or other obstructions. You should see daylight at the top of the chimney.

Check the firebox for cracked or missing bricks and mortar. If you spot any damage, order a professional fireplace and chimney inspection. An inspection costs $79 to $500.

You fireplace flue should be cleaned of creosote buildup every other year. A professional chimney sweep will charge $150 to $250 for the service.

Read more: http://members.houselogic.com/articles/fall-checklist/preview/#ixzz3CMKbs9X1
“Visit HouseLogic.com for more articles like this. Reprinted from HouseLogic.com with permission of the NATIONAL ASSOCIATION OF REALTORS®.”

Fall Lawn Care: 4 Ways to Say G’Night For The Winter

grass

By: Lisa Kaplan Gordon
Published: September 16, 2011

Labor Day through Halloween is your window for preparing lawns for a lush spring.

Although spring lawn care gets all the attention, fall lawn care is the make-it or break-it season for grass.

“I’m already thinking about next year,” says John Dillon, who takes care of New York City’s Central Park, which features 200 acres of lawn in the middle of Manhattan. “The grass I grow this fall is what will be there next spring.”

Fall lawn care is no walk in the park. It’s hard work, and Dillon guides you through the four basic steps.

1. Aeration

Aeration gives your lawn a breather in autumn and provides room for new grass to spread without competition from spring weeds. Aeration tools pull up plugs of grass and soil, breaking up compacted turf. That allows water, oxygen, and nutrients to reach roots, and gives seeds room to sprout.

If kids frequently play on your lawn, plan to aerate twice a year — fall and spring. If your lawn is just for show, then aerate once a year — and maybe even once every other year.

A hand-aerating tool ($20), which looks like a pitchfork with hollow tines, is labor-intensive and meant for unplugging small sections of grass. Gas-powered aerating machines (rental, $20/hour) are about the size of a big lawn mower, and are good for working entire lawns. Bring some muscle when you pick up your rental: Aerating machines are heavy and can be hard to lift into your truck or SUV.

Depending on the size of your property, professional aeration costs about $150.

2. Seeding

Fall, when the soil temperature is about 55 degrees, is the best time to seed your lawn because turf roots grow vigorously in fall and winter. If you want a lush lawn, don’t cheap out on the seed.

Bags of inexpensive seed ($35 for 15 pounds) often contain hollow husks, weed seed, and annual rye grass seed, which grows until the first frost then drops dead. Splurge on the good stuff ($55 for 15 pounds of Kentucky Bluegrass seed), which resists drought, disease, and insects.

Water your new seed every day for 10 to 20 days until it germinates.

3. Fertilizing

A late fall fertilization — before the first frost — helps your grass survive a harsh winter and encourages it to grow green and lush in spring. Make your last fertilization of the year count by choosing a product high (10% to 15%) in phosphorous, which is critical for root growth, Dillon says.

Note: Some states are banning phosphorous-rich fertilizers, which are harmful to the watershed. In those places, look for nitrogen-rich fertilizers, which promote shoot and root growth. Check with your local extension service to see what regulations apply in your area.

4. Mulching

Instead of raking leaves, run over them a couple of times with your mower to grind them into mulch. The shredded leaves protect grass from winter wind and desiccation. An added bonus — shredded leaves decompose into yummy organic matter to feed grass roots.

A mulching blade ($10) that attaches to your mower will grind the leaves even finer.

Read more: http://members.houselogic.com/articles/fall-lawn-care-tips/preview/#ixzz3CMJOPmPs
“Visit HouseLogic.com for more articles like this. Reprinted from HouseLogic.com with permission of the NATIONAL ASSOCIATION OF REALTORS®.”

How to Keep Your Dog Out of Your Garden

dog garden

By: Lisa Kaplan Gordon
Published: August 9, 2012

Is your pooch pawing your petunias? Here’s how to keep your dog out of your garden and away from your precious plants.

We want our dogs to eat well, but we don’t want them snacking on our heirloom vegetables and prized perennials. Nor do we want them digging up the daffodils.

How can you keep dogs from wrecking your garden?

Spray nasty odors

Your vegetable garden is a salad bar for your dog. To keep him away, spray plants with pungent white vinegar or apple bitter. Or plant marigolds between vegetable rows, which repel dogs and other backyard pests, such as Mexican bean beetles, aphids, squash bugs, and whiteflies.

However, don’t apply rabbit or deer repellents that contain coyote urine. Dogs love the smell of urine and will either roll in your sprayed plants or leave an odor of their own.

Sprinkle yucky tastes

Sprinkle powdered mustard or red pepper flakes around your plants. A few sniffs and licks of these unpleasant tastes will discourage your dog from returning to the area.

Fence dogs in or out

If you’ve got small dogs, a 16-inch fence border ($29 for 6 ft.) will mark the perimeter of your garden and discourage them from trampling your seedlings. For large, spunky dogs, encase your vegetables in a chicken wire cage with a top enclosure, which fence out deer and rabbits, too.

Or, contain your dog in a fenced play area that’s roomy and filled with interesting toys and treats. However, if your dog likes burying things, don’t give him a bone; instead offer chews, such as rawhide or bully sticks, that’ll keep him occupied and his mind off burying.

Erect prickly barriers

Place pruned rose or holly branches around your garden or plants. The thorns and prickly leaves will discourage your dog from entering the restricted area.

Provide a pooch path

If your dog cruises through your garden but leaves the veggies alone, make him a path of his own. You can lay down mulch, or even place a spare piece of carpet along your pet’s favorite route. You may have to alter your garden design a bit, but that’s better than watching puppy crash through your flowers or zucchini.

Read more: http://members.houselogic.com/articles/how-to-keep-dogs-out-of-garden/preview/#ixzz3AOOSnA2E
“Visit HouseLogic.com for more articles like this. Reprinted from HouseLogic.com with permission of the NATIONAL ASSOCIATION OF REALTORS®.”

  • « Previous Page
  • 1
  • 2
  • 3
  • 4
  • 5
  • …
  • 7
  • Next Page »
Powered by NJ Interest Rates

Featured Properties

1102 Atlantic Ave, Longport, NJ 08403
IDX Image
$4,295,000
Beds: 5
Baths: 4 | 1
 
2700 Atlantic Ave Ave #501, Longport, NJ 08403
IDX Image
$1,500,000
Beds: 3
Baths: 2
 
111 S 16th Ave #316, Longport, NJ 08403
IDX Image
$799,000
Beds: 2
Baths: 2
 
View all

About Jerome & Angel DiPentino

Jerome & Angel DiPentinoFormer owners of Premier Properties Real Estate Inc., Jerome and Angel DiPentino, shaped their business into a “boutique real estate firm” in Longport, New Jersey as the community’s leading real estate agency in 1990.

Premier Properties has joined forces with Long & Foster Real Estate – the largest real estate company in the Mid-Atlantic region. Long & Foster provides a one stop shopping experience with real estate, mortgage, title and insurance. While our name has changed, The Premier Team still prides itself on providing that “boutique real estate feel” in Longport. Read More...

Copyright © 2023 · Longport New Jersey Homes and Real Estate for Sale · Long & Foster Real Estate Longport

Jerome DiPentino and Angel DiPentino | Broker/Sales Associates
Jerome Cell: 609-432-5588 | Angel Cell: 609-457-0777
Long & Foster Real Estate, Inc | 2401 Atlantic Avenue - Longport, NJ 08403 | Office: 609-822-3339
All information provided is deemed reliable but is not guaranteed and should be independently verified.
Equal Housing Opportunity