Premier Sells Team Longport NJLongport NJ Real Estate

Jerome and Angel DiPentino of Long & Foster Real Estate

  • Home
  • Search for Homes
  • Our Listings
  • Rentals
  • Area Solds
    • Longport Sold Homes
    • Margate Sold Homes
    • Ventnor Sold Homes
  • Our Sold Homes
  • The Premier Team
    • About Long & Foster Real Estate
  • Contact Us

How to Buy a Charcoal Grill

grill
With models priced from $35 to $1000 there are charcoal grills to fit the budget of anyone who’s a fan of traditional barbecue.

A charcoal grill can be as basic as a 55-gallon drum cut in half and turned on its side, or as extravagant as a $1,000 ceramic-lined cooker. When shopping for a charcoal grill, author and barbecue expert C. Clark “Smoky” Hale urges consumers to stop and ask themselves the following questions: What type of cooking do you intend to use it for? How often do you expect to grill? How many people will you be grilling for? How much do you want to spend?

Cost range: $35-$1,000 and up

Likely additional costs: assembly, cover, charcoal

Average life span: 3-16 years

Sub-$50 range

In the case of charcoal grills, “small doesn’t have to mean cheap,” explains Hale, author of “Great American Barbecue & Grilling Manual.” Whereas many gas grills priced south of $50 aren’t worth the money, the same isn’t necessarily true when applied to charcoal.

Weber, the king of the kettle, sells a solid and wholly functional grill for around $35. Of course, that unit rests on the ground and measures just over a foot in diameter, making it useful only for the smallest of gatherings. Larger grills in this price range tend to be constructed of thin painted steel and positioned atop wobbly aluminum legs.

$50-$100 range

A homeowner looking to satisfy the needs of an average-size family should plan on spending at least $60 for a roomy but basic grill. Models in this category are of the 19- to 22-inch kettle variety, which is large enough to handle over a dozen burgers or chicken breasts.

Despite the increased girth, these grills restrict all but the most rudimentary cooking methods due to shallow lids that can’t accommodate whole chickens, turkeys, or other roasts. Because charcoal (and especially hardwood lump) burns hotter than gas, the thinner steel grates found on these grills often warp and need replacing at a cost of $15 to $45.

$100-$200 range

This price range includes 22- and 26-inch name brand kettles. But the roomiest charcoal grills in this category are not round, they are rectangular barrel-style units that mimic a dissected 55-gallon drum.

These solidly constructed rigs, which start at around $130, boast a cooking area two to three times the size of comparably priced kettles. The 1,000-square-inch grate surface makes it easy not only to cook for a crowd, but also to do indirect cooking for slower, longer roasts.

Though billed as smokers too, these models typically lack the airflow control needed for the serious, long-temperature cooking associated with traditional smoked barbecue, warns Hale.

$200-$300 range

The additional dollars spent for charcoal grills in this category often buy convenience rather than increased capacity or improved construction. Kettle-style grills come mounted in a portable cart with storage for charcoal and a small work area. Some feature propane ignition systems for effortless charcoal starting sans lighter fluid.

Hinged cooking grates make it easy to add or rearrange charcoal without having to remove the food. And many facilitate the ash-disposal process thanks to removable catch basins. For frequent grillers, these conveniences are worth the costs.

Ceramic cookers

“The Big Green Egg folks are like Apple computer people,” says Hale, referring to a prominent brand of ceramic charcoal cooker. “They are very passionate.”

Owing to their thick-walled ceramic construction, these trendy grills are unmatched at retaining heat for long periods of time. Precision dampers make it easy (with practice) to accurately control temps, making the units effective for everything from high-heat searing to roasting to low-and-slow smoking. Homeowners, however, must be prepared to shell out $700 and up for a grill with a cook surface equal to a $70 kettle.

Smokers

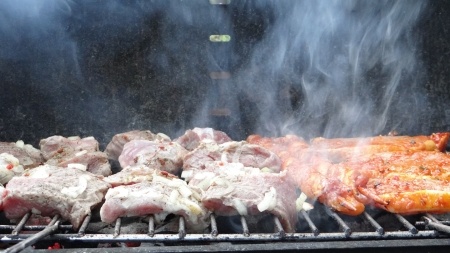
Most charcoal grills can be configured to accept wood chunks or chips, allowing the cook to impart a pleasant smoke flavor to cooking foods. But in order to truly excel at barbecue, says Hale, a grill must contain a system of tight-fitting dampers and vents that make it possible to accurately regulate cooking temperatures.

Offset smokers look like barrel-style grills with the addition of a side-mounted firebox. Heat and smoke travel from the firebox, through the main cooking chamber, and finally out the exhaust. Because the heat source is not directly underneath the food (indirect cooking), it is easier to maintain the lower temps needed for smoking. These units start around $250.

Water smokers, of which the Weber Smokey Mountain (aka the Bullet) is the most popular model, look like elongated kettle grills. Situated between the charcoal bowl at the bottom and the cooking chamber above is a shallow pan of liquid that acts like a heat sink, regulating temps. Well-made and backed by Weber’s 10-year warranty, these smokers sell for around $300.

Suggested extras: Wood ash combines with rain water to make lye, a corrosive and caustic substance. For that reason alone, a tight-fitting grill cover is a necessity. Prices range from $20 to $70. Chimney starters ($15) make fast work of igniting charcoal briquettes without the need for lighter fluid. Folks serious about barbecuing, says Hale, should purchase a quality grill thermometer for $10.

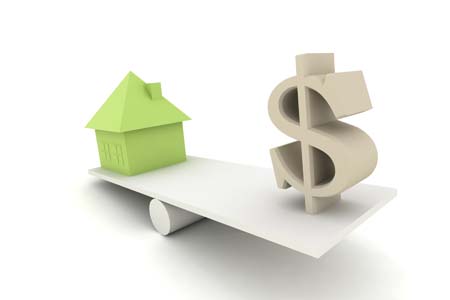
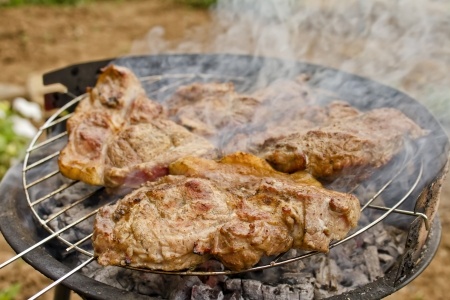
Cost of operation: There is no denying that charcoal grilling is more expensive than gas grilling. A typical charcoal cookout will cost about $3.50 in fuel, while the same session on a propane grill will run about $0.60, and even less if hooked up to a natural gas line. Nevertheless, charcoal grill aficionados swear by the superior taste of foods prepared with charcoal.

By: Douglas Trattner
Published: April 26, 2010

Read more: http://members.houselogic.com/articles/outdoor-appliance-guide-charcoal-grills-and-smokers/preview/#ixzz312h8cd8B
“Visit HouseLogic.com for more articles like this. Reprinted from HouseLogic.com with permission of the NATIONAL ASSOCIATION OF REALTORS®.”

Perennial Flowers: A Little Care Says ‘Encore! Encore!’ Each Year

perennials

Don’t take your old garden friends — perennial flowers — for granted. A little routine love keeps these stunners growing for bloomin’ ever. ROI, anyone?

You don’t need a calendar if you grow perennial flowers, which return each year like clockwork. But home owners often take these Old Faithfuls for granted. We don’t divide, deadhead, or cut back like we should. Before we know it, our lush hydrangeas are barren, and our salvia has run amuck.

Luckily, perennial flowers are a forgiving bunch; and with a little love, will keep on blooming — a nice ROI. Here’s how to care for your perennials and protect your landscape year after year.

Chose varieties, location wisely

Growing perennial flowers is all about planting the right flower in the right spot. In other words: Know thy garden, and read thy plant label.

“I’ve had couples in here fighting about whether a spot is sunny or shady,” says Alison Caldwell, buyer for Hicks Nurseries on Long Island, N.Y. “You really must know your site — sunny, shady, clay soil, or sandy — and then pick the appropriate plant.”

Grow labels tells you everything a plant loves — partial shade or full sun, a lot of water or a little drought.

“Succulents favor droughts, so don’t plant them next to a sprinkler head,” Caldwell says. “And hostas don’t want to be in full sun — their leaves burn.”

Some hardy perennial flowers that grow from coast to coast, Florida to Maine, include:

  • Ornamental grasses
  • Hostas
  • Daylilies
  • Iris
  • Mums
  • Salvia
  • Yarrow

Most perennial flowers appreciate well-drained soil; so, if necessary, amend your compacted or clay soil with leavening organic matter like compost, peat moss, and manure. This will create tiny pockets that contain air, water, and nutrients — the building blocks of healthy plants.

Warning: Never try to break up clay soil with sand alone. Sand + clay + water = cement.

Mulch miracles

Mulching perennials gives them a fighting chance of surviving climate swings — frigid winters, blistering summers. After planting, mound up to 4 inches of mulch around the plant base. This insulation will keep soil temperature and moisture levels relatively constant, and protect plants from surprises — plants don’t like surprises — like record-warm winters and summer heat waves.

Divide and nurture in spring

Perennial flowers return each year bigger and better … until they don’t. Overcrowding could be the culprit, and dividing the plant is the answer.

You know it’s time to divide when blooms are fewer and smaller, and when the plant’s center is open or dead.

“When it comes to dividing, every plant is a little different,” says Lance Walheim, author of Roses for Dummies and an expert at Bayer Advanced Garden, which makes lawn and pest products.

You can break daylilies apart with your hand, but you’ll have to divide salvia’s hard root ball with a shovel or other sharp landscape tools.

Plant and fertilize divisions in bare spots around your yard. Or have a perennial swap with neighbors — your daylilies for their hostas.

If you decide not to divide, stake drooping stalks to protect against disease.

Deadhead in summer; cut back in fall

After blooms are spent, lop off their heads to direct energy to a second bloom, rather than a seed head. When the growing season is finished, and you’re cleaning up your garden for winter, cut off dead stalks and foliage. This will help plants get a good rest and return healthier and happier in spring.

By: Lisa Kaplan Gordon
Published: February 10, 2012

Read more: http://members.houselogic.com/articles/perennial-flowers/preview/#ixzz312dH9bgl
“Visit HouseLogic.com for more articles like this. Reprinted from HouseLogic.com with permission of the NATIONAL ASSOCIATION OF REALTORS®.”

Guide to Buying and Installing a Sprinkler System

sprinkler

An irrigation system saves water, keeps your lawn looking great, and helps maintain your curb appeal. We’ve gathered the info to get you started.

An underground irrigation system delivers water to your landscaping at the right time, and in just the right amount, so you don’t water too much or too little. It’s relatively easy to install and makes a good DIY project.

You’ll also save money doing it yourself. A professionally installed system for a typical ¼-acre lot is $3,000 to $4,000. You can DIY it for under $1,500.

The heart of an underground system is pop-up sprinkler heads. When working, the heads raise up a few inches to spray water on your landscape. When not in use, they drop to ground level so you can mow or walk right over them.

Plus, today’s systems are pretty darn smart. Automated features decide when it’s been raining too much or too little, then adjust the amount of water your landscaping gets. That lowers the worry quotient for you, heads off costly over-watering, and makes the whole system almost maintenance-free.

Getting in the Zone

An irrigation system divides your property into zones. Each zone can be different in terms of the amount of water it gets, and at what time of day it’s watered. Examples of zones include:

  • Lawn zones have pop-up heads with just the right spray radius and range to cover a broad area of grass.
  • Landscaping zones have high-rise heads to water shrubs and ground cover.
  • Flower and vegetable zones may be equipped with bubblers and tiny spray heads that gently water plants without bruising edibles or knocking petals off blooms.

Everything functions on an automatic timer that controls water flow throughout the system. You can elect to include sensors that monitor rain and humidity — self-adjusting timers that prevent unnecessary watering.

Start with a Plan

Your irrigation journey starts with a plan that maps out:

  • Your yard, house location, and major landscaping features, such as trees.
  • Your irrigation zones.
  • The location of sprinkler heads and bubblers.
  • The location of underground water supply lines.
  • The location of a water-supply shutoff valve.
  • Any automatic sensors.

But planning is a challenge for first-timers. Manufacturers recognize this hurdle and go out of their way to provide planning help. After you give them some info on the size of your lot and your water supply system, they give you an irrigation plan tailored to your property.

You’d be crazy not to take advantage of their services. For one, they’re free. Second, they’re very thorough: downloadable guides and step-by-step videos take you through every part of creating a home irrigation system.

For example, Rainbird and Toro offer planning guides that show you how to make a scale drawing of your property, and how to easily gather information on your water pressure and water flow rate that’ll help determine the design of your system.

When you mail in the drawing and info, the manufacturer returns a custom plan with a materials list and detailed installation instructions, all designed specifically for your property. Replies take several weeks. For a small fee ($20-$30), you can have your plans arrive in a few days.

Orbit shows you how to use Google Maps to make a scaled plan of your lot without ever stepping outdoors. Plans are available instantly.

Get Ready to Dig

Your next job is trenching — digging channels in your yard for the water supply lines and sprinkler heads. With plan in hand, mark out the locations of the irrigation lines using string lines, powdered chalk, or lawn marking paint — it comes in a spray can specially designed to be used upside down ($5).

At this point comes a heads-up about your local building codes. You’ll need to ask a couple of questions of your local building and planning commission:

  • Do I need a permit?
  • Is a licensed plumber required to connect my irrigation system to my home’s water system?
  • How deep should the trenches be? (Most building codes require you to dig down 18 inches to protect the water lines from freezing — in colder climates the required depth is more.)

Unless you relish the idea of hand-digging several hundred feet of trench, rent a gas-powered trenching tool for $100–$160 per day. This walk-behind tool makes short work of deep, narrow trenches.

Very important! To prevent injury, be sure to have all utilities marked before you begin digging. Call your local utilities or dial 811.

Installing the System

With excavation complete, you’re ready to buy all the stuff you need. You’ll build your system from plastic pipe, either rigid or flexible PVC. Both are good choices and use the same methods of assembly.

  • Rigid PVC pipe is inexpensive — ¾-inch diameter pipe is about 25 cents per lineal foot.
  • Flex PVC costs more at about $1 per lineal foot of ¾-inch-diameter pipe, but it installs faster, there are fewer connections, and it’s more forgiving of trenches that aren’t perfectly straight.

There are lots of other components, including sprinkler heads and bubblers, and each type has different ranges and arcs — the size and shape of their spray. That’s another reason to check out the manufacturer’s guides — they’ll give you a complete materials list.

Unless you’re an accomplished DIY electrician and plumber, you’ll probably need a bit more professional help:

  • An electrician to extend a circuit to the automatic timer; figure 2-3 hours at $90-$110 per hour.
  • A plumber to tap into your household water system. Budget another $200-$300.

Ready to Call In the Pros?

If the DIY approach is more than you want to tackle, or your lot is larger than a third of an acre (14,500 sq. ft.), consider hiring a pro. Expect to pay $3,000-$4,000 to have an underground irrigation system installed on a ¼-acre lot.

Aside from saving you a lot of work, a pro is going to get the job done quickly and with minimal disruption. He’ll also come with knowledge of what design best suits local conditions.

By: Dave Toht
Published: April 10, 2013

Read more: http://members.houselogic.com/articles/irrigation-installation-cost/preview/#ixzz312Uuu2Zc

“Visit HouseLogic.com for more articles like this. Reprinted from HouseLogic.com with permission of the NATIONAL ASSOCIATION OF REALTORS®.”

Grilling Safety

grilling

Nothing spoils an outdoor barbecue more than burning the house down. Here are 6 tips to stay safe when grilling this summer.

Don’t think you’re at risk? Over the last five years, fire departments have responded to an average of 8,200 house fires per year involving grills, hibachis, and barbecues. Most of these fires took place during June and July, the peak grilling months.

Tip 1: Barbecue only outside

Firing it up in your home, trailer, tent, or any partially enclosed area is dangerous. If the carbon monoxide doesn’t kill you, your neighbors might, especially if you set off your building’s sprinkler system by grilling on your covered balcony.

Tip 2: Grills heat up to 650 degrees or higher

Always place your grill or hibachi on a non-flammable surface. For additional protection, place a heat-resistant pad or splatter mat beneath the cooker. And FYI, plastic has an average melting point of 150 degrees.

Tip 3: Protect your home and family

According to the Consumer Product Safety Commission, you should barbecue at least 10 feet away from your house or any structure. Children and pets should stay at least 3 feet away from the grilling area.

Tip 4: Lighter fluid can be dangerous

Before starting a fire, soak coals with an accelerant made for charcoal. Never use lighter fluid on hot briquettes. Doing so causes the fluid to vaporize and become explosive. The result could be a charbroiled yard and home.

Tip 5: Proper grilling attire

Don’t wear loose or baggy clothing while flipping burgers. This includes aprons, especially when your back is turned.

Tip 6: Utensils are not toys

Of course you want to keep your guests entertained at your next barbecue, but remember, playing with sharp utensils can be dangerous. You could poke an eye out or skewer a feathered friend.

Bonus tip: Hints at Heloise says there’s a new danger hidden away in your grill: bristles from wire cleaning brushes. If accidentally consumed, they could cause abdominal pain and more. Make sure that after you clean your grill with a wire brush, rinse the grill and wipe it with a paper towel to make sure no pesky wires are left.

For additional grilling safety tips, visit the following websites:

The National Fire Protection Agency

Hearth, Patio, and Barbecue Association

The Consumer Protection Agency

By: Deirdre Sullivan
Published: June 29, 2012

Read more: http://members.houselogic.com/articles/grilling-safety/preview/#ixzz312SNZw1a

“Visit HouseLogic.com for more articles like this. Reprinted from HouseLogic.com with permission of the NATIONAL ASSOCIATION OF REALTORS®.”

9 Reasons You Should Try Square Foot Gardening

gardening

Want to grow 100% of veggies in 20% of space? That’s just one reason to try square foot gardening, an easy and efficient way to grow your own produce.

In a nutshell, the square foot gardening method involves:

  • Dividing a 4-by-4-foot box into 16 squares; one type of crop in each square
  • Laying a permanent grid of 1-foot squares over the box to guide planting
  • Filling the box with a special, fresh soil mixture
  • Replanting each square after harvesting

The method was invented in 1981 by Mel Bartholomew, a retired civil engineer and efficiency expert who trained his time-is-money eye on traditional, single-row gardening.

“Traditional gardening was a lot of work and weeds,” Bartholomew says. “And when I asked, ‘Why are we doing it this way?’ I was told, ‘Because we’ve always done it that way.’”

Wrong answer for an efficiency guy. So Bartholomew analyzed everything he hated about gardening — weeding, watering, and long walks to large garden plots — and came up with a method that eliminates vegetable garden minuses and accentuates the positives — lots of organically grown vegetables in a fraction of the space and time.

Bartholomew’s book, Square Foot Gardening, inspired millions of small-space gardening acolytes and led to a foundation to feed the world, one square foot at a time.

Why should you square foot garden?

Bartholomew, 81, recently walked HouseLogic through the 9 reasons you should switch to square foot gardening.

1. Saves space: Square foot gardening boxes grow 100% of veggies grown the traditional way in only 20% of the space.

2. Saves water: Instead of shocking young plants with icy hose water, you water square foot garden plants with ladles of sun-warmed water from buckets or rain barrels. In the end, you use about 10% of the water you’d spray on a traditional garden.

3. Saves money on gardening tools: Since you never walk upon and pack down square foot gardening soil, you don’t need hoes, spades, or rakes to break it up. All you need is a hand trowel to mix the soil and a pair of scissors to cut greens.

4. No walking: You can place square foot gardening boxes anywhere there’s sun — outside your back door, on patios, and on decks. The closer the boxes are to your kitchen, the more you’ll tend and harvest produce.

5. No bending and reaching: Square foot gardening boxes typically are 4-by-4-foot square because Bartholomew figured adults can comfortably reach 2 feet. Gardeners can walk around their boxes, tending veggies without ever overreaching. If bending is a problem, build boxes on legs or rest them on a card table.

6. No weeding: Most weeds come from seeds or spores buried in soil. Square foot gardening soil, however, uses a 6-inch-deep mixture of 1/3 peat moss, 1/3 coarse vermiculite, and 1/3 blended compost made with at least five different sources — leaves, manure, food scraps, coffee grinds, and eggshells. If a wayward seed does blow into a planting box, you can easily pluck it from loose soil.

7. Uses fewer seeds: Traditional gardeners sprinkle seeds around, and then thin seedlings. Square foot gardeners plant seeds and seedlings according to a precise plant-spacing formula: 1 tomato seedling per sq. ft, 16 onions, 8 peas, 4 celery, and so on. The formula eliminates guesswork and stretches a pack of seeds much further.

8. Raises little gardeners: Kids love to play in dirt and watch things grow. Square foot gardening lets them do both, without the tedious chore of weeding. As a bonus, kids are more likely to eat vegetables they’ve grown themselves.

9. Raises rolling crops: After you harvest 1 square foot of veggies, throw in a handful of compost and plant a different crop in the bare square. That way, you’ll have a steady supply of greens throughout fall or until the first frost, whichever comes first.

By: Lisa Kaplan Gordon
Published: May 14, 2012
Read more: http://members.houselogic.com/articles/square-foot-gardening/preview/#ixzz2xk4Y03fc

“Visit HouseLogic.com for more articles like this. Reprinted from HouseLogic.com with permission of the NATIONAL ASSOCIATION OF REALTORS®.”

March 2014 Local Market Update

The closed home sales information is out for Brigantine, Longport, Margate and Ventnor. Below are the properties that have closed in the month of March. If you have any additional questions about the properties listed below or any home in the area, please don’t hesitate to contact us!


Brigantine NJ Sold Homes – 1st Quarter 2014

Address Style BR BA Sold Price Days on Market Closed Date
319 21st St Single Family 3 2 $460,500 1 3/1/2014
3 Delmar Ln Single Family 3 2.1 $400,000 79 3/4/2014
16 Hutchinson Pl Single Family 3 2 $250,000 39 3/6/2014
30 Vardon Rd Single Family 4 2.1 $220,000 126 3/7/2014
208 38th St Single Family 2 1 $175,000 205 3/14/2014
14 Kirkwood Cir Single Family 3 1.1 $230,000 529 3/14/2014
1 Ocean Dr E Single Family 3 2 $325,000 19 3/14/2014
1900 Revere Blvd Single Family 3 2 $350,000 8 3/14/2014
4508 Harbor Beach Blvd Single Family 5 4 $530,000 345 3/19/2014
218 S 8th St Single Family 3 2 $385,000 91 3/20/2014
302 Gull Cove Single Family 2 2.1 $249,000 279 3/21/2014
106A N 8th St Condo 3 1.1 $320,000 35 3/21/2014
600 W Brigantine Ave Condo 2 2.1 $330,000 19 3/21/2014
229 27th St Single Family 4 2.1 $652,500 26 3/21/2014
4901 Harbor Beach Blvd Condo 1 1 $68,000 15 3/25/2014
428 Lafayette Single Family 3 1 $109,000 107 3/26/2014
330 S 42nd St Condo 1 1 $136,000 47 3/26/2014
160 39th St Single Family 2 2 $160,000 106 3/26/2014
323 S 44th St Condo 2 2.1 $235,000 43 3/26/2014
4200 W Brigantine Ave Condo 2 2 $265,000 17 3/28/2014
3701 Ocean Ave Duplex $550,000 111 3/31/2014


Longport NJ Sold Homes – 1st Quarter 2014

Address Style BR BA Sold Price Days on Market Closed Date
216 N 33rd Single Family 4 3 $587,500 39 3/6/2014
2 S Manor Ave Single Family 3 1 $615,000 37 3/17/2014
111 S 16th Ave Condo 3 2 $787,500 167 3/19/2014
111 S 16th Ave Condo 2 2 $475,000 57 3/21/2014


Margate NJ Sold Homes – 1st Quarter 2014

Address Style BR BA Sold Price Days on Market Closed Date
9510 Amherst Ave Condo 1 1 $160,000 1 3/5/2014
310 N Mansfield Ave Single Family 4 4 $701,500 120 3/5/2014
7803 Bayshore Dr Single Family 5 5.1 $1,900,000 138 3/10/2014
9510 Amherst Ave Condo 1 1 $136,500 177 3/14/2014
9405 Atlantic Ave Single Family 3 2 $465,000 151 3/14/2014
304 N Douglas Ave Single Family 5 3 $515,000 16 3/14/2014
3 Circle Dr Single Family 4 2.1 $790,000 123 3/14/2014
115 N Douglas Ave Single Family 4 3.1 $699,000 337 3/18/2014
302 N Thurlow Ave Single Family 4 2 $340,000 190 3/19/2014
9711 Atlantic Ave Condo 0 1 $100,000 182 3/21/2014
405 N Thurlow Ave Single Family 5 5.1 $1,650,000 3 3/24/2014
21 S Monroe Ave Condo 2 2 $195,000 76 3/26/2014
8505 Fremont Ave Single Family 4 2 $475,000 105 3/28/2014
9100 Beach Condo 2 2 $487,500 121 3/31/2014


Ventnor NJ Sold Homes – 1st Quarter 2014

Address Style BR BA Sold Price Days on Market Closed Date
108 S Sacramento Single Family 5 3.1 $950,000 121 3/1/2014
810 N Cornwall Ave Single Family 3 2 $243,000 9 3/7/2014
102 S Cornwall Ave Single Family 8 4.2 $1,375,000 344 3/10/2014
705 N Dorset Ave, Unit A-12 Condo 2 1 $56,000 37 3/11/2014
236 N Derby Ave Condo 1 1.1 $95,000 171 3/13/2014
4800 Boardwalk Ave Condo 1 1 $175,000 119 3/21/2014
311 N Fredricksburg Ave Single Family 3 2 $240,000 24 3/27/2014
705 N Dudley Ave, Unit D8 Condo 2 1 $40,000 14 3/28/2014
5000 Boardwalk Condo 2 2 $266,000 439 3/28/2014
114 N Buffalo Ave Single Family 3 2 $345,000 38 3/28/2014
6100 Boadwalk Condo 1 1 $188,250 323 3/31/2014
20 N Newark Ave Duplex $225,000 37 3/31/2014
317 N Derby Ave Single Family 3 2 $201,000 409 3/31/2014

6 Home Deduction Traps and How to Avoid Them

tax tips

Get an “A” on your Schedule A form: Dodge these tax deduction pitfalls to save time, money, and an IRS investigation.

Trap #1: Line 6 – Real estate taxes

Your monthly mortgage payment often includes money for a tax escrow, from which the lender pays your local real estate taxes.

The money you send the bank may be more than what the bank pays for your taxes, says Julian Block, a tax attorney and author of Julian Block’s Home Seller’s Guide to Tax Savings. That will lead you to putting the wrong number on Schedule A.

Example:

  • Your monthly payment to the lender: $2,000 for mortgage + $500 escrow for taxes
  • Your annual property tax bill: $5,500

Now do the math:

  • Your bank received $6,000 for real estate taxes, but only paid $5,500. It may keep the extra $500 to apply to the next tax bill or refund it to you at some point, but meanwhile, you’re making a mistake if you enter $6,000 on Schedule A.
  • Instead, take the number from Form 1098—which your bank sends you each year—that shows the actual taxes paid.

Trap #2: Line 6 – Tax calculations for recent buyers and sellers

If you bought or sold a home in the middle of the year, figuring out what to put on line 6 of your Schedule A Form is tricky.

Don’t simply enter the number from your property tax bill on line 6 as you would if you owned the house the whole year. If you bought or sold a house in midyear, you should instead use the property tax amount listed on your HUD-1 closing statement, says Phil Marti, a retired IRS official.

Here’s why: Generally, depending on the local tax cycle, either the seller gives the buyer money to pay the taxes when they come due or, if the seller has already paid taxes, the buyer reimburses the seller at closing. Those taxes are deductible that year, but won’t be reflected on your property tax bill.

Trap #3: Line 10 – Properly deducting points

You can deduct points paid on a refinance, but not all at once, says David Sands, a CPA with Buchbinder Tunick & Co LLP. Rather, you deduct them over the life of your loan. So if you paid $1,000 in points for a 10-year refinance, you’re entitled to deduct only $100 per year on your Schedule A Form.

Trap #4: Line 10 – HELOC limits

If you took out a home equity line of credit (HELOC), you can generally deduct the interest on it only up to $100,000 of debt each year, says Matthew Lender, a CPA with EisnerLubin LLP.

For example, if you have a HELOC for $200,000, the bank will send you Form 1098 for interest paid on $200,000. But you can deduct only the interest paid on $100,000. If you just pull the number off Form 1098, you’ll deduct more than you’re entitled to.

Trap #5: Line 13 – Private mortgage insurance

You can deduct PMI on your Schedule A Form, as long as you started paying the insurance after Dec. 31, 2006. Congress renewed the PMI deduction for 2012 and 2013 for people making less than $110,000.

Since you’re thinking about it, this is also a good time to review your PMI: You might be able to cancel your PMI altogether because your home value has risen and the amount your owe on your mortgage has gone down.

Trap #6: Line 20 – Casualty and theft losses

You can deduct part or all of losses caused by theft, vandalism, fire, or similar causes, as well as corrosive drywall, but the process isn’t always obvious or simple:

  • Only deduct losses that are greater than 10% of your adjusted gross income and exceed $100 (line 38 of Form 1040).
  • Fill out Form 4684, which involves complex calculations for the cost basis and fair market value. This form gives you the number you need for line 20.

Bottom line on line 20: If you’ve got extensive losses, it’s best to consult a tax pro. “I wouldn’t do it myself, and I’ve been dealing with taxes for 40 years,” says former IRS official Marti.

By: Barbara Eisner Bayer
Published: January 30, 2014

This article provides general information about tax laws and consequences, but shouldn’t be relied upon as tax or legal advice applicable to particular transactions or circumstances. Consult a tax professional for such advice.

Read more: http://members.houselogic.com/articles/schedule-form-6-home-deduction-traps/preview/#ixzz2xk2LDVb4

“Visit HouseLogic.com for more articles like this. Reprinted from HouseLogic.com with permission of the NATIONAL ASSOCIATION OF REALTORS®.”

Season-by-Season Lawn Maintenance Calendar

spring lawn

By: Douglas Trattner
Published: April 8, 2013

Follow our season-by-season lawn maintenance calendar to get a barefoot-worthy lawn and ensure great curb appeal.

Sharpen mower blades to ensure clean cuts. A dull blade tears the grass, leaving jagged edges that discolor the lawn and invite pathogens.

Sharpen mower blades once each month during grass-cutting season. Have a backup blade (about $20) so that a sharp one is always on hand.

Tune up your mower with a new sparkplug ($3-$5) and air filter ($5-$10). Your mower might not need a new sparkplug every season, but changing it is a simple job, and doing it every year ensures you won’t forget the last time you replaced your sparkplug.

Buy fresh gas. Gas that’s been left to sit over the winter can accumulate moisture that harms small engines. This is especially true for fuel containing ethanol, so use regular grades of gasoline.

If you need to dump old gasoline, ask your city or county for local disposal sites that take old fuel.

Clean up your lawn. Time to get out the leaf rakes and remove any twigs and leaves that have accumulated over the winter. A thick layer of wet leaves can smother a lawn if not immediately removed in early spring. Cleaning up old debris clears the way for applying fertilizer and herbicides.

Spring

Depending on your weather, your grass will now start growing in earnest, so be ready for the first cutting. Don’t mow when the grass is wet — you could spread diseases, and wet clippings clog up lawn mowers.

Fertilizing: Both spring and fall are good times to fertilize your lawn. In the northern third of the country, where winters are cold, fertilize in fall — cool weather grasses go dormant over winter and store energy in their roots for use in the spring.

For the rest of the country, apply fertilizer just as your grass begins its most active growth. For best results, closely follow the application directions on the product. You’ll spend about $50 to $75 per application for an average ¼-acre lot.

Aeration: Aerating punches small holes in your lawn so water, fertilizers, and oxygen reach grass roots. Pick a day when the soil is damp but not soaked so the aeration machine can work efficiently.

Related: More about lawn aeration

Pre-emergent herbicides: Now is the time to apply a pre-emergent herbicide to prevent crabgrass and other weeds from taking root in your lawn. A soil thermometer is a handy helper; you can pick one up for $10-$20. When you soil temperature reaches 58 degrees — the temperature at which crabgrass begins to germinate — it’s time to apply the herbicide.

Early Summer

Watch out for grubs: Warm weather means that grub worms, the larvae stage of June, Japanese, and other beetles, start feeding on the tender root systems of lawns. Affected lawns show browning and wilting patches.

To be certain that the culprits are grubs, pull back the sod and look for white, C-shaped grubs. If you see more than 10 per square foot, your lawn should be treated with a chemical pesticide.

Milky spore is an environmentally friendly way to control some species of grubs. When using insecticides, read and follow all label directions, and water the product into the soil immediately. Cost is around $50 to $75 per application.

Grass-cutting tip: Your grass is starting to grow fast, and you might even be cutting more than once a week to keep up. To keep grass healthy, mow often enough so you’re removing no more than 1/3 of the grass blade.

Pesky weeds: Weeds that have escaped an herbicide application should be removed with a garden fork. Use a post-emergent herbicide only if you think the situation is getting out of hand.

Check out our guide to some common types of weeds and tips on how to get rid of them.

Summer

Here’s a good mantra to guide you through the heart of grass-mowing season: The taller the grass, the deeper the roots, the fewer the weeds, and the more moisture the soil holds between watering.

With that in mind, here’s how to ensure a healthy, green lawn:

  • Set your mower blade height to 3 inches.
  • Deep and infrequent watering is better for lawns than frequent sprinkles, which promote shallow root growth. In general, lawns need about 1 inch of water per week to maintain green color and active growth.

Lawns that receive less than that will likely go dormant. That’s okay, the grass is still alive, but dormant lawns should still receive at least 1 inch of water per month. Your grass will green up again when the weather brings regular rains.

  • To check the output of a sprinkler, scatter some pie tins around the yard to see how much water collects in a specific length of time. Having a rain gauge ($5 to $20) will help you keep track of how much water the lawn receives naturally.
  • At least once each month, clean underneath your mower to prevent spreading lawn diseases.
  • Although it’s OK to leave grass clippings on the lawn where they can decompose and nourish the soil, large clumps of clippings should be removed. Regularly rake up any leaves, twigs, and debris.

If your grass seems to be stressed out, check out our advice on what to do if your lawn is turning brown.

Early Fall

The best time to patch bare or thin spots is when the hot, dry days of summer have given way to cooler temps. Follow these simple steps:

1. Remove any dead grass.

2. Break up the soil with a garden trowel.

3. Add an inch of compost and work it into the soil.

4. Add grass seed that’s designed for shade or full sun, depending on the area you’re working on. Spread the seed evenly across the bare patch.

5. Use a hard-tooth rake to work the seed into the soil to a depth of about half an inch.

6. Sprinkle grass clippings over the patch to help prevent the soil from drying out.

7. Water the area; you’ll want to keep the patch moist, so lightly water once a day until the seed germinates and the new grass gets about one inch tall.

Fall

Your main job in fall is to keep your lawn free of leaves and other debris. You can use a mulching mower to break up leaves and add the organic matter to your soil, but be sure to clean up any clumps so they don’t kill the grass.

In the northern one-third of the country, now is the time to fertilize your lawn. Your grass will store the nutrients in its roots as it goes dormant over the winter, and your lawn will be ready for a jump start when spring warms the ground.

This is also the time to clean up your garden.

“Visit HouseLogic.com for more articles like this. Reprinted from HouseLogic.com with permission of the NATIONAL ASSOCIATION OF REALTORS®.”

Read This Before Landscaping This Spring; Your Pets Will Thank You

lawn

By: Lisa Kaplan Gordon
Published: March 26, 2012

When you get rid of weeds this spring, make sure you don’t get rid of Rover as well. Here are tips on keeping pets safe while you’re cleaning up your yard.

When you spruce up your yard for spring, remember that landscaping aids that make your plants healthy can make your pets real sick.

In a Dailycamera.com post, veterinarian Jennifer Bolser says the following landscaping staples can harm your pets:

  • Cocoa mulch: Contains theobromine, the chemical in chocolate that poisons dogs.
  • Fertilizers and herbicides: Can irritate pet skin, pads, tongues, and gums.
  • Compost: Ingesting coffee grinds and onions in compost piles can make pets ill.
  • Metal lawn edging: Can cut pets who walk on it.

To keep your plants and pets healthy, store chemicals in pet-proof containers, enclose compost piles in bins and drums, and choose plastic or rubber edging.

What do you do to keep your pets safe?

“Visit HouseLogic.com for more articles like this. Reprinted from HouseLogic.com with permission of the NATIONAL ASSOCIATION OF REALTORS®.”

Spring Cleaning List

broom

By: Lara Edge
Published: April 20, 2012

Don’t you just love that feeling you get when you check items off a list? Get that adrenaline going with our spring cleaning list.

Before you begin: Turn up the tunes with our Spotify spring cleaning playlist. Now you’re ready to tackle your spring cleaning list:

Walls: Dust your walls with your vacuum brush attachment, then clean using an all-purpose cleaner and rinse. Repair your walls by patching holes and dings and touching up paint.

TIP: Don’t use a spray cleaner, which will only leave streaks on your walls. Soak a cloth in cleaner, then wipe. To rinse, follow up with a clean cloth soaked in plain water.

Baseboards: Dust with a microfiber cloth or use your vacuum brush attachment, then spray with an all-purpose cleaner and wipe clean.

TIP: Clean your baseboards after you clean your floors since cleaning floors tends to kick debris up onto baseboards.

Windows: Use a microfiber cloth soaked in a solution of ¼ cup vinegar, ¼ to ½ teaspoon dish soap, and 2 cups water.

TIP: Don’t be tempted to use more vinegar. Too much can make windows appear cloudy.

Window screens: To deep clean your window screens, you should remove them. Place outside on a tarp or other clean waterproof surface, then use a garden hose, an all-purpose cleaner, and a soft brush (gently on the screen) to clean. Repair any torn window screens.

TIP: When removing your screens and hardware, label their location as you go to make re-installing them a breeze.

Shelves: Remove all items from shelves, and dust both the items and the shelves.

TIP: Use museum putty to secure items that tend to fall over, especially if you live in earthquake-prone areas.

Driveway: Use a pressure washer to give your driveway (and garage floor) a good cleaning. It’s amazing what a difference a sparkling driveway makes to your home’s curb appeal.

TIP: Try using Coke or Pepsi to remove oil and grease stains. It’ll take a little elbow grease, too, but the acidity of dark colas helps remove oil stains, as well as other tough stains, such as rust.

Siding: Using warm, soapy water and a soft-bristled brush attached to a long handle, clean your home in sections small enough to keep soapy water from drying before you can rinse.

TIP: Pressure washers can make the job go easier, but if you’re a power-washer newbie, you risk stripping off paint or damaging your siding. Try one of the newer, lighter, electric power washers, which are easier to handle, or stick with the old-fashioned method. Either way, wash from the bottom up to help prevent streaking.

Upholstery: Vacuum your sofas and chairs. Spot clean or steam clean as needed. Freshen dusty pillows, throws, and curtains by tossing them in the dryer on low or no heat. Or, take them outside on a nice day to fluff and bask in the sun as an energy-saving alternative.

TIP: To spot clean, use “whipped detergent” — a mixture of half dish soap and half water. Beat to a froth. Soak a cloth in the mixture, wash the stain, then rinse with a cloth soaked in fresh water.

Ceiling fans: Spray the inside of an old pillowcase with cleaning solution, then slip the bag over each blade and wipe clean.

TIP: Before you go up a ladder to clean your ceiling fan, check to see if the fan is turning in the right direction to keep your home cool. If you feel a breeze underneath the blades when turned on, your fan is set for summer. If you don’t feel a breeze, change the direction.

Air conditioners: Change your air conditioner filter, or clean it by soaking it in a vinegar-and-water solution for 1 to 4 hours (depending on how long it’s been since you last cleaned). Let dry completely before replacing.

TIP: Let the filter dry outside in bright sunshine to kill bacteria and to help remove odors.

For more spring cleaning lists, check out our Spring Cleaning 101 Guide and The Anti-Martha-Stewart Spring Cleaning Guide.

“Visit HouseLogic.com for more articles like this. Reprinted from HouseLogic.com with permission of the NATIONAL ASSOCIATION OF REALTORS®.”

What You Should Know About Your Home and Your 2013 Taxes

home taxes

By: Dona DeZube
Published: December 12, 2013

It’s the last year for three sweet home tax benefits, but the first for a way simpler home office deduction.

These days few things start a fight on Capitol Hill faster than taxes. Despite the fact that three important tax benefits used by millions of American homeowners are days from expiring, Congress is unlikely to do anything to re-up them any time soon.

So if you’re eligible, tax year 2013 is possibly the last time to claim the private mortgage insurance (PMI) deduction, the energy tax credit, and debt forgiveness benefit, all of which all expire on Dec. 31, 2013.

At least there’s one piece of good news for homeowners: If you have a home office, there’s a new, simpler option for calculating the home office deduction for which you may qualify on your 2013 taxes.

Meanwhile, here’s what you need to know about those expiring benefits as you ready your taxes:

PMI Deduction

This tax rule lets you deduct the cost of private mortgage insurance, which is what you pay your lender each month if you put down less than 20% on a home. PMI protects the lender if you default on the home loan. Your deduction could amount to a couple hundred dollars depending on your tax bracket and other factors.

Find out if you qualify for and how to take the PMI deduction.

Energy-Efficiency Upgrades

This sweet little tax credit lets you offset what you owe the IRS dollar-for-dollar for up to 10% of the amount you spent on certain home energy-efficiency upgrades, from insulation to water heaters. On the downside, the credit is capped at $500 (less in some cases). But on the bright side, the right improvement could lower your utility bills indefinitely.

Related: Take back your energy bills with these high-ROI energy-efficiency practices.

Debt Forgiveness

When you go through a short sale, foreclosure, or deed-in-lieu, your lender typically lets you off the hook for some or all of what you owe on your mortgage.

That forgiven mortgage debt is income, on which you’d typically have to pay income tax.

Suppose you’re in financial distress and your lender agrees to let you short-sell your home, say for $50,000 less than you owe on the mortgage, and forgive you for the balance. Without the protection of the Mortgage Debt Forgiveness Act, you’ll owe income tax on that $50,000.

It’s likely if you had the money to pay income tax on $50,000, you’d have used it to pay your mortgage in the first place.

New Simplified Option for the Home Office Deduction

This may be the last year for the benefits above, but a new one kicks in for the 2013 tax year. If you work from home, you may qualify to use a new, simplified option for claiming the home office deduction when you file your 2013 taxes.

How much simpler is it? It lets you claim $5 per sq. ft. for up to 300 sq. ft. instead of having to compute the actual expenses of your home office using a 43-line form. To calculate the square footage of your office, just multiply the length of two walls. For example, an 8-by-10-foot room is 80 sq. ft. And at $5 per, that’s $400.

Although using the simplified option is obviously easier, the basic requirements for claiming the home office deduction haven’t changed. Your home office still must be used for business purposes:

  • Exclusively, and
  • On a regular basis.

Related: Which Home Office Set-Ups Qualify for a Deduction?

Why Might the Tax Benefits Not Be Renewed?

Although the expiring tax benefits were renewed retroactively in past years, that may not happen in 2014 because many in Congress would like to see comprehensive tax reform rather than scattershot renewals of individual provisions. This could delay a decision on the homeownership tax benefits until the big picture budget and tax issues are resolved.

So if you can, enjoy them now!

“Visit HouseLogic.com for more articles like this. Reprinted from HouseLogic.com with permission of the NATIONAL ASSOCIATION OF REALTORS®.”

Evaluate Your House for a Deck

deck

By: Dave Toht
Published: November 25, 2009

Here’s how to plan a new deck that suits your property, meets your budget, and offers the best return on your investment.

Deciding on the site and size

Your deck will be a popular place, so give careful thought to where it should be located. Begin by working out how to access it from the house. The ever-handy back door to the kitchen probably won’t do the job; it will force traffic toward the cooking area, making a shambles of any large-group entertaining. A better solution is a French door or slider that gives primary access from a living room, dining room, or family room while being handy to the kitchen. If the doorway can also be positioned to offer an expansive view, all the better.

Next, make sure the deck neither swamps your yard, nor becomes lost in it. Your local codes may set standards for how much of your lot can be occupied by a deck, and how close a deck can be to your lot line. Check these limitations early in your planning with your city or county building department.

Decide where to locate stairways off the deck so they provide unobtrusive access to the backyard. Also consider the path of the sun and the location of shade trees; sunlight may be pleasant in the morning but unbearable later in the day — having a shade tree to the west of your deck will help block the harsh late-day sun. Work out how to preserve your privacy and how to screen your deck from prevailing winds.

How much should you spend?

If you’re considering a deck the size of a helipad, with all the bells and whistles imaginable, better think again. According to the 2014 Cost vs. Value Report, simple is best. For example, a medium-size (16-by-20-foot) deck made of pressure-treated wood provides the best return, averaging about 87% nationally. (In the Pacific region, where the outdoor-living season is lengthy, a deck add-on will do even better, earning back 108% of the initial investment.)

Composite decking (Trex, EverGrain, and TimberTech are some well-known brands) makes great sense from a maintenance point of view but will be more expensive — composites cost about 45% more than pressure-treated wood — and will recoup an average of 74.3% of your cost. If you own an upscale home, a more elaborate deck may be appropriate to keep pace with the competition, but don’t expect a premium pay back: A two-level, 400-sq. ft. deck with upscale features such as composite decking, decorative railings, and built-in lighting offers only a 65.1% pay back.

Hankering for an even higher return? If you’re reasonably handy, you might want to go for the gold and build the deck yourself. Labor costs typically make up more than half the cost of residential construction. That means you can spend as little as $4,000 in materials for a wood deck of mid-range size and come away with a resale value of more than $8,000 — a handsome return.

However, plan on spending four to six weekends building a 16×20 foot deck yourself. If you choose this route, consider buying a ready-made deck plan. Or, put to use one of the many websites with interactive design aids, such as Lowe’s Deck Designer (registration required), and Deckorators.

Think local

To recoup a good portion of your investment, your deck needs to be right for your market. Appraiser Dick Koestner of Davenport, Iowa, recommends the simply checking out other decks in your area. “Don’t make it too extreme [compared with] what’s typical in your market,” he counsels. “Definitely don’t make it less than what is expected in the market.”

Koestner also emphasizes the importance of obeying local codes. “A lot of potential purchasers are having a home inspection done,” he says. “If the home inspector finds the deck isn’t built to code, most of the purchasers are saying, ‘Hey, fix it.’”

He emphasizes that codes exist not just to preserve property values, but promote safety. For example, railing balusters spaced too far apart can constitute a falling hazard for small children (most codes stipulate 4-inch maximum gap). In addition, a deck inadequately attached to the house can collapse, often during a party when the structure is loaded with the extra weight of many people, creating mayhem like something out of the Poseidon Adventure. So get a permit from your building department and follow their requirements.

Of course, by dint of taking out a building permit your tax assessment will rise, but only to the extent that the value of your property is increased. The effect should be minimal: Decks are considered an outdoor improvement much like a new driveway or upgraded landscaping, not additional living space.

Looking good

Although it’s hard to put a dollar value on aesthetics, looks count. Give thought to how the deck will meld with the architecture of your house. Railings offer a good opportunity to pull in color and detail that complements your home. Consider how the deck fits in with your backyard; it should make a smooth transition from the house to the landscape.

“Visit HouseLogic.com for more articles like this. Reprinted from HouseLogic.com with permission of the NATIONAL ASSOCIATION OF REALTORS®.”

  • « Previous Page
  • 1
  • …
  • 3
  • 4
  • 5
Powered by NJ Interest Rates

Featured Properties

1102 Atlantic Ave, Longport, NJ 08403
IDX Image
$4,295,000
Beds: 5
Baths: 4 | 1
 
2700 Atlantic Ave Ave #501, Longport, NJ 08403
IDX Image
$1,500,000
Beds: 3
Baths: 2
 
111 S 16th Ave #316, Longport, NJ 08403
IDX Image
$799,000
Beds: 2
Baths: 2
 
View all

About Jerome & Angel DiPentino

Jerome & Angel DiPentinoFormer owners of Premier Properties Real Estate Inc., Jerome and Angel DiPentino, shaped their business into a “boutique real estate firm” in Longport, New Jersey as the community’s leading real estate agency in 1990.

Premier Properties has joined forces with Long & Foster Real Estate – the largest real estate company in the Mid-Atlantic region. Long & Foster provides a one stop shopping experience with real estate, mortgage, title and insurance. While our name has changed, The Premier Team still prides itself on providing that “boutique real estate feel” in Longport. Read More...

Copyright © 2023 · Longport New Jersey Homes and Real Estate for Sale · Long & Foster Real Estate Longport

Jerome DiPentino and Angel DiPentino | Broker/Sales Associates
Jerome Cell: 609-432-5588 | Angel Cell: 609-457-0777
Long & Foster Real Estate, Inc | 2401 Atlantic Avenue - Longport, NJ 08403 | Office: 609-822-3339
All information provided is deemed reliable but is not guaranteed and should be independently verified.
Equal Housing Opportunity