Premier Sells Team Longport NJLongport NJ Real Estate

Jerome and Angel DiPentino of Long & Foster Real Estate

  • Home
  • Home Search
  • Our Listings
  • Rentals
  • Area Solds
    • Longport Sold Homes
    • Margate Sold Homes
    • Ventnor Sold Homes
  • Our Sold Homes
  • The Premier Team
    • About Long & Foster Real Estate
  • Contact

Think Your AC Won’t Make it Through the Summer? We’ve Got the Fixes

hvac

Is your AC making ominous noises? Maybe it sounds fine but isn’t cooling. Here’s a list of common air conditioning warning signs and their likely causes and fixes.

“Let comfort be your guide,” says Tom Hutchinson of Hutchinson Plumbing Heating Cooling. Air conditioning is all about comfort, so the simplest way to evaluate your system is to ask: Am I comfortable?

Air conditioning and HVAC units don’t last forever — 12 years is an average lifespan — and the moment they fail is usually when you need them the most.

The good news is that not every system malfunction spells total doom. Many nuisances are so cheap and easy to fix, you’ll kick yourself for not doing them sooner.

Warning sign #1: My air conditioning won’t turn on

Possible cause: Often, the most likely culprit is the easiest to remedy: the thermostat isn’t set correctly, or power isn’t reaching the AC unit.

The fix: Check to see that the thermostat is set to AC or “cool,” that the temperature setting is correct, and that the battery is fresh. Second, check the circuit breaker: It could simply be a tripped fuse.

Cost: Free

Warning sign #2: I’m not as comfortable as I was last year

Possible cause: “Airflow is paramount to comfort,” notes Hutchinson. If you aren’t comfortable, the problem usually can be traced to issues with airflow.

The fix: Change the filter. (You should do this as part of regular HVAC maintenance anyway.) Depending on the quality of the filter, the amount of people living in the house, and if there are pets, the filter should be changed every 30-90 days.

Outdoors, make sure there’s at least 24 inches of clearance on the sides and 5 feet on top of the unit. Also, check to make sure there are no obstructions to the home’s cold air returns and registers.

Cost:
$5 to $20, depending on filter.

Warning sign #3: My utility bills are abnormally high

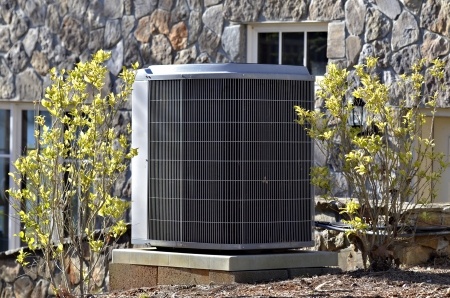
Possible cause: A spike in operating costs typically signals inefficient operation. After a dirty filter (warning sign #2), the most likely culprit is a choked condensing coil. Located within the outdoor unit, the coil has countless cooling fins — much like a car radiator — that can accumulate dust and debris.

The fix: Call out a pro for a spring tune-up.

Cost: $75 to $150

Warning sign #4: Weird noises during startup and operation

Possible cause: Rattling, buzzing, or ticking? The good news is that the cause might be little more than a loose screw. The bad news is that it could be caused by a bum blower motor (indoors) or bent fan blade (outdoors).

The fix: If you’re lucky, a simple tightening here and lubricating there will fix the problem. If not, you might require a new fan motor or fan blade.

Cost:
$75 for an inspection and tune-up; $750 for a new motor.

Warning sign #5: The AC shuts off before or long after I’m comfortable

Possible cause: Improper placement of the thermostat can wreak havoc on one’s comfort. The unit might be in direct sun, too close to a register, or near a hot oven. Also, a remodel might have you spending more time where the thermostat is not.

The fix:
Relocate the thermostat.

Cost: Free if you’re handy (and plan on reusing the same unit), up to $150 for a new programmable unit and somebody to install it.

Warning sign #6: There’s a puddle of water next to my furnace

Possible cause: During normal operation, the system generates moisture in the form of condensate. That water collects in a pan and flows out a line either into a floor drain or sump basin. An accumulation of water signals a blockage or disconnection of the tube.

The fix: Inspect the tube for crimps, clogs, and disconnections. Also, if the water flows into a sump basin, ensure that the sump pump is in good working order.

Cost: Free to clean out blockage; $20 to replace line; $50 for new sump pump.

Warning sign #7: The air coming out of the registers doesn’t feel as cold as it used to

Possible cause: The refrigerant lines aren’t insulated.

The fix: The outdoor unit is connected to the indoor system by two copper refrigerant lines, which should be covered with an insulating sleeve. Make sure that it is. Also, the system may need its refrigerant re-charged.

Cost:
$5 for insulation and up to $150 for a system re-charge.

Warning sign #8: My AC unit refuses to kick on at all

Possible cause:
Burnt-out compressor

The fix: If the compressor fails, the unit won’t run. The only fix for this is a costly replacement of the equipment.

Cost:
$600 to $1,000. It might be wise to replace your air conditioner if it’s more than 8 years old.


By: Douglas Trattner
Published: May 30, 2012

Read more: http://members.houselogic.com/articles/air-conditioning-problems/preview/#ixzz33gTLBMbT
“Visit HouseLogic.com for more articles like this. Reprinted from HouseLogic.com with permission of the NATIONAL ASSOCIATION OF REALTORS®.”

What Should Be in an Emergency Survival Kit?

flashlight

Preparing and keeping a fully stocked home emergency preparedness kit could be the key to your family’s safety if disaster strikes.

You can’t prevent disasters, but you can take charge of how you respond if you’re prepared. The first step is putting together an emergency preparedness kit.

Your Most Important Papers If a flood destroys your home, you could spend weeks or even months just trying to re-create the essential documents you’ll need to get back on track. That’s why it’s critical to have backups of important papers, such as:

  • The deed to your house.
  • Proof of insurance.
  • Medical records.
  • Passports.
  • Social security cards.
  • A list of personal contacts.

Keep one set at home in a portable case that you can grab quickly. Keep another in digital form — either on a secure website such as Dropbox or on a memory stick, or, even better, both. And while you’re at it, use the opportunity to check whether your insurance is up to date.

“People often don’t know what their homeowners insurance policy covers, and most don’t cover flooding,” points out Rick Bissell, Ph.D., a professor of emergency health services at the University of Maryland, Baltimore. Find out what hazards your area faces, and make sure you’re protected against them.

Basic Items for Survival

Water: One gallon per person per day for at least three days, for drinking and sanitation; double if you live in a very hot climate, have young kids, or are nursing. Bottled water is best, but you can also store tap water in food-grade containers or two-liter soda bottles that have been sanitized. Factor in your pet’s water needs, too.

Food: At least a three-day supply of non-perishables and a can opener. Pack protein, fruit, and vegetables, but make sure they’re in a form that stores easily, such as cereal bars and trail mix with dried fruit. Include some treats that have a long shelf life, such as Tootsie Rolls. Store food in pest-proof plastic or metal tubs and keep it in a cool, dry place.

Flashlights and extra batteries: “Candles are not recommended because there are many house fires caused by candles left unattended,” says David Riedman, a public affairs officer with FEMA.

Battery-operated radio: Red Cross radios are available at multiple retailers and online.

First-Aid Supplies:

  • Two pairs of sterile gloves
  • Adhesive bandages and sterile dressings
  • Soap or other cleanser
  • Antibiotic towelettes and ointment
  • Burn ointment
  • Eye wash
  • Thermometer
  • Scissors
  • Tweezers
  • Petroleum jelly
  • Aspirin or non-aspirin pain reliever
  • Stomach analgesics such as Tums, Pepto-Bismol
  • Laxative

Sanitation and Hygiene Supplies:

  • Moist towelettes
  • Paper towels
  • Toilet paper
  • Garbage bags
  • Plastic ties
  • Shampoo
  • Toothpaste and toothbrush
  • Deodorant

Additional Items:

  • Plastic sheeting, duct tape, and dust masks — in case you need to seal your home or shelter from airborne contaminants
  • A whistle to signal for help
  • Toys or other comfort items for kids
  • Cash

Update your kit as your needs change, and replace food and water approaching its expiration date. You might pick a specific time each year to check, such as before hurricane season in the south or after Thanksgiving if you live in the north.

By: Wendy Paris
Published: August 28, 2009

Read more: http://members.houselogic.com/articles/emergency-preparedness-kit/preview/#ixzz312bVuZrh

“Visit HouseLogic.com for more articles like this. Reprinted from HouseLogic.com with permission of the NATIONAL ASSOCIATION OF REALTORS®.”

How to Buy a Charcoal Grill

grill
With models priced from $35 to $1000 there are charcoal grills to fit the budget of anyone who’s a fan of traditional barbecue.

A charcoal grill can be as basic as a 55-gallon drum cut in half and turned on its side, or as extravagant as a $1,000 ceramic-lined cooker. When shopping for a charcoal grill, author and barbecue expert C. Clark “Smoky” Hale urges consumers to stop and ask themselves the following questions: What type of cooking do you intend to use it for? How often do you expect to grill? How many people will you be grilling for? How much do you want to spend?

Cost range: $35-$1,000 and up

Likely additional costs: assembly, cover, charcoal

Average life span: 3-16 years

Sub-$50 range

In the case of charcoal grills, “small doesn’t have to mean cheap,” explains Hale, author of “Great American Barbecue & Grilling Manual.” Whereas many gas grills priced south of $50 aren’t worth the money, the same isn’t necessarily true when applied to charcoal.

Weber, the king of the kettle, sells a solid and wholly functional grill for around $35. Of course, that unit rests on the ground and measures just over a foot in diameter, making it useful only for the smallest of gatherings. Larger grills in this price range tend to be constructed of thin painted steel and positioned atop wobbly aluminum legs.

$50-$100 range

A homeowner looking to satisfy the needs of an average-size family should plan on spending at least $60 for a roomy but basic grill. Models in this category are of the 19- to 22-inch kettle variety, which is large enough to handle over a dozen burgers or chicken breasts.

Despite the increased girth, these grills restrict all but the most rudimentary cooking methods due to shallow lids that can’t accommodate whole chickens, turkeys, or other roasts. Because charcoal (and especially hardwood lump) burns hotter than gas, the thinner steel grates found on these grills often warp and need replacing at a cost of $15 to $45.

$100-$200 range

This price range includes 22- and 26-inch name brand kettles. But the roomiest charcoal grills in this category are not round, they are rectangular barrel-style units that mimic a dissected 55-gallon drum.

These solidly constructed rigs, which start at around $130, boast a cooking area two to three times the size of comparably priced kettles. The 1,000-square-inch grate surface makes it easy not only to cook for a crowd, but also to do indirect cooking for slower, longer roasts.

Though billed as smokers too, these models typically lack the airflow control needed for the serious, long-temperature cooking associated with traditional smoked barbecue, warns Hale.

$200-$300 range

The additional dollars spent for charcoal grills in this category often buy convenience rather than increased capacity or improved construction. Kettle-style grills come mounted in a portable cart with storage for charcoal and a small work area. Some feature propane ignition systems for effortless charcoal starting sans lighter fluid.

Hinged cooking grates make it easy to add or rearrange charcoal without having to remove the food. And many facilitate the ash-disposal process thanks to removable catch basins. For frequent grillers, these conveniences are worth the costs.

Ceramic cookers

“The Big Green Egg folks are like Apple computer people,” says Hale, referring to a prominent brand of ceramic charcoal cooker. “They are very passionate.”

Owing to their thick-walled ceramic construction, these trendy grills are unmatched at retaining heat for long periods of time. Precision dampers make it easy (with practice) to accurately control temps, making the units effective for everything from high-heat searing to roasting to low-and-slow smoking. Homeowners, however, must be prepared to shell out $700 and up for a grill with a cook surface equal to a $70 kettle.

Smokers

Most charcoal grills can be configured to accept wood chunks or chips, allowing the cook to impart a pleasant smoke flavor to cooking foods. But in order to truly excel at barbecue, says Hale, a grill must contain a system of tight-fitting dampers and vents that make it possible to accurately regulate cooking temperatures.

Offset smokers look like barrel-style grills with the addition of a side-mounted firebox. Heat and smoke travel from the firebox, through the main cooking chamber, and finally out the exhaust. Because the heat source is not directly underneath the food (indirect cooking), it is easier to maintain the lower temps needed for smoking. These units start around $250.

Water smokers, of which the Weber Smokey Mountain (aka the Bullet) is the most popular model, look like elongated kettle grills. Situated between the charcoal bowl at the bottom and the cooking chamber above is a shallow pan of liquid that acts like a heat sink, regulating temps. Well-made and backed by Weber’s 10-year warranty, these smokers sell for around $300.

Suggested extras: Wood ash combines with rain water to make lye, a corrosive and caustic substance. For that reason alone, a tight-fitting grill cover is a necessity. Prices range from $20 to $70. Chimney starters ($15) make fast work of igniting charcoal briquettes without the need for lighter fluid. Folks serious about barbecuing, says Hale, should purchase a quality grill thermometer for $10.

Cost of operation: There is no denying that charcoal grilling is more expensive than gas grilling. A typical charcoal cookout will cost about $3.50 in fuel, while the same session on a propane grill will run about $0.60, and even less if hooked up to a natural gas line. Nevertheless, charcoal grill aficionados swear by the superior taste of foods prepared with charcoal.

By: Douglas Trattner
Published: April 26, 2010

Read more: http://members.houselogic.com/articles/outdoor-appliance-guide-charcoal-grills-and-smokers/preview/#ixzz312h8cd8B
“Visit HouseLogic.com for more articles like this. Reprinted from HouseLogic.com with permission of the NATIONAL ASSOCIATION OF REALTORS®.”

Perennial Flowers: A Little Care Says ‘Encore! Encore!’ Each Year

perennials

Don’t take your old garden friends — perennial flowers — for granted. A little routine love keeps these stunners growing for bloomin’ ever. ROI, anyone?

You don’t need a calendar if you grow perennial flowers, which return each year like clockwork. But home owners often take these Old Faithfuls for granted. We don’t divide, deadhead, or cut back like we should. Before we know it, our lush hydrangeas are barren, and our salvia has run amuck.

Luckily, perennial flowers are a forgiving bunch; and with a little love, will keep on blooming — a nice ROI. Here’s how to care for your perennials and protect your landscape year after year.

Chose varieties, location wisely

Growing perennial flowers is all about planting the right flower in the right spot. In other words: Know thy garden, and read thy plant label.

“I’ve had couples in here fighting about whether a spot is sunny or shady,” says Alison Caldwell, buyer for Hicks Nurseries on Long Island, N.Y. “You really must know your site — sunny, shady, clay soil, or sandy — and then pick the appropriate plant.”

Grow labels tells you everything a plant loves — partial shade or full sun, a lot of water or a little drought.

“Succulents favor droughts, so don’t plant them next to a sprinkler head,” Caldwell says. “And hostas don’t want to be in full sun — their leaves burn.”

Some hardy perennial flowers that grow from coast to coast, Florida to Maine, include:

  • Ornamental grasses
  • Hostas
  • Daylilies
  • Iris
  • Mums
  • Salvia
  • Yarrow

Most perennial flowers appreciate well-drained soil; so, if necessary, amend your compacted or clay soil with leavening organic matter like compost, peat moss, and manure. This will create tiny pockets that contain air, water, and nutrients — the building blocks of healthy plants.

Warning: Never try to break up clay soil with sand alone. Sand + clay + water = cement.

Mulch miracles

Mulching perennials gives them a fighting chance of surviving climate swings — frigid winters, blistering summers. After planting, mound up to 4 inches of mulch around the plant base. This insulation will keep soil temperature and moisture levels relatively constant, and protect plants from surprises — plants don’t like surprises — like record-warm winters and summer heat waves.

Divide and nurture in spring

Perennial flowers return each year bigger and better … until they don’t. Overcrowding could be the culprit, and dividing the plant is the answer.

You know it’s time to divide when blooms are fewer and smaller, and when the plant’s center is open or dead.

“When it comes to dividing, every plant is a little different,” says Lance Walheim, author of Roses for Dummies and an expert at Bayer Advanced Garden, which makes lawn and pest products.

You can break daylilies apart with your hand, but you’ll have to divide salvia’s hard root ball with a shovel or other sharp landscape tools.

Plant and fertilize divisions in bare spots around your yard. Or have a perennial swap with neighbors — your daylilies for their hostas.

If you decide not to divide, stake drooping stalks to protect against disease.

Deadhead in summer; cut back in fall

After blooms are spent, lop off their heads to direct energy to a second bloom, rather than a seed head. When the growing season is finished, and you’re cleaning up your garden for winter, cut off dead stalks and foliage. This will help plants get a good rest and return healthier and happier in spring.

By: Lisa Kaplan Gordon
Published: February 10, 2012

Read more: http://members.houselogic.com/articles/perennial-flowers/preview/#ixzz312dH9bgl
“Visit HouseLogic.com for more articles like this. Reprinted from HouseLogic.com with permission of the NATIONAL ASSOCIATION OF REALTORS®.”

Guide to Buying and Installing a Sprinkler System

sprinkler

An irrigation system saves water, keeps your lawn looking great, and helps maintain your curb appeal. We’ve gathered the info to get you started.

An underground irrigation system delivers water to your landscaping at the right time, and in just the right amount, so you don’t water too much or too little. It’s relatively easy to install and makes a good DIY project.

You’ll also save money doing it yourself. A professionally installed system for a typical ¼-acre lot is $3,000 to $4,000. You can DIY it for under $1,500.

The heart of an underground system is pop-up sprinkler heads. When working, the heads raise up a few inches to spray water on your landscape. When not in use, they drop to ground level so you can mow or walk right over them.

Plus, today’s systems are pretty darn smart. Automated features decide when it’s been raining too much or too little, then adjust the amount of water your landscaping gets. That lowers the worry quotient for you, heads off costly over-watering, and makes the whole system almost maintenance-free.

Getting in the Zone

An irrigation system divides your property into zones. Each zone can be different in terms of the amount of water it gets, and at what time of day it’s watered. Examples of zones include:

  • Lawn zones have pop-up heads with just the right spray radius and range to cover a broad area of grass.
  • Landscaping zones have high-rise heads to water shrubs and ground cover.
  • Flower and vegetable zones may be equipped with bubblers and tiny spray heads that gently water plants without bruising edibles or knocking petals off blooms.

Everything functions on an automatic timer that controls water flow throughout the system. You can elect to include sensors that monitor rain and humidity — self-adjusting timers that prevent unnecessary watering.

Start with a Plan

Your irrigation journey starts with a plan that maps out:

  • Your yard, house location, and major landscaping features, such as trees.
  • Your irrigation zones.
  • The location of sprinkler heads and bubblers.
  • The location of underground water supply lines.
  • The location of a water-supply shutoff valve.
  • Any automatic sensors.

But planning is a challenge for first-timers. Manufacturers recognize this hurdle and go out of their way to provide planning help. After you give them some info on the size of your lot and your water supply system, they give you an irrigation plan tailored to your property.

You’d be crazy not to take advantage of their services. For one, they’re free. Second, they’re very thorough: downloadable guides and step-by-step videos take you through every part of creating a home irrigation system.

For example, Rainbird and Toro offer planning guides that show you how to make a scale drawing of your property, and how to easily gather information on your water pressure and water flow rate that’ll help determine the design of your system.

When you mail in the drawing and info, the manufacturer returns a custom plan with a materials list and detailed installation instructions, all designed specifically for your property. Replies take several weeks. For a small fee ($20-$30), you can have your plans arrive in a few days.

Orbit shows you how to use Google Maps to make a scaled plan of your lot without ever stepping outdoors. Plans are available instantly.

Get Ready to Dig

Your next job is trenching — digging channels in your yard for the water supply lines and sprinkler heads. With plan in hand, mark out the locations of the irrigation lines using string lines, powdered chalk, or lawn marking paint — it comes in a spray can specially designed to be used upside down ($5).

At this point comes a heads-up about your local building codes. You’ll need to ask a couple of questions of your local building and planning commission:

  • Do I need a permit?
  • Is a licensed plumber required to connect my irrigation system to my home’s water system?
  • How deep should the trenches be? (Most building codes require you to dig down 18 inches to protect the water lines from freezing — in colder climates the required depth is more.)

Unless you relish the idea of hand-digging several hundred feet of trench, rent a gas-powered trenching tool for $100–$160 per day. This walk-behind tool makes short work of deep, narrow trenches.

Very important! To prevent injury, be sure to have all utilities marked before you begin digging. Call your local utilities or dial 811.

Installing the System

With excavation complete, you’re ready to buy all the stuff you need. You’ll build your system from plastic pipe, either rigid or flexible PVC. Both are good choices and use the same methods of assembly.

  • Rigid PVC pipe is inexpensive — ¾-inch diameter pipe is about 25 cents per lineal foot.
  • Flex PVC costs more at about $1 per lineal foot of ¾-inch-diameter pipe, but it installs faster, there are fewer connections, and it’s more forgiving of trenches that aren’t perfectly straight.

There are lots of other components, including sprinkler heads and bubblers, and each type has different ranges and arcs — the size and shape of their spray. That’s another reason to check out the manufacturer’s guides — they’ll give you a complete materials list.

Unless you’re an accomplished DIY electrician and plumber, you’ll probably need a bit more professional help:

  • An electrician to extend a circuit to the automatic timer; figure 2-3 hours at $90-$110 per hour.
  • A plumber to tap into your household water system. Budget another $200-$300.

Ready to Call In the Pros?

If the DIY approach is more than you want to tackle, or your lot is larger than a third of an acre (14,500 sq. ft.), consider hiring a pro. Expect to pay $3,000-$4,000 to have an underground irrigation system installed on a ¼-acre lot.

Aside from saving you a lot of work, a pro is going to get the job done quickly and with minimal disruption. He’ll also come with knowledge of what design best suits local conditions.

By: Dave Toht
Published: April 10, 2013

Read more: http://members.houselogic.com/articles/irrigation-installation-cost/preview/#ixzz312Uuu2Zc

“Visit HouseLogic.com for more articles like this. Reprinted from HouseLogic.com with permission of the NATIONAL ASSOCIATION OF REALTORS®.”

Grilling Safety

grilling

Nothing spoils an outdoor barbecue more than burning the house down. Here are 6 tips to stay safe when grilling this summer.

Don’t think you’re at risk? Over the last five years, fire departments have responded to an average of 8,200 house fires per year involving grills, hibachis, and barbecues. Most of these fires took place during June and July, the peak grilling months.

Tip 1: Barbecue only outside

Firing it up in your home, trailer, tent, or any partially enclosed area is dangerous. If the carbon monoxide doesn’t kill you, your neighbors might, especially if you set off your building’s sprinkler system by grilling on your covered balcony.

Tip 2: Grills heat up to 650 degrees or higher

Always place your grill or hibachi on a non-flammable surface. For additional protection, place a heat-resistant pad or splatter mat beneath the cooker. And FYI, plastic has an average melting point of 150 degrees.

Tip 3: Protect your home and family

According to the Consumer Product Safety Commission, you should barbecue at least 10 feet away from your house or any structure. Children and pets should stay at least 3 feet away from the grilling area.

Tip 4: Lighter fluid can be dangerous

Before starting a fire, soak coals with an accelerant made for charcoal. Never use lighter fluid on hot briquettes. Doing so causes the fluid to vaporize and become explosive. The result could be a charbroiled yard and home.

Tip 5: Proper grilling attire

Don’t wear loose or baggy clothing while flipping burgers. This includes aprons, especially when your back is turned.

Tip 6: Utensils are not toys

Of course you want to keep your guests entertained at your next barbecue, but remember, playing with sharp utensils can be dangerous. You could poke an eye out or skewer a feathered friend.

Bonus tip: Hints at Heloise says there’s a new danger hidden away in your grill: bristles from wire cleaning brushes. If accidentally consumed, they could cause abdominal pain and more. Make sure that after you clean your grill with a wire brush, rinse the grill and wipe it with a paper towel to make sure no pesky wires are left.

For additional grilling safety tips, visit the following websites:

The National Fire Protection Agency

Hearth, Patio, and Barbecue Association

The Consumer Protection Agency

By: Deirdre Sullivan
Published: June 29, 2012

Read more: http://members.houselogic.com/articles/grilling-safety/preview/#ixzz312SNZw1a

“Visit HouseLogic.com for more articles like this. Reprinted from HouseLogic.com with permission of the NATIONAL ASSOCIATION OF REALTORS®.”

9 Reasons You Should Try Square Foot Gardening

gardening

Want to grow 100% of veggies in 20% of space? That’s just one reason to try square foot gardening, an easy and efficient way to grow your own produce.

In a nutshell, the square foot gardening method involves:

  • Dividing a 4-by-4-foot box into 16 squares; one type of crop in each square
  • Laying a permanent grid of 1-foot squares over the box to guide planting
  • Filling the box with a special, fresh soil mixture
  • Replanting each square after harvesting

The method was invented in 1981 by Mel Bartholomew, a retired civil engineer and efficiency expert who trained his time-is-money eye on traditional, single-row gardening.

“Traditional gardening was a lot of work and weeds,” Bartholomew says. “And when I asked, ‘Why are we doing it this way?’ I was told, ‘Because we’ve always done it that way.’”

Wrong answer for an efficiency guy. So Bartholomew analyzed everything he hated about gardening — weeding, watering, and long walks to large garden plots — and came up with a method that eliminates vegetable garden minuses and accentuates the positives — lots of organically grown vegetables in a fraction of the space and time.

Bartholomew’s book, Square Foot Gardening, inspired millions of small-space gardening acolytes and led to a foundation to feed the world, one square foot at a time.

Why should you square foot garden?

Bartholomew, 81, recently walked HouseLogic through the 9 reasons you should switch to square foot gardening.

1. Saves space: Square foot gardening boxes grow 100% of veggies grown the traditional way in only 20% of the space.

2. Saves water: Instead of shocking young plants with icy hose water, you water square foot garden plants with ladles of sun-warmed water from buckets or rain barrels. In the end, you use about 10% of the water you’d spray on a traditional garden.

3. Saves money on gardening tools: Since you never walk upon and pack down square foot gardening soil, you don’t need hoes, spades, or rakes to break it up. All you need is a hand trowel to mix the soil and a pair of scissors to cut greens.

4. No walking: You can place square foot gardening boxes anywhere there’s sun — outside your back door, on patios, and on decks. The closer the boxes are to your kitchen, the more you’ll tend and harvest produce.

5. No bending and reaching: Square foot gardening boxes typically are 4-by-4-foot square because Bartholomew figured adults can comfortably reach 2 feet. Gardeners can walk around their boxes, tending veggies without ever overreaching. If bending is a problem, build boxes on legs or rest them on a card table.

6. No weeding: Most weeds come from seeds or spores buried in soil. Square foot gardening soil, however, uses a 6-inch-deep mixture of 1/3 peat moss, 1/3 coarse vermiculite, and 1/3 blended compost made with at least five different sources — leaves, manure, food scraps, coffee grinds, and eggshells. If a wayward seed does blow into a planting box, you can easily pluck it from loose soil.

7. Uses fewer seeds: Traditional gardeners sprinkle seeds around, and then thin seedlings. Square foot gardeners plant seeds and seedlings according to a precise plant-spacing formula: 1 tomato seedling per sq. ft, 16 onions, 8 peas, 4 celery, and so on. The formula eliminates guesswork and stretches a pack of seeds much further.

8. Raises little gardeners: Kids love to play in dirt and watch things grow. Square foot gardening lets them do both, without the tedious chore of weeding. As a bonus, kids are more likely to eat vegetables they’ve grown themselves.

9. Raises rolling crops: After you harvest 1 square foot of veggies, throw in a handful of compost and plant a different crop in the bare square. That way, you’ll have a steady supply of greens throughout fall or until the first frost, whichever comes first.

By: Lisa Kaplan Gordon
Published: May 14, 2012
Read more: http://members.houselogic.com/articles/square-foot-gardening/preview/#ixzz2xk4Y03fc

“Visit HouseLogic.com for more articles like this. Reprinted from HouseLogic.com with permission of the NATIONAL ASSOCIATION OF REALTORS®.”

6 Home Deduction Traps and How to Avoid Them

tax tips

Get an “A” on your Schedule A form: Dodge these tax deduction pitfalls to save time, money, and an IRS investigation.

Trap #1: Line 6 – Real estate taxes

Your monthly mortgage payment often includes money for a tax escrow, from which the lender pays your local real estate taxes.

The money you send the bank may be more than what the bank pays for your taxes, says Julian Block, a tax attorney and author of Julian Block’s Home Seller’s Guide to Tax Savings. That will lead you to putting the wrong number on Schedule A.

Example:

  • Your monthly payment to the lender: $2,000 for mortgage + $500 escrow for taxes
  • Your annual property tax bill: $5,500

Now do the math:

  • Your bank received $6,000 for real estate taxes, but only paid $5,500. It may keep the extra $500 to apply to the next tax bill or refund it to you at some point, but meanwhile, you’re making a mistake if you enter $6,000 on Schedule A.
  • Instead, take the number from Form 1098—which your bank sends you each year—that shows the actual taxes paid.

Trap #2: Line 6 – Tax calculations for recent buyers and sellers

If you bought or sold a home in the middle of the year, figuring out what to put on line 6 of your Schedule A Form is tricky.

Don’t simply enter the number from your property tax bill on line 6 as you would if you owned the house the whole year. If you bought or sold a house in midyear, you should instead use the property tax amount listed on your HUD-1 closing statement, says Phil Marti, a retired IRS official.

Here’s why: Generally, depending on the local tax cycle, either the seller gives the buyer money to pay the taxes when they come due or, if the seller has already paid taxes, the buyer reimburses the seller at closing. Those taxes are deductible that year, but won’t be reflected on your property tax bill.

Trap #3: Line 10 – Properly deducting points

You can deduct points paid on a refinance, but not all at once, says David Sands, a CPA with Buchbinder Tunick & Co LLP. Rather, you deduct them over the life of your loan. So if you paid $1,000 in points for a 10-year refinance, you’re entitled to deduct only $100 per year on your Schedule A Form.

Trap #4: Line 10 – HELOC limits

If you took out a home equity line of credit (HELOC), you can generally deduct the interest on it only up to $100,000 of debt each year, says Matthew Lender, a CPA with EisnerLubin LLP.

For example, if you have a HELOC for $200,000, the bank will send you Form 1098 for interest paid on $200,000. But you can deduct only the interest paid on $100,000. If you just pull the number off Form 1098, you’ll deduct more than you’re entitled to.

Trap #5: Line 13 – Private mortgage insurance

You can deduct PMI on your Schedule A Form, as long as you started paying the insurance after Dec. 31, 2006. Congress renewed the PMI deduction for 2012 and 2013 for people making less than $110,000.

Since you’re thinking about it, this is also a good time to review your PMI: You might be able to cancel your PMI altogether because your home value has risen and the amount your owe on your mortgage has gone down.

Trap #6: Line 20 – Casualty and theft losses

You can deduct part or all of losses caused by theft, vandalism, fire, or similar causes, as well as corrosive drywall, but the process isn’t always obvious or simple:

  • Only deduct losses that are greater than 10% of your adjusted gross income and exceed $100 (line 38 of Form 1040).
  • Fill out Form 4684, which involves complex calculations for the cost basis and fair market value. This form gives you the number you need for line 20.

Bottom line on line 20: If you’ve got extensive losses, it’s best to consult a tax pro. “I wouldn’t do it myself, and I’ve been dealing with taxes for 40 years,” says former IRS official Marti.

By: Barbara Eisner Bayer
Published: January 30, 2014

This article provides general information about tax laws and consequences, but shouldn’t be relied upon as tax or legal advice applicable to particular transactions or circumstances. Consult a tax professional for such advice.

Read more: http://members.houselogic.com/articles/schedule-form-6-home-deduction-traps/preview/#ixzz2xk2LDVb4

“Visit HouseLogic.com for more articles like this. Reprinted from HouseLogic.com with permission of the NATIONAL ASSOCIATION OF REALTORS®.”

Read This Before Landscaping This Spring; Your Pets Will Thank You

lawn

By: Lisa Kaplan Gordon
Published: March 26, 2012

When you get rid of weeds this spring, make sure you don’t get rid of Rover as well. Here are tips on keeping pets safe while you’re cleaning up your yard.

When you spruce up your yard for spring, remember that landscaping aids that make your plants healthy can make your pets real sick.

In a Dailycamera.com post, veterinarian Jennifer Bolser says the following landscaping staples can harm your pets:

  • Cocoa mulch: Contains theobromine, the chemical in chocolate that poisons dogs.
  • Fertilizers and herbicides: Can irritate pet skin, pads, tongues, and gums.
  • Compost: Ingesting coffee grinds and onions in compost piles can make pets ill.
  • Metal lawn edging: Can cut pets who walk on it.

To keep your plants and pets healthy, store chemicals in pet-proof containers, enclose compost piles in bins and drums, and choose plastic or rubber edging.

What do you do to keep your pets safe?

“Visit HouseLogic.com for more articles like this. Reprinted from HouseLogic.com with permission of the NATIONAL ASSOCIATION OF REALTORS®.”

Spring Cleaning List

broom

By: Lara Edge
Published: April 20, 2012

Don’t you just love that feeling you get when you check items off a list? Get that adrenaline going with our spring cleaning list.

Before you begin: Turn up the tunes with our Spotify spring cleaning playlist. Now you’re ready to tackle your spring cleaning list:

Walls: Dust your walls with your vacuum brush attachment, then clean using an all-purpose cleaner and rinse. Repair your walls by patching holes and dings and touching up paint.

TIP: Don’t use a spray cleaner, which will only leave streaks on your walls. Soak a cloth in cleaner, then wipe. To rinse, follow up with a clean cloth soaked in plain water.

Baseboards: Dust with a microfiber cloth or use your vacuum brush attachment, then spray with an all-purpose cleaner and wipe clean.

TIP: Clean your baseboards after you clean your floors since cleaning floors tends to kick debris up onto baseboards.

Windows: Use a microfiber cloth soaked in a solution of ¼ cup vinegar, ¼ to ½ teaspoon dish soap, and 2 cups water.

TIP: Don’t be tempted to use more vinegar. Too much can make windows appear cloudy.

Window screens: To deep clean your window screens, you should remove them. Place outside on a tarp or other clean waterproof surface, then use a garden hose, an all-purpose cleaner, and a soft brush (gently on the screen) to clean. Repair any torn window screens.

TIP: When removing your screens and hardware, label their location as you go to make re-installing them a breeze.

Shelves: Remove all items from shelves, and dust both the items and the shelves.

TIP: Use museum putty to secure items that tend to fall over, especially if you live in earthquake-prone areas.

Driveway: Use a pressure washer to give your driveway (and garage floor) a good cleaning. It’s amazing what a difference a sparkling driveway makes to your home’s curb appeal.

TIP: Try using Coke or Pepsi to remove oil and grease stains. It’ll take a little elbow grease, too, but the acidity of dark colas helps remove oil stains, as well as other tough stains, such as rust.

Siding: Using warm, soapy water and a soft-bristled brush attached to a long handle, clean your home in sections small enough to keep soapy water from drying before you can rinse.

TIP: Pressure washers can make the job go easier, but if you’re a power-washer newbie, you risk stripping off paint or damaging your siding. Try one of the newer, lighter, electric power washers, which are easier to handle, or stick with the old-fashioned method. Either way, wash from the bottom up to help prevent streaking.

Upholstery: Vacuum your sofas and chairs. Spot clean or steam clean as needed. Freshen dusty pillows, throws, and curtains by tossing them in the dryer on low or no heat. Or, take them outside on a nice day to fluff and bask in the sun as an energy-saving alternative.

TIP: To spot clean, use “whipped detergent” — a mixture of half dish soap and half water. Beat to a froth. Soak a cloth in the mixture, wash the stain, then rinse with a cloth soaked in fresh water.

Ceiling fans: Spray the inside of an old pillowcase with cleaning solution, then slip the bag over each blade and wipe clean.

TIP: Before you go up a ladder to clean your ceiling fan, check to see if the fan is turning in the right direction to keep your home cool. If you feel a breeze underneath the blades when turned on, your fan is set for summer. If you don’t feel a breeze, change the direction.

Air conditioners: Change your air conditioner filter, or clean it by soaking it in a vinegar-and-water solution for 1 to 4 hours (depending on how long it’s been since you last cleaned). Let dry completely before replacing.

TIP: Let the filter dry outside in bright sunshine to kill bacteria and to help remove odors.

For more spring cleaning lists, check out our Spring Cleaning 101 Guide and The Anti-Martha-Stewart Spring Cleaning Guide.

“Visit HouseLogic.com for more articles like this. Reprinted from HouseLogic.com with permission of the NATIONAL ASSOCIATION OF REALTORS®.”

  • « Previous Page
  • 1
  • 2
  • 3
  • 4
Powered by NJ Interest Rates

Featured Properties

1503 Atlantic Ave, Longport, NJ 08403
IDX Image
$2,295,000
Beds: 3
Baths: 3 | 1
Board Logo
 
1503 Atlantic Ave #1503, Longport, NJ 08403
IDX Image
$2,295,000
Beds: 3
Baths: 3 | 1
Board Logo
 
2700 Atlantic Ave #419, Longport, NJ 08403
IDX Image
$1,699,000
Beds: 2
Baths: 2
Board Logo
 
View all

About Jerome & Angel DiPentino

Jerome & Angel DiPentinoFormer owners of Premier Properties Real Estate Inc., Jerome and Angel DiPentino, shaped their business into a “boutique real estate firm” in Longport, New Jersey as the community’s leading real estate agency in 1990.

Premier Properties has joined forces with Long & Foster Real Estate – the largest real estate company in the Mid-Atlantic region. Long & Foster provides a one stop shopping experience with real estate, mortgage, title and insurance. While our name has changed, The Premier Team still prides itself on providing that “boutique real estate feel” in Longport. Read More...

Copyright © 2025 · Longport New Jersey Homes and Real Estate for Sale · Long & Foster Real Estate Longport

Jerome DiPentino and Angel DiPentino | Broker/Sales Associates
Jerome Cell: 609-432-5588 | Angel Cell: 609-457-0777
Long & Foster Real Estate, Inc | 2401 Atlantic Avenue - Longport, NJ 08403 | Office: 609-822-3339
All information provided is deemed reliable but is not guaranteed and should be independently verified.
Equal Housing Opportunity