Premier Sells Team Longport NJLongport NJ Real Estate

Jerome and Angel DiPentino of Long & Foster Real Estate

  • Home
  • Home Search
  • Our Listings
  • Rentals
  • Area Solds
    • Longport Sold Homes
    • Margate Sold Homes
    • Ventnor Sold Homes
  • Our Sold Homes
  • The Premier Team
    • About Long & Foster Real Estate
  • Contact

7 Landscaping Mistakes That Wreck Curb Appeal

garden

Don’t let badly designed or maintained landscaping wreck your home’s curb appeal. Here are pitfalls to avoid.

Clumsy, neglected, and hodgepodge landscaping not only hurts your home’s curb appeal, it can cut the value of your property and make it harder to sell.

Real estate appraisers say bad landscaping is a buyer turnoff that can increase the number of days a property languishes on the market, which also hurts prices.

“I’ve been with clients who won’t even go into a house because of the bad landscaping outside,” says Mack Strickland, a Chester, Va., REALTOR® and appraiser.

Even more important, bad landscaping is a downer that hurts the way you see and enjoy your home.

Don’t let bad landscaping happen to you. Here are the seven landscaping mistakes that bust, rather than boost, your home’s curb appeal.

1. Planting Without A Plan

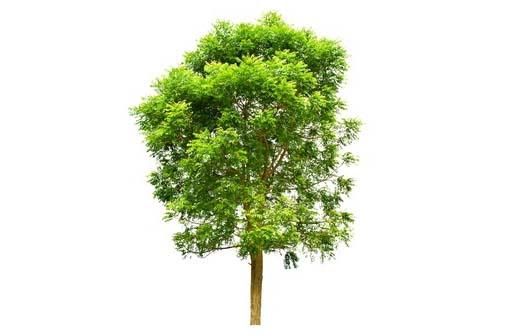
Some landscaping choices, such as a line of begonias, will last a season; others, like trees, can last a lifetime. So, take time to plan and plot a yard that gives you maximum enjoyment and curb appeal.

For the design challenged, landscape architects are worth the investment ($300-$2,500 depending on yard size). They will render elevations of your future yard, and provide plant lists so you can install landscaping yourself.

2. Too Much Togetherness

Yes, planting in clusters looks way better than installing single plants, soldier-like, throughout your yard. But make sure your groups of perennials, shrubs, and trees have plenty of room to spread, or they’ll look choked and overgrown. Also, over-crowded landscaping competes with itself for food and water, putting the clusters at risk, especially during drought.

Google how high and wide the mature plant will be, and then combine that info with the spacing suggestions on planting labels. At first, garden beds of young plants will look too airy and prairie-like. But within three years, your beds will fill in with room to grow.

Remember: First year it sleeps, second it creeps, third it leaps.

3. Zoning Out

Don’t be seduced by catalog plants that look gorgeous on paper but aren’t suited to your hardiness zone. You’ll wind up with plants that die prematurely, or demand winter covers, daily watering, and other intensive efforts to keep them alive and well.

Check plant labels to see which hardiness zones are best for your plants.

4. More of the Same

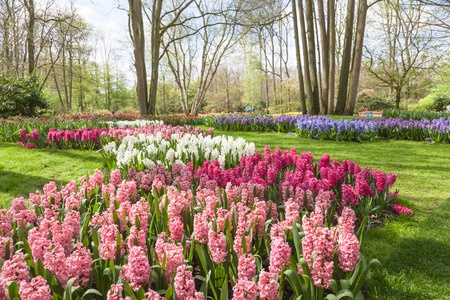
Resist the design temptation to carpet-bomb your yard with your favorite plant or shrub, which will create a boring, monochromatic landscape. Worse, your yard will look great when your fave flowers bloom, then will look drab the rest of the year.

Mix things up and strive for four-season color. For example, combine spring-blooming azaleas with summer-blooming roses and autumn-blazing shrubs — such as burning bushes (Euonymus alatus). For winter color, try the red osier dogwood (Cornus stolonifera), a hardy shrub that sports bright-red branches in winter.

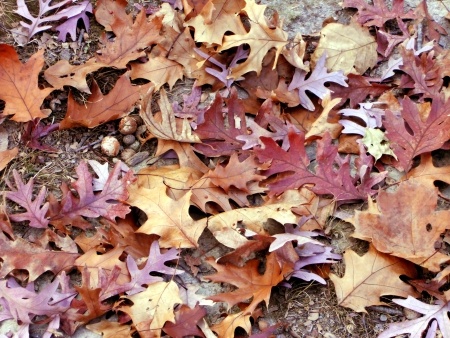
5. Refusing to Bury Your DeadNothing wrecks curb appeal faster than rows of dead or dying shrubs and perennials. So quickly remove your dearly departed landscaping from your front and side yards.

Spent plants that lived their natural lives are good candidates for a compost pile — if you grind them first, they’ll decompose faster. But if your landscaping succumbed to disease or infestation, it’s best to inter them in black plastic bags, then add to the trash.

6. Weeds Gone Wild

Weeds not only wreck the look of your landscaping, they compete with pricey vegetation for water and food. Weeds also can shorten the life of brick, stone, and pavers by growing in mortar cracks.

The best way to stop weeds is to spread a pre-emergent about three weeks before weed seeds typically germinate. If you can’t stop them from growing, at least get rid of weeds before they flower and send a zillion weed seeds throughout your yard.

7. Contain Those Critters

Deer, rabbits, and other backyard pests think your landscaping is an all-you-can eat buffet, leaving you with denuded branches and topless perennials.

If you’ve got a critter problem:

  • Plant deer- or rabbit-resistant varieties. Your local extension agent can provide a list of green things critters won’t eat in your area.
  • Install an electric fence around landscaping you want to protect.
  • Spray plants with critter repellent. After a hard rain, spray again.


By: Lisa Kaplan Gordon
Published: September 9, 2013

Read more: http://members.houselogic.com/articles/landscaping-mistakes-wreck-curb-appeal/preview/#ixzz312VZJi2C

“Visit HouseLogic.com for more articles like this. Reprinted from HouseLogic.com with permission of the NATIONAL ASSOCIATION OF REALTORS®.”

Should I Rent or Sell My House?

sign

When your current home no longer suits you, selling it is a popular option. But in some cases, turning it into a rental home might make more sense.

There are lots of factors to consider when making the “sell vs. rent my home” decision, including:

  • Your financial situation.
  • Local market conditions for rental homes.
  • Your future housing plans.
  • Your tolerance for being a landlord.
  • State and federal income taxes.
  • Current and projected home prices.

Other factors to consider include:

Is your move permanent?

Going away for a few years and planning to come back to the area? It may be cheaper to rent your house and move back in when you return, rather than paying sales commissions to sell your current home and purchase of another one when you get back.

You’re being transferred, but you are likely coming back.

Suppose you have owned and lived in your home for two or more years but are now being transferred to a different city temporarily, after which you plan to return. You can rent your home for up to three years without losing the chance to sell it with no capital gains tax. So long as you owned and lived in the house for two of the five years prior to the sale, any capital gain on the sale can generally be excluded.

Therefore, by turning your home into a rental, you keep the option to move back in when you return, or sell it and avoid paying capital gains tax on any gain you might have.

Can you rent your home for enough money to cover the mortgage payment and expenses?

If you can, keeping your house can be a smart way to help fund your retirement. Each month your tenants pay rent. You likely won’t pay tax on that income if you have enough expenses to offset it (like mortgage interest and repair costs).

When you finish paying off your mortgage or once you retire, you can sell the house and convert your equity into a lump sum, or continue renting it and collecting income during your retirement.

Do you need more tax deductions?

When you rent your home instead of selling, you get to depreciate it for tax purposes. In most cases, you divide the amount you paid for the house, plus the cost of major improvements (less the value of the land) by 27.5 (that’s how many years the tax law says a house must be depreciated) to arrive at your annual depreciation.

For example, if you paid $100,000 for the house, and the portion allocated to the land is $20,000, you get to deduct $2,909 in depreciation annually ($80,000/27.5). Along with this, you can deduct other expenses, such as property taxes, repairs, and community association fees.

You think home prices are going to rise over the next five years.

Even if your rental income doesn’t cover all your expenses (mortgage, property taxes, repairs, etc.), you might make up that loss if your home’s value rises before you sell it.

Say your home is worth $100,000 today and your expenses are $1,000 a year more than the rent you can collect. Over 10 years, you’ll lose $10,000 ($1,000 x 10 years), but if your home sale nets you more than $110,000, you’ll make money despite those annual losses. Your annual losses might be tax deductible, saving you money on your tax bill.

What’s your home’s condition?

Renters, more so than buyers, can be willing to overlook outdated home fixtures because renters know they’re just passing through your home, not owning it.

If you don’t have the money to invest in improvements and your home’s fixtures scream 1970s (and not in a good, retro chic way), renting may be the better choice.

You need the profit from selling your home to fund your move-up home.

If you need a different home and must sell your current home so you can use the equity as a downpayment, you might want to sell your home vs. renting it.

If you don’t need all the equity in your home for your downpayment, you might be able to take out a home equity loan or refinance into an investor loan and use the loan proceeds as your downpayment, and still make your home a rental.

You freak out about condition and panic over repairs.

When someone lives in your home, they can scuff the walls, burn the countertops, and forget to water your prized shrubberies. If you can’t live with that wear and tear, sell rather than rent your home.

Becoming a landlord usually means you still have to maintain your house. You’ll get the bills when the plumbing springs a leak or the refrigerator dies. If making DIY repairs is beyond you and paying for upkeep is going to cause you to panic, opt to sell your house vs. renting it to save your sanity. You can save many of these headaches by using a property manager, but this, of course, will cost you.

Can you evict a tenant who fails to pay?

If you wouldn’t have the heart to force out a renter who didn’t pay, you shouldn’t become a landlord — or if you do become a landlord, plan to have a pro manage your property.

By: Dona DeZube
Published: November 14, 2012

Read more: http://members.houselogic.com/articles/should-i-rent-or-sell-my-house/preview/#ixzz312i14udg
“Visit HouseLogic.com for more articles like this. Reprinted from HouseLogic.com with permission of the NATIONAL ASSOCIATION OF REALTORS®.”

How to Properly Care for Trees

tree

When trees fail to thrive, they (and you) have a problem. Here are tips on how to care for your trees to prevent troubles.

But when trees fail to leaf out in spring or drop the leaves they have; when foliage turns brown before autumn; when trees lean precariously or branches die; then suddenly our trees become the center of attention.

What’s wrong? The likely culprit is human error. Trees often get sick because they haven’t been planted and cared for properly.

The good news: It’s pretty easy to give your trees the care they need to stay healthy and fight off diseases. Here are the most common errors and how to avoid them:

Improper Pruning

Improper pruning can destabilize a tree, encourage the spread of disease, and even make it fall over.

Signs of bad pruning include:

  • Tree is leaning more than usual.
  • Tree looks top- or bottom-heavy.
  • One tree is blocking the sun from another.
  • Tree is too big for its space.
  • Pruning cuts are jagged.

Do it right:

  • Pruning is as much art as science. A properly pruned tree looks balanced and beautiful; it feels comfortable — not squished into — its space; it lacks dead branches or ones that crisscross.
  • Pruning techniques — where and how — are specific to each species of tree. So before you make your first cut, consult a pruning manual.
  • Make sure your saws, loppers, and shears are clean and sharp to prevent disease.

Mulching Mayhem

Mulch helps protect trees (especially young ones) from stress and gives your yard great curb appeal. But more mulch is not necessarily better, and too little mulch does little to protect trees.

Signs of mulching mistakes:

  • Mulch piled up against the tree trunk, volcano style, which can cause trunk rot and encourage infestation and disease.
  • Mulch covering the tree’s root collar, where the trunk flares into the root system.
  • Exposed roots.

Do it right:

Begin mulching about 6 in. from the tree base, and extend the mulch to the end of the tree’s drip line just beneath the end of the tree canopy. Start with 1 in. of mulch toward the base, building up to no more than 4 inches at the end of the mulch circle.

Use mulch only from reputable sources, not strange mulch piles that may contain material from diseased trees. To save money, make your own mulch from healthy lawn clippings, shredded leaves, branches, and bark.

Fertilizer Frenzy

A tree planted in a sunny location with good soil and covered with organic matter doesn’t need extra fertilizer: it makes its own food through photosynthesis.

Still, many homeowners mistakenly think their trees need an annual dose of fertilizer that adds minerals and nutrients to the soil. In fact, the opposite is true. Over-fertilizing can poison a tree’s root system, cause excessive and weak growth, and pollute watersheds.

Signs of over-fertilizing:

  • Small or yellow foliage.
  • Dead branches.
  • Reduced growth.
  • Salts on soil surface.

Do it right:

Many ailments — infestation, compacted soil, trauma, and nutrient deficiency — can cause a tree to show the same symptoms of over-fertilizing. So before you add fertilizer, test your soil to determine which, if any, nutrients your tree lacks. A good time to test soil is either before you plant, or every 3 years or so after planting.

If fertilize you must, add only the nutrients your tree needs, usually nitrogen, phosphorous, and potassium. Fertilize in early spring and fall; never fertilize during drought.

Planting Mistakes

Your new tree has so much potential. But if you plant a tree that doesn’t fit your hardiness zone; if you manhandle the little one and squeeze it into a hole that’s too narrow and too shallow; you may limit your tree’s future.

Signs of improper planting:

  • Trees grow into utility lines or foundations.
  • Scant or dry foliage.
  • Stunted growth from inappropriate sun conditions.
  • Dieback due to trauma at planting time.

Do it right:

You and your trees will be together for a long time. So when you select a species and location, consider the eventual size of the mature tree — the spread of its canopy and roots — not just the dimensions of the sapling. Plant trees away from overhead power lines and underground gas lines, and at least 15 feet away from the house (up to 35 feet for big trees).

When planting, dig a hole 3 to 5 times the diameter of the tree’s root ball and about 1 ft. deep. Make sure the root collar (flare) rests just above the soil surface. Don’t forget to water slowly and deeply until the root system is established.

By: Lisa Kaplan Gordon
Published: June 13, 2013

Read more: http://members.houselogic.com/articles/tree-care/preview/#ixzz2xjzu5AXz

“Visit HouseLogic.com for more articles like this. Reprinted from HouseLogic.com with permission of the NATIONAL ASSOCIATION OF REALTORS®.”

5 Classy Kitchen Cabinet Updates for Under $100

paint brush

By: Lisa Kaplan Gordon
Published: October 23, 2012

You don’t have to spend a lot to give your tired cabinets a lift. These five inexpensive cabinet updates will brighten the mood of your entire kitchen.

1. Handsome Hardware

Knobs and pulls are kitchen jewelry that can dress cabinets up. Note that cabinet hardware can get very fancy and expensive — costing $30 and up for a single ornate knob. But you’ll get a huge bang for a few bucks by buying 10-packs of simple, contemporary hardware at big box stores for less than $20 (that’s $2 a knob!).

To save time and money, replace 1-hole hardware with 1-hole upgrades; 2-hole with 2-hole. That way, you won’t need to drill or patch.

2. Pretty in Paint

Nothing updates old cabinets as quickly as fresh coat of paint.

Painting cabinets yourself is cost-effective — a few gallons of paint, sandpaper, cleaner — but the process is time-intensive. You can paint most cabinet surfaces, but proper prep is key to success. For laminate and melamine finishes, be sure to rough up the surface with 150-grit sandpaper, and apply a good bonding primer before topping it off with the color of your choice.

If you’re going to dive into this DIY project, keep these tips in mind:

  • Lighter-colored paints will make your kitchen seem bigger.
  • Don’t skip on prep. Thoroughly clean cabinet doors and boxes to remove grease and dried-on gunk; fill holes or nicks with wood putty, then sand.
  • Sand each coat of paint so your final coat will look perfect.
  • Lay doors flat to paint, and wait until each side is completely dry before painting the other side. It will take more time, but you’ll avoid ugly drip marks.

3. Moulding Miracles

Crown moulding adds a touch of class to the tops of tired cabinets for less than you’d expect. Three-inch, primed composite crown moulding with a dentil design costs as little as $20 for 8 ft.

It’s easiest to add moulding when you’re repainting cabinets; that way you’ll get a perfect match.

If you order matching wood moulding from your cabinet’s manufacturer, be prepared for a color difference between new moulding and older cabinets. Natural wood cabinets (especially cherry) will darken with age.

4. Fancy Glass

Change the glass insert in a cabinet door, and you change the look and feel of your kitchen.

“Decorative glass takes stock cabinets and gives them a custom look,” says Anthony Longo, who sells glass panels.

Not all cabinet doors are candidates for a changeover, however. You’ll need the kind of door with a removable panel. Check the backs of your doors to see if the center panel can be taken out.

Types of glass inserts are limitless — contemporary, bubbles, raindrops on water, antique — and cost $7-$9 sq. ft. So, you can change the look of a 2-door, 30 x 24-inch cabinet (about 5 sq. ft. of glass) for between $35 and $45.

5. Task Lighting

Once, the only way to shed light on kitchen tasks was by hard-wiring under-cabinet lights — an expensive and messy task. But you can add lighting under and inside cabinets with battery powered, peel-and-stick LED lights.

Of course, battery-run lights are not as bright as their hard-wired cousins. But at about $8 each, you can afford to buy several and scatter them around. LED light bulbs last for thousands of hours of use.

“Visit HouseLogic.com for more articles like this. Reprinted from HouseLogic.com with permission of the NATIONAL ASSOCIATION OF REALTORS®.”

Protect Your Home from Cold-weather Threats

By: Gwen Moran

Published: September 24, 2009

The right tools and pre-winter maintenance will ensure that your home and your family are safe and from cold-weather threats.

First, understand the threats

Blizzards. Storms with heavy winds and large amounts of snow accumulation can cause roof or other structural damage and leave you isolated.

Ice storms and ice dams. Ice storms coat structures, trees, power lines, cars, roads—and virtually everything else—with ice. As the ice melts, large chunks can fall and cause injury to anyone below. When ice melts during the day and then re-freezes at night, ice dams, which block water from flowing in the gutter, may form. This condition can force water back under the roof line and cause leaks.

Sleet or freezing rain. Combinations of snow and freezing rain may cause slippery conditions and coat roads, sidewalks, and driveways with ice when temperatures drop.

Protect yourself

The Federal Emergency Management Agency recommends that home owners have shovels on hand, as well as melting agents, such as rock salt. Some of the new, more environmentally friendly deicers include calcium magnesium acetate and sand to improve traction. Be sure to stock up early in the season, as these agents tend to be in short supply during periods before a well-publicized storm.

FEMA also advises you have enough fuel to maintain heat in your home, as well as a backup heating source: firewood if the home has a working fireplace, or a generator to power heaters in case of power failure. However, use caution as these can represent fire hazards when not used correctly. Be sure to follow directions explicitly and keep a fire extinguisher. Some generators and fireplaces also require proper ventilation, according to the Institute for Business and Home Safety, so follow directions carefully and keep them away from curtains or other flammable items.

Stock up on extra blankets, warm clothing, and enough food and water to sustain your family in case of a few days of isolation. And a transistor radio with fresh batteries can help keep you updated on news and information in case of a power outage.

Protect your home

Before winter, there are some precautions you can take to protect your home from the ravages of cold weather storms:

Winterize your home. Check shutters, siding, and other exterior materials to ensure they’re secure, says retired contractor and home improvement expert and writer John Wilder of Jacksonville, Fla. High winds, ice, and moisture from winter storms can easily strip off such outside elements if they’re loose.

Be sure that gutters are clear of debris and that walkways are even and don’t represent tripping hazards that can be exacerbated with snow or ice. Caulk drafty windows and apply weather stripping to doors—both inexpensive strategies that can keep heat in your home. Air sealing can help you save about $350 in energy costs or one-third of your average annual heating and cooling costs. The average annual home energy bill is about $2,200, according to Energy Star, of which about $1,000 represents heating and cooling. An assortment of air sealing materials and tools, including silicone foam, caulk, aluminum flashing for flues, and additional insulation, will run roughly $100-$350.

Watch your roof. Consider roof heating cables to prevent ice dams on roofs and in gutters, Wilder recommends. They emit a low level of electric-powered heat and prevent ice from blocking gutters and downspouts. These cables can also help melt snow as it falls and help prevent it from accumulating on your roof, where its weight may cause damage.

The cable costs approximately $50-$100 for a 65 to 100 ft. package and can be purchased online or at home improvement retailers. Well-ventilated attics, which release warm air and melt ice, can reduce the risk of ice dams as well, according to the Institute.

Winterize pipes. Be sure your pipes, especially those exposed or in unheated areas like crawl spaces, are wrapped in insulation to prevent freezing and bursting. Also, learn where your water shut-off valves are so you can turn off the water supply in case of a leak. Six feet of insulation can cost anywhere from $7 to $17; it’s available at most home improvement stores.

Trim tree branches. Branches that overhang roofs or areas where you park your car—or which are simply overgrown—represent a risk to structures, vehicles, and people. Keep trees trimmed and remove those that are weak or sickly to prevent them from falling on or near your home. Tree trimming and removal pricing varies greatly, and you may have additional restrictions if you live in an historic community or if the trees are close to power lines.

Check with your municipality about any regulations and contact your local Chamber of Commerce, municipal offices, or contractor rating sites like MerchantCircle.com or AngiesList.com to get the names of reputable pros. Tree trimming and removal can be dangerous, so don’t attempt it on your own unless you’re experienced.

By keeping your home in good repair and stocking up on the supplies you’ll need before the rush for rock salt and shovels begins, you’ll be as ready as possible to tough out the storm.

“Visit HouseLogic.com for more articles like this. Reprinted from HouseLogic.com with permission of the NATIONAL ASSOCIATION OF REALTORS®.”

Keep Your Home Sale from Falling Apart

hammer

After finding a buyer, all you have to do to make it to closing is to avoid these five traps.

Mistake #1: Ignore contingencies

If your contract requires you to do something before the sale, do it. If the buyers make the sale contingent on certain repairs, don’t do cheap patch-jobs and expect the buyers not to notice the fixes weren’t done properly.

Mistake #2: Don’t bother to fix things that break

The last thing any seller needs is for the buyers to notice on the pre-closing walk-through that the home isn’t in the same condition as when they made their offer. When things fall apart in a home about to be purchased, sellers must make the repairs. If the furnace fails, get a professional to fix it, and inform the buyers that the work was done. When you fail to maintain the home, the buyers may lose confidence in your integrity and the condition of the home and back out of the sale.

Mistake #3: Get lax about deadlines

Treat deadlines as sacrosanct. If you have three days to accept or reject the home inspection, make your decision within three days. If you’re selling, move out a few days early, so you can turn over the keys at closing.

Mistake #4: Refuse to negotiate any further

Once you’ve negotiated a price, it’s natural to calculate how much you’ll walk away with from the closing table. However, problems uncovered during inspections will have to be fixed. The appraisal may come in at a price below what the buyers offered to pay. Be prepared to negotiate with the buyers over these bottom-line-influencing issues.

Mistake #5: Hide liens from buyers

Did you neglect to mention that Uncle Sam has placed a tax lien on your home or you owe six months of homeowners association fees? The title search is going to turn up any liens filed on your house. To sell your house, you have to pay off the lien (or get the borrower to agree to pay it off). If you can do that with the sales proceeds, great. If not, the sale isn’t going to close.

By: G. M. Filisko
Published: March 30, 2010

G.M. Filisko is an attorney and award-winning writer who wanted a successful closing on a Wisconsin property so bad that she probably made her agent rethink going into real estate. A frequent contributor to many national publications including Bankrate.com, REALTOR® Magazine, and the American Bar Association Journal, she specializes in real estate, business, personal finance, and legal topics.

Read more: http://members.houselogic.com/articles/keep-your-home-sale-falling-apart/preview/#ixzz2xk3sfCfQ

“Visit HouseLogic.com for more articles like this. Reprinted from HouseLogic.com with permission of the NATIONAL ASSOCIATION OF REALTORS®.”

11 Ways to Create a Welcoming Front Entrance for Under $100

mailbox

Wouldn’t it be nice to approach your home’s entrance with a grin instead of a grimace? Take our tips for beating a clear, safe, and stylish path to your front door.

First impressions count — not just for your friends, relatives, and the UPS guy, but for yourself. Whether it’s on an urban stoop or a Victorian front porch, your front door and the area leading up to it should extend a warm welcome to all comers — and needn’t cost a bundle.

Here’s what you can do to make welcoming happen on the cheap.

1. Clear the way for curb appeal. The path to your front door should be at least 3 feet wide so people can walk shoulder-to-shoulder, with an unobstructed view and no stumbling hazards. So get out those loppers and cut back any overhanging branches or encroaching shrubs.

2. Light the route. Landscape lighting makes it easy to get around at night. Solar-powered LED lights you can just stick in the ground, requiring no wiring, are suprisingly inexpensive. We found 8 packs for under $60 online.

3. Go glossy. Borrow inspiration from London’s lovely row houses, whose owners assert their individuality by painting their doors in high-gloss colors. The reflective sheen of a royal blue, deep green, crimson, or whatever color you like will ensure your house stands out from the pack.

4. Pretty up the view. A door with lots of glass is a plus for letting light into the front hall — but if you also want privacy and a bit of decor, check out decorative window film. It’s removable and re-positionable, and comes in innumerable styles and motifs. Pricing depends on size and design; many available for under $30.

A way to get the look of stained glass without doing custom work or buying a whole new door: Mount a decorative panel on the inside of the door behind an existing glass insert, $92 for an Arts and Crafts-style panel 20-inches-high by 11-inches-wide.

5. Replace door hardware. While you’re at it, polish up the handle on the big front door. Or better yet, replace it with a shiny new brass lockset with a secure deadbolt. Available for about $60.

6. Please knock. Doorbells may be the norm, but a hefty knocker is a classic that will never run out of battery life, and another opportunity to express yourself (whatever your favorite animal or insect is, there’s a door-knocker in its image).

7. Ever-greenery. Boxwoods are always tidy-looking, the definition of easy upkeep. A pair on either side of the door is traditional, but a singleton is good, too. About $25 at garden centers. In cold climates, make sure pots are frost-proof (polyethylene urns and boxes mimic terracotta and wood to perfection).

8. Numbers game. Is your house number clearly visible? That’s of prime importance if you want your guests to arrive and your pizza to be hot. Stick-on vinyl numbers in a variety of fonts make it easy, starting at about $4 per digit.

9. Foot traffic. A hardworking mat for wiping muddy feet is a must. A thick coir mat can be had at the hardware store for less than $20. Even fancier varieties can be found well under $50.

10. Go for the glow. Fumbling for keys in the dark isn’t fun. Consider doubling up on porch lights with a pair of lanterns, one on each side of the door, for symmetry and twice the illumination. Many mounted lights are available well under $100.

11. Snail mail. Mailboxes run the gamut from kitschy roadside novelties masquerading as dogs, fish, or what-have-you to sober black lockboxes mounted alongside the front door. Whichever way you go, make sure yours is standing or hanging straight, with a secure closure, and no dings or dents. The mail carrier will thank you.

By: Cara Greenberg
Published: November 5, 2012

Read more: http://members.houselogic.com/articles/front-door-entry-ideas/preview/#ixzz30rm1yCF4

“Visit HouseLogic.com for more articles like this. Reprinted from HouseLogic.com with permission of the NATIONAL ASSOCIATION OF REALTORS®.”

Small Home Storage: Maximize Your Storage Space

storage

By: Terry Sheridan

Published: January 21, 2011

Your small home has more storage space than you think. For relatively little money but a lot of common sense and ingenuity, there’s space to be found.

Here are six tips to maximize storage that won’t empty your savings account:

1. De-clutter. It’s the first thing architect Sarah Susanka of “Not So Big House” tells clients who talk of expanding their homes. Haven’t used something for a couple of years? Pitch it, she says. You’ll be amazed at how much space opens up when you do.

Cost: $0.

2. Platform/bunkbeds. Add space and eliminate a dresser in a small bedroom with a three-drawer or six-drawer platform bed. Find one at a furniture or big department store, and online.

Cost: $400 to $600, queen size.

Bunkbeds won’t have drawers, but save space by stacking beds. And kids love ‘em. They come in a variety of styles and configurations. Some will convert to two twin beds.

Cost: $300 to $550.

3. Shoe organizers. They’re for so much more than just shoes. Hang one in a kitchen closet or pantry, and use it as your small home catch-all for remotes, keys, notepads, cell phones, and chargers, and other household essentials. It’ll free up a kitchen drawer or two for other uses.

Cost: Less than $20.

4. Toe-kick storage. The space under your kitchen cabinets is a treasure trove of storage possibilities. Put placemats, napkins, cookie sheets, and how-to manuals there. Hire a cabinet-maker to install them, or request them as a custom feature in a new-cabinet order.

Cost: About $300 per drawer.

5. Floor-to-ceiling storage. Furniture-style 6-foot-tall bookcases don’t use all available wall space. But extend shelving that extra two feet to the ceiling, and you’ve got room for a lot more books, knickknacks, or art objects. Home improvement stores have brackets and shelves in a variety of colors and sizes to match your décor.

Cost: Under $200, depending on the space size.

“Visit HouseLogic.com for more articles like this. Reprinted from HouseLogic.com with permission of the NATIONAL ASSOCIATION OF REALTORS®.”

Your Top Home Ownership Tax Questions Answered

taxes

By: Natasha Padgitt
Published: December 31, 2012

Which tax benefits do home owners miss? Will you get audited if you take the home office deduction? Find out the answers to these questions and more before Tax Day.

There are a lot of home ownership tax benefits — if you don’t forget to take them. To make sure you get your due, HouseLogic asked tax expert Abe Schneier, a senior technical manager with the American Institute of CPAs, for tax-filing tips.

HouseLogic: What’s the most common home-related tax deduction or credit claimed by home owners?

“Visit HouseLogic.com for more articles like this. Reprinted from HouseLogic.com with permission of the NATIONAL ASSOCIATION OF REALTORS®.”

Abe Schneier: The mortgage interest deduction, [which the NATIONAL ASSOCIATION OF REALTORS® estimates amounts to about $3,000 in tax savings for the average itemizing home owner] and [the deduction for] real property taxes.

HL: Which tax provision do home owners often overlook?

AS: You can deduct mortgage insurance premiums [or PMI] if you were required to get PMI as a condition of receiving financing on your home. Some people will overlook that, although it’s typically disclosed on the 1099 that you receive from the bank, along with all the deductible information you need.

HL note: The PMI deduction has been extended through 2013 and is retroactive for 2012.

[Another area of tax-filing confusion is] whether you’ve correctly treated any points you paid if you refinanced. In a new home purchase, the points can be deducted [in the tax year you paid them]. But typically in a refinancing, you have to amortize and deduct any points you paid over the life of the mortgage, and people tend to forget that after a couple of years.

HL: What’s the No. 1 mistake home owners make when filing their taxes?

AS: Because you receive a statement from the bank with details [such as] how much mortgage interest you paid over the year, and how much the bank pays on your behalf in real estate taxes, the number of mistakes has dropped.

But if you’re in a state where you pay the real estate taxes on your own — the bank doesn’t handle it for you — [people] make mistakes because sometimes real estate tax bills include other items besides pure real estate taxes. It could be trash collection fees; it could be snow removal fees that the state or county is assessing on the real estate tax bill. Since the items are included in the same bill, home owners sometimes deduct [those fees] regardless of whether the items are actually taxes.

HL: What’s the single most important piece of advice for people filing their taxes as a first-time home owner?

AS: You have to take a look at your closing statement from when you bought the house. It’s commonly called the HUD-1 form and you receive it at the closing. Occasionally, there are fees such as prepaid taxes or interest at closing that can be deductible.

HL: What tax advice do you have for someone who’s owned their home for 10 or 20 years?

AS: If you’ve been a longtime home owner and you’ve been through refinancings, you have to be careful about how much interest you’ve deducted, especially if you have a home equity loan or equity line. A lot of people who’ve refinanced have sizable equity lines. The maximum outstanding home equity debt on which interest is deductible is $100,000; the maximum loan amount on which interest is deductible is $1 million.

HL: What home improvement-related records should home owners keep?

AS: Absolutely keep your receipts for couple of reasons:

1. You want to make sure — if there are any warranties attached to the work that was done — that you maintain those records and you have something to go back to the person who did the work in case something doesn’t function properly.

2. If you’ve added value to the home — you’ve added a deck, you’ve added a room, you’ve added something new to house — you’ll need to know what the gain is on that capital improvement when you sell the house.

HL note: Tax rules let you add capital improvement expenses to the cost basis of your home, and a higher cost basis lowers the total profit or capital gain you’re required to pay taxes on. Of course, most home owners are exempted from taxes on the first $500,000 in profit for joint filers ($250,000 for single filers). So it doesn’t apply to too many people.

HL: How do I tell the difference between a capital improvement and a repair?

AS: Typically a repair is [done] to allow an item, like a home furnace or air conditioner, to continue. But if you were to replace the heating unit, that’s not a repair.

HL: Does taking any home-related tax benefits, such as the home office deduction, make a taxpayer more likely to be audited?

AS: Only if numbers look out of the ordinary — for instance, if one year you were writing off $20,000 in mortgage interest debt and the next year you’re writing off $100,000 in mortgage interest. Taking the home office deduction in and of itself doesn’t usually generate an audit. However, if you claim nominal income and significantly higher expenses in an effort to create artificial losses, the IRS will see that there’s something else going on there.

HL: Once filing season is over, when should home owners start thinking about next year’s taxes?

AS: Well, hopefully, when you visit your CPA to give information about or pick up [this year’s] tax return, your CPA has spoken with you about your plans for [next year]:

  • If any major improvements are scheduled
  • If you’re planning on moving
  • How to organize any expenditures for fixing up the home before sale

If you’re planning to do any of those things, talk with your CPA so that you’re prepared with documentation and so that the [tax pro] can help minimize your tax situation.

“Visit HouseLogic.com for more articles like this. Reprinted from HouseLogic.com with permission of the NATIONAL ASSOCIATION OF REALTORS®.”

Got Leaky Windows? 3 Low-Cost Tips to Fix Them

window

By: Nicolette Toussaint
Published: May 2, 2011

I used to hang an extra woolly robe in my bathroom because my post-shower route took me past a window so drafty it made me wonder about the etymology of “window.” Turns out it comes from the Anglo-Saxon “vindr” and “auga,” which translates as “wind eye.” How appropriate.

If the “wind eye” focused on you last winter, but you’re not ready to invest in new windows, you can still cut your energy bills if you seal those air leaks—and if you do so now, you’ll prevent cool air from escaping your home this summer.

Here are three low-cost tips to help keep air leaks at bay:

#1: For most windows: Just fill the gaps.

Easier said than done if you’re dealing with old, flaky caulk, weather stripping, or adhesive that’s really tough to remove. But if you don’t clean it off well, your new caulk and stripping won’t adhere well and could peel away before you see any benefits.

However, a common household product, petroleum jelly, removes that adhesive goo quite well. Just rub the jelly over the sticky goo, let it sit for a few minutes, then wipe away. Another swipe with rubbing alcohol will remove the greasy film left from the jelly. (This technique, by the way, also works for removing price labels.)

#2. For older windows with rattling panes: Make baffles.

Cut quarter-round pine strips to fit. Use finishing nails and wood glue to secure them just inside the framed glass. Once you’ve caulked and painted the strips to match, they will disappear into the framework and look like part of the original window. It worked wonderfully on my 1920-era casement windows.

#3. If you want window treatments, too: Install waffle shades.

Folding fabric shades that are made with cells that trap air have great insulating properties—so good that some of them qualify for federal energy rebates, which have been extended into 2011. They start at around $50—still less expensive than new windows—and you get a new look, too.

Leaky windows are a big deal, winter or summer. What ways have you found to fix your windy windows?

Read more: http://members.houselogic.com/articles/got-leaky-windows-3-low-cost-tips-fix-them/preview/#ixzz3CMLObKOL
“Visit HouseLogic.com for more articles like this. Reprinted from HouseLogic.com with permission of the NATIONAL ASSOCIATION OF REALTORS®.”

7 Smart Strategies for Bathroom Remodeling

bath

By: John Riha
Published: March 4, 2011

Here’s how to get the bathroom of your dreams without making your budget a nightmare.

You dream about a bathroom that’s high on comfort and personal style, but you also want materials, fixtures, and amenities with lasting value. Wake up! You can have both.

A mid-range bathroom remodel is a solid investment, according to Remodeling Magazine’s annual Cost vs. Value Report. An average bath remodel of $16,128 will recoup about 72.5% of those costs when it’s time to sell your home, and a more extensive $51,374 job returns about 63.6%. In addition, you can maximize the value of your investment by using these smart strategies, which will create a stylish yet budget-friendly bathroom.

1. Stick to a Plan

A bathroom remodel is no place for improvisation. Before ripping out the first tile, think hard about how you will use the space, what materials and fixtures you want, and how much you’re willing to spend.

The National Kitchen and Bath Association (NKBA) recommends spending up to six months evaluating and planning before beginning work. That way, you have a roadmap that will guide decisions, even the ones made under remodeling stress. Once work has begun — a process that averages two to three months — resist changing your mind. Work stoppages and alterations add costs. Some contractors include clauses in their contracts that specify premium prices for changing original plans.

If planning isn’t your strong suit, hire a designer. In addition to adding style and efficiency, a professional designer makes sure contractors and installers are scheduled in an orderly fashion. A pro charges $100 to $200 per hour, and spends 10 to 30 hours on a bathroom project.

2. Keep the Same Footprint

You can afford that Italian tile you love if you can live with the total square footage you already have.

Keeping the same footprint, and locating new plumbing fixtures near existing plumbing pipes, saves demolition and reconstruction dollars. You’ll also cut down on the dust and debris that make remodeling so hard to live with.

Make the most of the space you have. Glass doors on showers and tubs open up the area. A pedestal sink takes up less room than a vanity. If you miss the storage, replace a mirror with a deep medicine cabinet.

3. Make Lighting a Priority

Multiple shower heads and radiant heat floors are fabulous adds to a bathroom remodel. But few items make a bathroom more satisfying than lighting designed for everyday grooming. You can install lighting for a fraction of the cost of pricier amenities.

Well-designed bathroom task lighting surrounds vanity mirrors and eliminates shadows on faces: You look better already. The scheme includes two ceiling- or soffit-mounted fixtures, and side fixtures or sconces distributed vertically across 24 inches (to account for people of various heights). Four-bulb lighting fixtures work well for side lighting.

Today, shopping for bulbs means paying attention to lumens, the amount of light you get from a bulb — i.e., brightness. For these bathroom task areas, the Lighting Research Center recommends:

  • Toilet: 45 lumens
  • Sink: 450 lumens
  • Vanity: 1,680 lumens

4. Clear the Air

Bathroom ventilation systems may be out of sight, but they shouldn’t be out of mind during a bathroom remodel.

Bathroom ventilation is essential for removing excess humidity that fogs mirrors, makes bathroom floors slippery, and contributes to the growth of mildew and mold. Controlling mold and humidity is especially important for maintaining healthy indoor air quality and protecting the value of your home — mold remediation is expensive, and excess humidity can damage cabinets and painted finishes.

A bathroom vent and water closet fan should exhaust air to the outside — not simply to the space between ceiling joists. Better models have whisper-quiet exhaust fans and humidity-controlled switches that activate when a sensor detects excess moisture in the air.

5. Think Storage

Bathroom storage is a challenge: By the time you’ve installed the toilet, shower, and sink, there’s often little space left to store towels, toilet paper, and hair and body products. Here are some ways to find storage in hidden places.

  • Think vertically: Upper wall space in a bathroom is often underused. Freestanding, multi-tiered shelf units designed to fit over toilet tanks turn unused wall area into found storage. Spaces between wall studs create attractive and useful niches for holding soaps and toiletries. Install shelves over towel bars to use blank wall space.
  • Think moveable: Inexpensive woven baskets set on the floor are stylish towel holders. A floor-stand coat rack holds wet towels, bath robes, and clothes.
  • Think utility: Adding a slide-out tray to vanity cabinet compartments provides full access to stored items and prevents lesser-used items from being lost or forgotten.

6. Contribute Sweat Equity

Shave labor costs by doing some work yourself. Tell your contractor which projects you’ll handle, so there are no misunderstandings later.

Some easy DIY projects:

  • Install window and baseboard trim; save $250.
  • Paint walls and trim, 200 sq.ft.; save $200.
  • Install toilet; save $150.
  • Install towel bars and shelves; save $20 each.

7. Choose Low-Cost Design for High Visual Impact

A “soft scheme” adds visual zest to your bathroom, but doesn’t create a one-of-a-kind look that might scare away future buyers.

Soft schemes employ neutral colors for permanent fixtures and surfaces, then add pizzazz with items that are easily changed, such as shower curtains, window treatments, towels, throw rugs, and wall colors. These relatively low-cost decorative touches provide tons of personality but are easy to redo whenever you want.

Read more: http://members.houselogic.com/articles/strategy-for-bathroom-remodeling/preview/#ixzz3CMM54GIe
“Visit HouseLogic.com for more articles like this. Reprinted from HouseLogic.com with permission of the NATIONAL ASSOCIATION OF REALTORS®.”

Fall Maintenance Checklist

fall

By: John Riha
Published: October 1, 2012

You’ll be ready for winter’s worst and head off expensive repairs when you complete this checklist of 10 essential fall maintenance tasks.

1. Stow the mower.

If you’re not familiar with fuel stabilizer, you should be. If your mower sits for months with gas in its tank, the gas will slowly deteriorate, which can damage internal engine parts. Fuel stabilizer ($10 for a 10-ounce bottle) prevents gas from degrading.

Add stabilizer to your gasoline can to keep spare gas in good condition over the winter, and top off your mower tank with stabilized gas before you put it away for the winter. Run the mower for five minutes to make sure the stabilizer reaches the carburetor.

Another lawn mower care method is to run your mower dry before stowing it.

1. When the mower is cool, remove the spark plug and pour a capful of engine oil into the spark plug hole.

2. Pull the starter cord a couple of times to distribute the oil, which keeps pistons lubricated and ensures an easy start come spring.

3. Turn the mower on its side and clean out accumulated grass and gunk from the mower deck.

2. Don’t be a drip.

Remove garden hoses from outdoor faucets. Leaving hoses attached can cause water to back up in the faucets and in the plumbing pipes just inside your exterior walls. If freezing temps hit, that water could freeze, expand, and crack the faucet or pipes. Make this an early fall priority so a sudden cold snap doesn’t sneak up and cause damage.

Turn off any shutoff valves on water supply lines that lead to exterior faucets. That way, you’ll guard against minor leaks that may let water enter the faucet.

While you’re at it, drain garden hoses and store them in a shed or garage.

3. Put your sprinkler system to sleep.

Time to drain your irrigation system. Even buried irrigation lines can freeze, leading to busted pipes and broken sprinkler heads.

1. Turn off the water to the system at the main valve.

2. Shut off the automatic controller.

3. Open drain valves to remove water from the system.

4. Remove any above-ground sprinkler heads and shake the water out of them, then replace.

If you don’t have drain valves, then hire an irrigation pro to blow out the systems pipes with compressed air. A pro is worth the $75 to $150 charge to make sure the job is done right, and to ensure you don’t have busted pipes and sprinkler head repairs to make in the spring.

4. Seal the deal.

Grab a couple of tubes of color-matched exterior caulk ($5 for a 12-ounce tube) and make a journey around your home’s exterior, sealing up cracks between trim and siding, around window and door frames, and where pipes and wires enter your house. Preventing moisture from getting inside your walls is one of the least expensive — and most important — of your fall maintenance jobs. You’ll also seal air leaks that waste energy.

Pick a nice day when temps are above 50 degrees so caulk flows easily.

5. De-gunk your gutters.

Clogged rain gutters can cause ice dams, which can lead to expensive repairs. After the leaves have fallen, clean your gutters to remove leaves, twigs, and gunk. Make sure gutters aren’t sagging and trapping water; tighten gutter hangers and downspout brackets. Replace any worn or damaged gutters and downspouts.

If you find colored grit from asphalt roof shingles in your gutters, beware. That sand-like grit helps protect shingles from the damaging ultraviolet rays of the sun. Look closely for other signs of roof damage (#5, below); it may be time for a roofing replacement.

Your downspouts should extend at least 5 feet away from your house to prevent foundation problems. If they don’t, add downspout extensions; $10 to $20 each.

6. Eyeball your roof.

If you have a steep roof or a multistory house, stay safe and use binoculars to inspect your roof from the ground.

Look for warning signs: Shingles that are buckled, cracked, or missing; rust spots on flashing. Any loose, damaged, or missing shingles should be replaced immediately.

Black algae stains are just cosmetic, but masses of moss and lichen could signal roofing that’s decayed underneath. Call in a pro roofer for a $50 to $100 eval.

A plumbing vent stack usually is flashed with a rubber collar — called a boot — that may crack or loosen over time. They’ll wear out before your roof does, so make sure they’re in good shape. A pro roofer will charge $75 to $150 to replace a boot, depending on how steep your roof is.

7. Direct your drainage.

Take a close look at the soil around your foundation and make sure it slopes away from your house at least 6 vertical inches over 10 feet. That way, you’ll keep water from soaking the soils around your foundation, which could lead to cracks and leaks.

Be sure soil doesn’t touch your siding.

8. Get your furnace in tune.

Schedule an appointment with a heating and cooling pro to get your heating system checked and tuned up for the coming heating season. You’ll pay $50 to $100 for a checkup.

An annual maintenance contract ensures you’re at the top of the list for checks and shaves 20% off the cost of a single visit.

Change your furnace filters, too. This is a job you should do every two months anyway, but if you haven’t, now’s the time. If your HVAC includes a built-in humidifier, make sure the contractor replaces that filter.

9. Prune plants.

Late fall is the best time to prune plants and trees — when the summer growth cycle is over. Your goal is to keep limbs and branches at least 3 feet from your house so moisture won’t drip onto roofing and siding, and to prevent damage to your house exterior during high winds.

For advice on pruning specific plants in your region, check with your state extension service.

10. Give your fireplace a once-over.

To make sure your fireplace is safe, grab a flashlight and look up inside your fireplace flue to make sure the damper opens and closes properly. Open the damper and look up into the flue to make sure it’s free of birds’ nests, branches and leaves, or other obstructions. You should see daylight at the top of the chimney.

Check the firebox for cracked or missing bricks and mortar. If you spot any damage, order a professional fireplace and chimney inspection. An inspection costs $79 to $500.

You fireplace flue should be cleaned of creosote buildup every other year. A professional chimney sweep will charge $150 to $250 for the service.

Read more: http://members.houselogic.com/articles/fall-checklist/preview/#ixzz3CMKbs9X1
“Visit HouseLogic.com for more articles like this. Reprinted from HouseLogic.com with permission of the NATIONAL ASSOCIATION OF REALTORS®.”

  • « Previous Page
  • 1
  • 2
  • 3
  • 4
  • Next Page »
Powered by NJ Interest Rates

Featured Properties

1503 Atlantic Ave, Longport, NJ 08403
IDX Image
$2,295,000
Beds: 3
Baths: 3 | 1
Board Logo
 
1503 Atlantic Ave #1503, Longport, NJ 08403
IDX Image
$2,295,000
Beds: 3
Baths: 3 | 1
Board Logo
 
2700 Atlantic Ave #419, Longport, NJ 08403
IDX Image
$1,699,000
Beds: 2
Baths: 2
Board Logo
 
View all

About Jerome & Angel DiPentino

Jerome & Angel DiPentinoFormer owners of Premier Properties Real Estate Inc., Jerome and Angel DiPentino, shaped their business into a “boutique real estate firm” in Longport, New Jersey as the community’s leading real estate agency in 1990.

Premier Properties has joined forces with Long & Foster Real Estate – the largest real estate company in the Mid-Atlantic region. Long & Foster provides a one stop shopping experience with real estate, mortgage, title and insurance. While our name has changed, The Premier Team still prides itself on providing that “boutique real estate feel” in Longport. Read More...

Copyright © 2025 · Longport New Jersey Homes and Real Estate for Sale · Long & Foster Real Estate Longport

Jerome DiPentino and Angel DiPentino | Broker/Sales Associates
Jerome Cell: 609-432-5588 | Angel Cell: 609-457-0777
Long & Foster Real Estate, Inc | 2401 Atlantic Avenue - Longport, NJ 08403 | Office: 609-822-3339
All information provided is deemed reliable but is not guaranteed and should be independently verified.
Equal Housing Opportunity